Table of Contents >> Show >> Hide
- Why Mop N Glo Buildup Happens on Linoleum
- Before You Start: Confirm It Is Really Linoleum
- What You Will Need
- Step-by-Step: How to Remove Mop N Glo From Linoleum Floors
- 1. Dry-clean the floor first
- 2. Wash off the easy grime
- 3. Test an inconspicuous area
- 4. Use a floor-safe polish remover or stripper
- 5. Repeat on stubborn areas instead of scrubbing harder
- 6. Try a last-resort ammonia method only with extreme caution
- 7. Do a final rinse and dry completely
- 8. Decide whether the floor needs a new protective finish
- Mistakes to Avoid
- How to Keep Mop N Glo Buildup From Coming Back
- When It Is Better to Call a Professional
- Final Thoughts
- Real-World Experiences With Removing Mop N Glo From Linoleum Floors
- SEO Tags
If your linoleum floor used to look charming and classic but now looks like it’s wearing a cloudy plastic raincoat, you are probably dealing with Mop N Glo buildup. Or, to be more precise, Mop & Glo buildupthe same product many people search as “Mop N Glo.” It happens more often than you’d think. A product that promises shine can be perfectly fine in moderation, but when layer after layer goes down over time, the result can be dullness, haze, tackiness, streaks, trapped dirt, and that mysterious feeling that the floor is somehow both shiny and dirty at the same time. Quite a talent, really.
The good news is that you can usually remove that film without destroying your linoleum. The trick is to stop thinking like a person who is “cleaning a floor” and start thinking like a person who is “removing a coating.” Those are two very different jobs. Regular mopping lifts everyday dirt. Removing old Mop N Glo means loosening and taking away a finish layer that may have bonded to the surface in thin coats over months or years.
This guide walks through the safest, smartest way to strip Mop N Glo from linoleum floors, step by step. It also explains what not to do, because floor-care disasters are often born from the famous last words: “I figured a stronger cleaner would work faster.” Sometimes it does. Sometimes it also makes the floor sad.
Why Mop N Glo Buildup Happens on Linoleum
Linoleum is not the same as modern luxury vinyl plank, laminate, or ceramic tile. It is a resilient floor material with its own finish and care needs. That matters because a cleaner that seems harmless on one surface may be too aggressive on another. When a shine-enhancing cleaner is used repeatedly, especially without fully removing previous layers, the finish can collect dirt and create a cloudy film. In high-traffic areas, the buildup often becomes obvious first in walk paths, corners, near the stove, or around the sink.
Here are the common signs you are dealing with Mop N Glo residue instead of ordinary grime:
- The floor looks streaky even right after mopping.
- It feels slightly sticky or rubbery under bare feet.
- There is a cloudy or yellowish cast in sunlight.
- Footprints appear quickly after cleaning.
- Fresh cleaner seems to make the floor worse, not better.
That last one is the biggest clue. If more mopping keeps making the floor look more tired, the issue is usually product buildup, not a lack of effort.
Before You Start: Confirm It Is Really Linoleum
This may sound obvious, but it is important. Real linoleum and sheet vinyl are often confused, especially in older kitchens, laundry rooms, mudrooms, and rental homes. They are both resilient floors, but they do not always react the same way to cleaners and removers. If you know the floor is linoleum, stay on the gentler side. If you are not sure, act as though it is delicate until proven otherwise.
That means three rules from the start:
- Do not use abrasive pads, steel wool, or hard scraping tools.
- Do not flood the floor with water.
- Do not jump straight to harsh chemicals without a test area.
What You Will Need
- Broom, vacuum, or dry microfiber dust mop
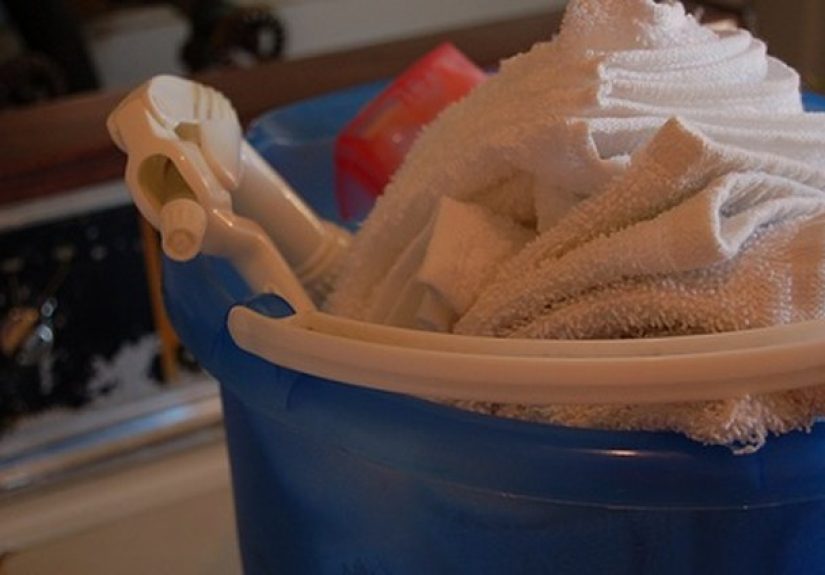
- Two buckets
- Microfiber mop or soft sponge mop
- Soft cloths or microfiber towels
- Soft-bristle scrub brush or nonabrasive scrub pad
- Warm water
- Mild dish soap or a pH-neutral floor cleaner
- A floor polish remover or floor stripper labeled safe for resilient, no-wax, or similar hard floors
- Rubber gloves
- Good ventilation
If you are using a commercial remover, read the label all the way through before it touches the floor. Not the “I skimmed it” version. The real version. Dwell time, dilution, rinsing, and surface restrictions matter.
Step-by-Step: How to Remove Mop N Glo From Linoleum Floors
1. Dry-clean the floor first
Sweep or vacuum thoroughly before you do anything wet. Dust, sand, and crumbs can turn into scratchy little troublemakers once moisture arrives. Pay extra attention to edges, under cabinets, and along baseboards where residue tends to collect.
2. Wash off the easy grime
Mix warm water with a very small amount of mild dish soap or use a pH-neutral floor cleaner. Dampen a microfiber mop and clean the floor lightly. The goal is not to remove the buildup yet; it is to get rid of surface dirt so you do not smear mud into softened finish later.
Go easy on water. Linoleum prefers damp cleaning, not indoor weather events. After mopping, go over the floor once with clean water and a wrung-out mop to remove soap residue. Let the floor dry.
3. Test an inconspicuous area
This is the step impatient people skip and later regret while kneeling on the floor whispering, “Why is it lighter in that one square?” Test your remover in a closet corner, behind a trash can, or along a wall hidden by furniture.
Apply a small amount of the remover according to label directions. Let it dwell for the recommended time. Do not let it dry on the floor. Wipe, rinse, and inspect the area after it dries. You want to see whether the film softens and lifts without discoloring or damaging the linoleum underneath.
4. Use a floor-safe polish remover or stripper
This is usually the most effective way to remove old Mop N Glo. A dedicated floor polish remover is designed to break down acrylic or shine-enhancing films more effectively than routine cleaners. In practical terms, that means less aggressive scrubbing and a lower chance of turning your Saturday into a chemistry experiment.
Work in small sections, usually about 3-by-3 feet or 4-by-4 feet at a time. Apply the product, give it the proper dwell time, then gently agitate with a soft brush or nonabrasive pad. You should start to see cloudy residue loosen. Wipe up the slurry with cloths or a mop you do not mind sacrificing to the cause.
Once the residue is up, rinse that section with clean water. Then rinse it again. The first rinse removes loosened finish. The second helps make sure you are not leaving remover behind. Repeat the process section by section until the whole floor is done.
5. Repeat on stubborn areas instead of scrubbing harder
If one pass does not fully remove the buildup, do another pass. This is boring advice, but it is good advice. It is better to repeat a gentle chemical process than to attack the floor with brute force. High-traffic paths and old spill zones usually need extra attention because more product and more soil tend to collect there.
If buildup is especially heavy, place a remover-soaked cloth on the area for a short dwell time, then lift and wipe. This can help soften old layers without grinding them into the floor.
6. Try a last-resort ammonia method only with extreme caution
Older U.S. cleaning guidance has sometimes suggested diluted ammonia solutions for removing wax or polish buildup. That is why you may see people online swearing that ammonia is the magic answer. The problem is that linoleum-specific care advice also warns that ammonia-based cleaners can strip polish and damage or dull the surface. So for true linoleum, ammonia is not the first choice. It is the “tiny hidden test only, maybe, if nothing else worked and the floor manufacturer does not prohibit it” choice.
If you decide to try it, keep the solution very diluted, use gloves, open windows, keep pets and kids away, and rinse immediately and thoroughly. Never combine ammonia with bleach or any other cleaner. If the test area shows any color change, surface roughness, softening, or weirdness of any kind, stop right there and go back to a dedicated floor-safe remover.
7. Do a final rinse and dry completely
When the buildup is gone, rinse the entire floor with clean water using a dampnot drippingmop. Then dry it with clean towels or allow it to air dry fully before walking on it. This step matters. Residual remover can leave its own haze if you rush the finish line.
8. Decide whether the floor needs a new protective finish
Once old Mop N Glo is removed, some linoleum floors look fantastic immediately. Others look a bit flat at first because the artificial gloss is gone and the real floor is finally visible again. That does not necessarily mean the floor is damaged. It may simply mean the floor is honest now.
If the floor needs renewed protection, use only a finish specifically recommended for linoleum or by the flooring manufacturer. Do not automatically put another shine product down just because the old one came off. That is how the cycle begins again.
Mistakes to Avoid
Using abrasive tools
Scouring pads, razor blades, and aggressive scrub brushes can scratch linoleum and leave you with a much bigger problem than haze.
Using too much water
Linoleum does not love prolonged soaking. Excess moisture can creep into seams and edges, which can lead to lifting, curling, or damage over time.
Applying more shine to hide buildup
This is the floor-care equivalent of putting fresh frosting on a stale cake. It may look better for a minute, but the problem is still underneath.
Skipping the rinse
If you do not rinse off loosened finish and remover residue, the floor can dry cloudy again and make you question your life choices.
Trusting every “miracle hack” on the internet
If someone promises that one random pantry ingredient will fix decades of polish buildup in five minutes, maybe keep your skepticism shoes on.
How to Keep Mop N Glo Buildup From Coming Back
- Use a pH-neutral cleaner for routine mopping.
- Mop lightly and rinse when needed instead of layering gloss products.
- Clean spills quickly so you are not tempted to “seal over” stains with shine.
- Use entry mats to reduce grit and grime.
- Reserve restorative finishes for rare occasions, not weekly enthusiasm.
In plain English: clean the floor more often, but coat it less often. Your linoleum will thank you by not looking like it has been laminated by accident.
When It Is Better to Call a Professional
Call a pro if the floor is very old, historically important, badly discolored, or already peeling at the seams. Also get help if the finish buildup is severe and you are not sure whether the floor is linoleum, vinyl, or something stranger from the architectural creativity of decades past. Professional floor-care companies often have low-residue stripping equipment and surface-specific products that can save time and reduce risk.
Final Thoughts
Removing Mop N Glo from linoleum floors is not glamorous, but it is absolutely doable. The main lesson is simple: buildup responds better to patience than force. Start with dry cleaning and gentle washing, move to a floor-safe polish remover, work in small sections, rinse thoroughly, and be very cautious with anything harsh. Once the haze is gone, you may be surprised by how good the original floor still looks underneath.
And if the room suddenly seems brighter, cleaner, and less like a 1997 supermarket aisle, congratulations. Your linoleum has been liberated.
Real-World Experiences With Removing Mop N Glo From Linoleum Floors
One of the most common homeowner experiences is realizing the floor was never actually “dirty” in the usual sense. People often say they spent months mopping harder and buying better-smelling cleaners, only to discover that the grayish haze, sticky footprints, or dull streaks were coming from old product buildup, not fresh mess. That is an important mental shift. Once people stop treating the problem like ordinary grime and start treating it like an old coating, the job becomes much easier and far less frustrating.
Another frequent experience is the surprise hidden under the first cleaned section. Many people expect the stripped area to look wildly shiny. Instead, they notice it looks flatter but cleaner, more even, and more natural. At first that can feel disappointing, because the artificial gloss is gone. Then, after the whole room is finished, the floor usually looks better overallless cloudy, less blotchy, and more consistent in color. In other words, the floor stops trying to cosplay as a plastic showroom sample and starts looking like real linoleum again.
High-traffic zones are where the drama usually lives. Near sinks, stoves, refrigerators, and doorways, people often find the old Mop N Glo has mixed with years of grease, dust, and microscopic grit. Those sections can turn into stubborn patches that seem immune to regular mopping. A lot of homeowners report that once they started working in small sections and allowing the remover to dwell properly, the floor finally responded. The big breakthrough is almost never “scrub like you are in a revenge montage.” It is usually “slow down, keep the section small, and rinse better.”
People also learn quickly that residue removal is a two-bucket job. One bucket for the cleaner or remover, one for the rinse water. If you use the same dirty solution over and over, you end up redistributing softened finish instead of removing it. That is why some first attempts fail. The floor looks better while wet, then dries cloudy again, and the homeowner feels personally betrayed. Usually the answer is not a harsher product. It is cleaner rinse water and a second pass.
There is also a recurring experience with “miracle fixes.” Someone recommends vinegar. Someone else swears by ammonia. Another person proposes a scrub brush that looks like it belongs in a crime lab. In practice, the best outcomes usually come from the least dramatic approach: test first, use a surface-appropriate remover, avoid abrasives, and rinse thoroughly. The more aggressive the shortcut, the more likely the floor will end up dull, discolored, or annoyed.
Finally, many people say the biggest lesson is what happens after the floor is restored. They become much more cautious about any cleaner that promises shine, protection, glow, gloss, radiance, brilliance, or enough sparkle to be seen from low Earth orbit. Once you have removed years of buildup by hand, you tend to become a loyal fan of simpler maintenance. A pH-neutral cleaner, a damp microfiber mop, and a little restraint suddenly seem like genius. And honestly, they are.


