Table of Contents >> Show >> Hide
- Why Cheesecake Doneness Is So Tricky
- Our Test Kitchen’s 3 Foolproof Tests for Cheesecake Doneness
- Extra Doneness Clues We Use as Backup
- Doneness Looks Different by Cheesecake Type
- The Cooling Step Is Part of Baking (Yes, Really)
- Common Doneness Problems (and What to Do About Them)
- FAQ: Quick Answers from Our Test Kitchen
- Test Kitchen Experiences: What We Learned After Baking Cheesecake on Repeat
- Conclusion: The Doneness Checklist We Trust Every Time
Cheesecake is the dessert equivalent of a group project: it looks calm on the surface, but one wrong move and everything cracks under pressure. And the most stressful moment is always the samestanding in front of the oven whispering, “Are you done?” to a cake that refuses to answer.
In our test kitchen, we’ve learned a comforting truth: you don’t need psychic powers to nail cheesecake doneness. You need a few reliable cues (plus the confidence to pull a cheesecake that looks slightly underbaked). This guide breaks down the exact tests we usejiggle, touch, and temperaturealong with the why behind them, so you can bake creamy cheesecake without playing oven roulette.
Why Cheesecake Doneness Is So Tricky
Cheesecake isn’t a “cake” in the fluffy-crumb sense. It’s closer to a custard: a mixture of dairy and eggs that sets as proteins coagulate and moisture redistributes. That means it can go from “silky” to “slightly rubbery” faster than you can say “just five more minutes.”
Also, cheesecake keeps cooking after you take it out. The outer ring holds a lot of heat, and that heat gently moves inward (carryover cooking), firming the center as it cools. So if you bake until the center is totally firm in the oven, you’re often baking it past the sweet spot.
Our Test Kitchen’s 3 Foolproof Tests for Cheesecake Doneness
Use these in order. Think of them as a short, reliable checklistnot a dramatic dessert trial.
1) The Jiggle Test (Our #1 Go-To)
Put on oven mitts, gently hold the sides of the pan, and give it a small shake. You’re not trying to start an earthquakejust enough to see how the center moves.
- Done: The outer 2–3 inches look set, and the center has a small, controlled jigglelike gelatin, not like soup.
- Needs more time: The whole surface ripples, or the center looks glossy and liquidy as it sloshes.
- Probably overbaked: The center barely moves at all, and the top looks dry or puffy.
Test kitchen note: If you’ve ever overbaked cheesecake, you know the texture turns from “creamy dream” to “dense cheesecake brick.” A slight jiggle is your friend. It firms up as the cheesecake cools.
2) The Gentle Touch Test (Fast and Surprisingly Accurate)
Wash your hands, then lightly tap the center of the cheesecake. (Yes, you can be delicate. We believe in you.)
- Done: The center feels set with a slight givelike a firm custard.
- Needs more time: Your finger sinks in and the surface feels loose or wet.
If you’re doing this test, keep it gentle. The goal is information, not fingerprints.
3) The Temperature Test (When You Want Numbers, Not Vibes)
If you’re the kind of person who sleeps better after checking the locks twice, you’ll love this one. An instant-read thermometer gives a clear doneness signalespecially helpful if your oven runs hot, your pan is dark, or your cheesecake is extra tall.
Where to temp: Insert the thermometer into the center of the cheesecake, aiming for the middle of the filling (not touching the crust or pan). Insert it deep enough to read the interior, not just the surface.
What to look for:
- Classic creamy target: Pull the cheesecake when the center reads about 150–155°F.
- Extra-creamy strategy: Some recipes pull closer to the mid-140s and rely on carryover cooking to finish the set. This works best when you’ve baked cheesecakes before and trust your cooling process.
Reality check: The thermometer leaves a small hole. If you’re topping the cheesecake with fruit, ganache, or whipped cream, nobody will ever know. If you’re serving it plain, you can often smooth the top gently with an offset spatula after cooling (or pretend it’s a “rustic chef’s signature”).
Extra Doneness Clues We Use as Backup
The three tests above are the main event, but these clues help confirm you’re on track:
The Surface Sheen Changes
Underbaked cheesecake often looks shiny and wet in the center. As it sets, the top becomes more matte. It shouldn’t look parchedjust less glossy.
The Edges Look Slightly Puffed and Set
Most cheesecakes rise a little around the edges as they bake. When the edges look set and just slightly puffed, you’re usually close. If it climbs like a soufflé and starts to brown aggressively, your oven may be running hot.
The Center Is Lighter in Color (Sometimes)
Depending on your recipe, the center may look a touch paler than the edges when it’s properly baked. This isn’t universal, but it can be a helpful hintespecially in a water bath where browning is minimal.
Cracks Are a Clue (Not a Goal)
A crack often means the cheesecake baked too long, baked too hot, cooled too fast, or had too much air whipped into the batter. Some styles (hello, Basque) crack on purposebut for classic New York-style, cracks usually signal stress: the custard expanded, then tightened as it dried.
Doneness Looks Different by Cheesecake Type
One reason cheesecake doneness advice feels confusing is that not all cheesecakes behave the same. Here’s how we adjust our expectations.
New York-Style (Dense, Cream Cheese-Forward)
This is the classic “tall, rich, creamy” cheesecake. For this style, the jiggle test is extremely reliable: set edges, small center wobble. Temperature targets in the low 150s (°F) tend to produce that signature creamy slice.
Sour Cream–Topped or High-Dairy Cheesecakes
Cheesecakes with lots of sour cream, heavy cream, or similar additions can appear looser in the center even when they’re properly baked. Expect a slightly larger soft zone. In our kitchen, we lean more heavily on the gentle touch test and/or a thermometer for these.
Basque “Burnt” Cheesecake
Basque cheesecake is the lovable rebel: baked hotter, intentionally browned, often cracked, and served with a custardy center. The jiggle is more dramaticthink “wobbly middle” is part of the charm. Thermometer checks can help you keep it creamy rather than fully set like a traditional cake.
Mini Cheesecakes and Cheesecake Bars
Smaller formats set faster and can overbake quickly. Look for minimal jiggle and a set top. Because they’re shallow, thermometer readings can be tricky (easy to hit the pan), so we rely more on visual cues and timingthen chill thoroughly.
The Cooling Step Is Part of Baking (Yes, Really)
If you want a cheesecake that’s creamy, not cracked, and not collapsing like a sad lawn chair, cooling is non-negotiable.
Our Favorite Cool-Down Routine
- When the cheesecake passes the jiggle test (or hits your target temperature), turn off the oven.
- Crack the door and let it sit for 30–60 minutes. This gentle cool-down reduces thermal shock.
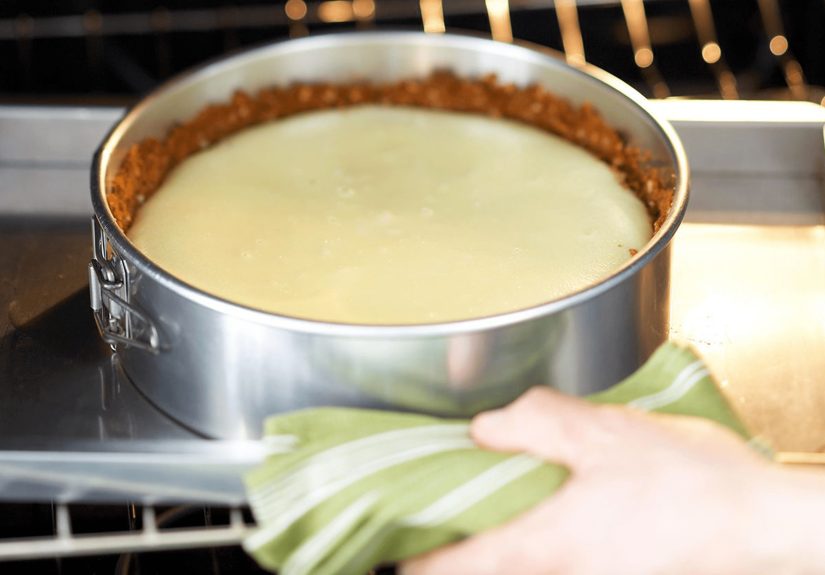
- Remove and cool at room temperature until barely warm.
- Cover and refrigerate for at least 6–8 hours, ideally overnight.
Why the long chill? Cheesecake is at its best after the interior fully sets and moisture redistributes. If you slice too soon, even a properly baked cheesecake can look underdone.
Common Doneness Problems (and What to Do About Them)
“My Cheesecake Is Too Jiggly After Cooling”
If it’s still loose after a full overnight chill, it likely needed more baking time. If it’s only slightly soft, give it another few hours in the fridgecheesecake can firm up more than you’d expect.
Can you re-bake it? Sometimes. If the center is truly runny and the cheesecake has cooled completely, you can return it to a low oven briefly. But results vary, and overbaking is a real risk. In our kitchen, we usually pivot to serving it as a “spoonable cheesecake” with berries and whipped cream (the dessert equivalent of changing the subject).
“My Cheesecake Is Dry or Grainy”
This is classic overbake behavior. Custards tighten when they go too far, squeezing out moisture and creating a drier texture. Next time: pull earlier (jiggle is good), consider a water bath or steam, and avoid baking at too high a temperature.
“It Cracked!”
Cracks happen. You’re baking a delicate custard in an oven, not assembling IKEA furniture (and even that comes with emotional damage). Cover cracks with toppings: fruit compote, sour cream topping, chocolate ganache, whipped cream, or even a dramatic pile of berries.
FAQ: Quick Answers from Our Test Kitchen
Should I use the toothpick test?
Not as your main method. Cheesecake isn’t a standard cake crumb; the center can be creamy and still “stick.” Plus, poking can encourage cracks. Use jiggle, touch, or temperature instead.
Can I open the oven while it bakes?
Try not to do it repeatedly. Temperature swings can contribute to sinking or cracking. If you must check, do it quickly and near the end of baking.
What’s the “perfect” jiggle?
Think: the center moves like gelatin, not like a wave. The edges stay put; the middle gives a small, confident wobble. If you see liquid movement across a wide area, it needs more time.
Does cheesecake need a water bath?
Not always, but it helps with even baking and can reduce cracks. If you hate water baths (valid), a pan of hot water on a lower rack can create helpful steam without the risk of leaks.
Is it safe to pull cheesecake at 150–155°F?
Many baking authorities cite that range as a doneness benchmark for cheesecake texture, with carryover and hot outer zones continuing the set. If you’re baking for someone at higher risk (young children, pregnant people, older adults, immunocompromised), consider using pasteurized eggs and following official egg-dish safety guidance.
Test Kitchen Experiences: What We Learned After Baking Cheesecake on Repeat
After enough cheesecake testing, you start to notice patternslike how every oven has a personality, and some of them are petty. We ran multiple bakes with the same batter to see how different “done” signals played out after cooling, chilling, and slicing. Here are the moments that actually changed how we bake.
The biggest surprise: The cheesecake that looked the least “done” at pull time often ate the best the next day. When we baked until the center barely moved, the slices were neat… but the texture skewed dense and slightly dry, especially near the outer ring. When we pulled while the center still had a small, obvious wobble, the overnight chill finished the job beautifullycreamy, smooth, and not crumbly at the edges.
The jiggle test became easier once we memorized the “set ring.” The outer 2–3 inches should behave like it’s already in the fridge: stable and set. The middle should look like it’s still deciding whether it wants to be pudding. If that soft zone spreads too far (half the cheesecake moving like a waterbed), it will usually slice poorly later. But a modest, contained wobble? That’s the sweet spot.
Temperature testing taught us timing, not just numbers. On cheesecakes baked in a water bath, the rise in center temperature near the end was gentle. Without a water bath, the edges heated faster and the center lagged behind, which made carryover cooking more dramatic. That’s when a slightly lower pull temperature made sensebecause the heat stored in the outer ring continued to migrate inward as the cheesecake rested.
Cooling is where cracks are bornor prevented. In one test, we pulled a cheesecake that was perfectly baked, then cooled it on the counter in a chilly kitchen. That top cracked like it heard a bad joke. In the next test, we used a slow cool-down in the turned-off oven with the door cracked, then cooled to room temp gradually. Same batter, same bake time, wildly different results. The lesson: cheesecake hates sudden change. Treat it like a catcalm voice, slow movements, no surprises.
Overmixing showed up later. The cheesecakes that got aggressively beaten (because someone “wanted it extra smooth”) rose higher, then sank more dramatically, and cracked more often. The gentler-mixed batches baked flatter, cooled more evenly, and sliced cleaner. Now we mix just until combined, especially after adding eggs.
Finally, we stopped chasing a flawless top. Even a well-baked cheesecake can develop a small crack if your oven cycles hot, the pan is dark, or the kitchen is cold. And honestly? Once we topped a cracked cheesecake with glossy berries and a cloud of whipped cream, nobody cared. The real win is texture: creamy center, not runny; set edges, not rubbery. If you nail that, you’ve nailed the cheesecakeeven if the top has a tiny “character line.”
Conclusion: The Doneness Checklist We Trust Every Time
If you remember nothing else, remember this: cheesecake is done when the edges are set and the center still shows a small, controlled jiggle. Let carryover heat and a proper chill finish the set. When you want extra certainty, temp the center and aim for the low 150s (°F) for classic creamy texture. Then cool slowly, chill thoroughly, and slice like you mean it.