Table of Contents >> Show >> Hide
- What Is the Difference Between "Find" and "Find and Replace"?
- How to Open Find and Find and Replace in Word
- How to Use the Basic Find Feature in Microsoft Word
- How to Use Find and Replace in Word Step by Step
- Advanced Find and Replace Options You Should Actually Use
- Practical Examples of Find and Replace in Real Documents
- Common Mistakes to Avoid
- Best Practices for Using Find and Replace Like a Pro
- Experiences and Lessons From Real Editing Work
- Final Thoughts
If you have ever stared at a Microsoft Word document thinking, “I know I typed that somewhere,” congratulations: you are exactly the kind of person the Find feature was built for. And if you have ever realized halfway through a report that you spelled a client’s name wrong 27 times, then Find and Replace is about to become your new best friend.
These two tools may sound basic, but they can save an absurd amount of time. Instead of scrolling through pages like a detective in a caffeine spiral, you can jump straight to the words, phrases, formatting marks, and even special characters you want to fix. Better yet, Microsoft Word gives you advanced options that make the tool far more powerful than many people realize.
In this guide, you’ll learn how to use Find in Word, how to replace text safely, how to search for formatting, and how to clean up messy documents without turning your file into a digital crime scene. Whether you write blog posts, school papers, contracts, manuals, or meeting notes, these Word editing tips can help you work faster and smarter.
What Is the Difference Between "Find" and "Find and Replace"?
The Find feature helps you search for a specific word, phrase, number, or formatting item in a Word document. It is ideal when you want to locate content quickly without changing anything.
The Find and Replace feature does the same search job, but it also lets you swap the original text for something else. That makes it useful for correcting repeated mistakes, updating old terminology, standardizing brand names, or cleaning up formatting problems.
Think of it this way:
- Find says, “Show me where this appears.”
- Find and Replace says, “Show me where this appears, and let me fix it.”
That may not sound dramatic, but if you are editing a 40-page document, the difference is huge. One tool helps you navigate. The other helps you perform surgery.
How to Open Find and Find and Replace in Word
On Windows
To search in a Word document, press Ctrl + F. This usually opens the Navigation Pane, where you can type your search term and move through the results.
To open the Replace dialog directly, press Ctrl + H. You can also go to the Home tab and look for the Editing group, then click Replace.
On Mac
In Word for Mac, you can use the menu bar under Edit > Find. For Replace, the common shortcut is Command + Shift + H. Depending on your version, Word may open a side pane first and then offer advanced options from a gear or settings menu.
In Word for the Web
If you are using Word in a browser, the basic experience is still easy. Search for a word or phrase, then choose the replace option if you need to make changes. The web version handles everyday Find and Replace tasks well, though desktop Word still offers the richest set of advanced tools.
How to Use the Basic Find Feature in Microsoft Word
Let’s start with the fastest win. Say you are reviewing a proposal and need to find every mention of the phrase quarterly review.
- Open your Word document.
- Press Ctrl + F on Windows or use the Find command on Mac.
- Type the word or phrase into the search box.
- Word highlights matching results throughout the document.
- Click each result in the Navigation Pane or use the arrows to jump between matches.
This is perfect when you need to verify a fact, check consistency, or move around a long file quickly. It is also handy when editing large documents with lots of headings, repeated terms, or references to product names.
One underrated benefit of Find is that it helps you catch accidental repetition. If you suspect you overused a phrase like in conclusion or best-in-class, a quick search will show you exactly how often it appears. Sometimes the results are humbling. Helpful, but humbling.
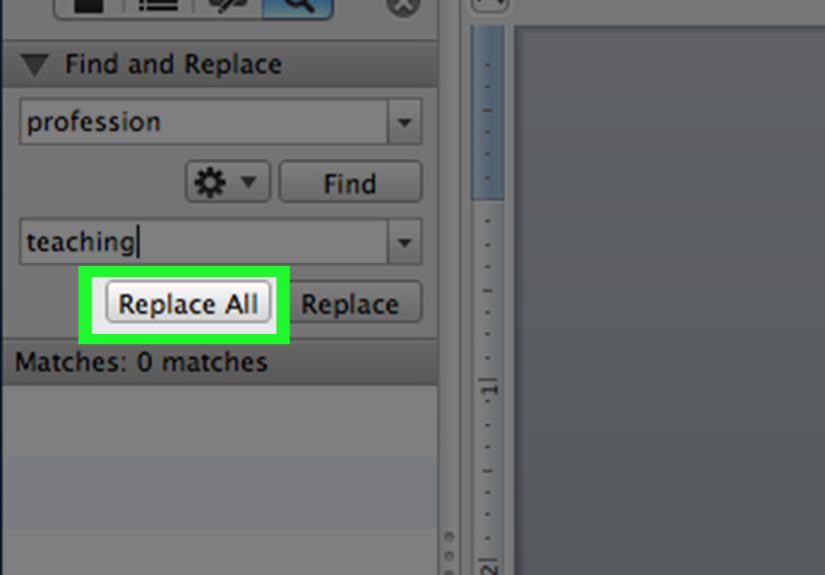
How to Use Find and Replace in Word Step by Step
Now for the part that saves real time. Imagine you wrote Acme Tech throughout a document, but the correct company name is Acme Technologies. Instead of fixing each instance manually, you can replace them in seconds.
- Press Ctrl + H on Windows, or open the Replace tool from the menu or ribbon.
- In the Find what box, type the text you want to locate.
- In the Replace with box, type the new text.
- Choose Find Next if you want to review matches one at a time.
- Click Replace for individual changes or Replace All to update everything at once.
That is the basic workflow, and for many editing jobs, it is all you need. But here is the smart move: when the change matters, use Replace before Replace All. Reviewing each match helps you avoid awkward mistakes, like changing part of a longer word by accident.
For example, replacing art with design across a document without checking settings could turn partial into pdesignial. That is not a rebrand. That is a cry for help.
Advanced Find and Replace Options You Should Actually Use
Most people open Word’s Replace box, do the bare minimum, and leave. That works, but it also ignores the feature’s best capabilities. Click More in the Find and Replace dialog and you’ll see options that help you search with much more precision.
1. Match Case
This tells Word to respect capitalization. If you search for Apple with Match Case turned on, Word will not treat apple as the same thing.
This is useful when you need to distinguish between a proper noun and a common noun, such as:
- March versus march
- Turkey versus turkey
- Word versus word
2. Find Whole Words Only
This option helps Word search for complete words instead of matching text buried inside other words. If you search for cat, Word will find cat but skip catalog and educate.
It is one of the easiest ways to prevent messy replacements, especially in professional documents.
3. Search by Formatting
You can use Find and Replace to search for formatting, not just text. This is a lifesaver when a document looks inconsistent and you cannot remember where the problem spots are.
Examples include finding text that is:
- bold
- italic
- highlighted
- a certain font or size
- styled differently from the rest of the document
You can even replace one format with another. For example, you might replace bold blue headings with a different font style, or remove random highlighting that someone sprinkled across the document like confetti.
4. Search for Special Characters
Word can also find non-printing or special characters, which is fantastic for document cleanup. These include paragraph marks, tabs, line breaks, nonbreaking spaces, and similar items that quietly make formatting weird.
A few common cleanup examples:
- Replace double spaces with single spaces
- Replace manual line breaks with paragraph marks
- Replace nonbreaking spaces with regular spaces
- Remove stray tabs that wreck alignment
If you have ever pasted content from a website, a PDF, or an old report and ended up with bizarre spacing, this feature is your cleanup crew.
5. Use Wildcards for Smarter Pattern Searches
Word also supports wildcards, which let you search for patterns instead of exact text. This is one of the most powerful advanced find options in Microsoft Word.
For instance, you can use:
- ? to match a single character
- * to match a string of characters
- @ to match one or more occurrences of the previous character
That means you can search more flexibly when text varies slightly. Wildcards are especially useful in editing legal documents, long reports, or content libraries where patterns repeat but are not identical.
One important note: Word calls these wildcards, not full regular expressions. They are powerful, but they are still Word’s own flavor of smart searching.
Practical Examples of Find and Replace in Real Documents
Updating a Brand Name
Your company changes NorthPeak Media to NorthPeak Digital. Use Find and Replace to update all mentions in a proposal, but check each one first so you do not change file names, email addresses, or quoted text that should stay as-is.
Fixing a Repeated Misspelling
You realize you typed definately instead of definitely throughout a white paper. Find and Replace can solve that in seconds and spare you from pretending it was an intentional stylistic choice.
Cleaning Up Imported Text
You paste content from another source and discover line breaks in awkward places. Replacing manual line breaks with paragraph marks or spaces can make the text readable again.
Standardizing Headings
If some headings are in 14-point bold Arial and others are in 16-point Calibri, you can use format-based searching to find the inconsistent ones and make the document look polished.
Removing Extra Spaces
This is one of the classic cleanup moves. Search for two spaces and replace them with one. Repeat until Word finds no more matches. It is simple, satisfying, and strangely therapeutic.
Common Mistakes to Avoid
Using Replace All Too Early
Yes, it is fast. It is also how tiny mistakes become giant headaches. If the replacement affects names, technical terms, or partial matches, review several results before you replace everything.
Ignoring Capitalization
If your document includes both uppercase and lowercase versions of a term, use Match Case when needed. Otherwise, you may create inconsistent or awkward results.
Skipping Whole-Word Settings
If you only want an exact word, turn on whole-word matching. This reduces accidental replacements inside longer words.
Forgetting About Formatting
Sometimes the problem is not the text. It is the styling. If a document looks inconsistent, try searching for formatting instead of reading every line manually.
Not Using Track Changes on High-Stakes Edits
If you are editing an important file, consider turning on Track Changes before running major replacements. That gives you a safety net if the edit goes sideways.
Best Practices for Using Find and Replace Like a Pro
- Save a copy of the document before large replacements.
- Test your replacement on one or two matches first.
- Use Match Case and whole-word options whenever precision matters.
- Use formatting searches to clean inconsistent styling faster.
- Use special characters when cleaning pasted or imported text.
- Use wildcards only when you understand the pattern you are targeting.
- Rerun Find after replacing to confirm the old term is truly gone.
These habits make a big difference, especially when you are editing longer Microsoft Word documents for work, school, or publishing.
Experiences and Lessons From Real Editing Work
In real-world document editing, the Find and Find and Replace features often feel less like convenience tools and more like emergency equipment. One common situation happens in team projects. A document gets passed between several people, each with their own writing habits, and suddenly the file contains three versions of the same product name, two spellings of a person’s last name, and enough inconsistent capitalization to make an editor blink twice. In moments like that, Find and Replace is not just useful; it restores order.
Another familiar experience comes from long-form writing. Maybe you are drafting a blog post, manual, or research paper and halfway through you decide a phrase is too repetitive. At first, you think, “I’ll just fix it later.” Then later arrives, and the phrase has appeared 19 times. This is where Find helps you audit your own style. It reveals patterns you did not notice while drafting quickly, including overused expressions, filler words, and awkward phrasing. It is like holding up a mirror to your writing, except the mirror is brutally honest.
Students also run into this all the time. A paper may begin with one term, then shift to a slightly different version later. For example, a writer starts with social media platforms, then switches to social platforms, then uses digital communities. Sometimes that variation is fine. Sometimes it weakens clarity. Using Find helps students check consistency, while Replace helps bring the language back into alignment without rereading every paragraph line by line.
Office workers have their own version of the same story. Reports get copied from old templates, which means outdated years, old department names, and retired wording can hang around like uninvited guests. One quick Find search for the previous year or an old brand name can uncover all the leftovers. One careful Replace session can clean the whole document before anyone higher up notices that the “2024 strategic plan” somehow made its way into a 2026 file.
Then there is the formatting mess. Anyone who has copied text from emails, websites, PDFs, or collaborative docs knows the chaos that can follow. Random line breaks appear. Spacing gets weird. Tabs show up where they have absolutely no business being. This is where advanced Find and Replace feels magical. Searching for paragraph marks, manual line breaks, or nonbreaking spaces can turn a sloppy pasted block into something clean and publishable in minutes.
The biggest lesson from all these experiences is simple: the smartest users do not wait until a document becomes a mess. They use Find early to review language, use Replace carefully to standardize terms, and use advanced options to clean formatting before problems spread. Once you build that habit, Word stops feeling like a giant blank page and starts feeling like a tool that is actually on your side.
Final Thoughts
If you only use Microsoft Word for typing, you are missing out on some of its most practical editing tools. Learning how to use Find in Word helps you navigate long documents quickly. Learning how to use Find and Replace in Microsoft Word helps you correct repeated issues, standardize language, and clean messy formatting with far less effort.
The basic version is easy enough for beginners, but the advanced options are where the real power lives. Match case, whole-word searching, formatting replacement, special characters, and wildcards can all save time when used correctly. The key is knowing when to search broadly, when to narrow the results, and when to replace one result at a time instead of detonating the whole document with Replace All.
Once you get comfortable with these features, editing becomes faster, more accurate, and much less annoying. And honestly, anything that reduces annoying document work deserves a standing ovation.