Table of Contents >> Show >> Hide
- Why Home Insulation Matters More Than You Think
- Key Concepts: R-Value, Climate Zones, and Air Sealing
- The Main Types of Home Insulation (and Where They Shine)
- Where to Insulate First for Maximum Impact
- How to Evaluate Your Existing Insulation
- DIY vs. Pro: What’s Safe to Tackle Yourself?
- Costs, Savings, and Tax Credits
- A Simple Planning Checklist
- Real-World Experiences with Home Insulation Upgrades
- Conclusion: Insulation Is a DIY Superpower
If you’ve ever stood in your hallway wondering, “Why is this house freezing when the thermostat says 72°F?”, you’ve already met the villain of our story: poor insulation. The good news? With a little know-how and some sweat equity, you can upgrade your home’s insulation, boost comfort, and trim those energy bills in true Family Handyman style.
This guide walks you through what insulation does, the different types, how to decode R-values, where to add insulation first, and when it’s time to call in the pros. By the end, you’ll be able to look at your attic and think, “Yeah, I’ve got this,” instead of “Nope, that’s where the spiders live.”
Why Home Insulation Matters More Than You Think
Insulation’s main job is simple: slow down heat moving between indoors and outdoors. In winter, it helps keep your expensive heated air inside your home. In summer, it helps keep the hot outdoor air from turning your house into a slow cooker. Less heat flow means your furnace and air conditioner don’t have to work as hard, which usually means lower utility bills and a more comfortable home year-round.
Proper insulation also helps with:
- Comfort: Fewer cold drafts, fewer hot rooms, and fewer arguments about who touched the thermostat.
- Energy efficiency: Many homes can save around 10% on heating and cooling costs just by sealing air leaks and adding insulation in key spots like the attic.
- Noise reduction: Certain insulation types (like mineral wool and dense-pack cellulose) help quiet noisy streets, loud neighbors, or enthusiastic drummers in the basement.
- Durability and moisture control: When combined with good air sealing, insulation can help reduce condensation, mold growth, and ice dams.
Key Concepts: R-Value, Climate Zones, and Air Sealing
What Is R-Value?
R-value is the insulation world’s favorite number. It measures how well a material resists heat flow: the higher the R-value, the better the insulation performance. It’s usually listed “per inch” of thickness. For example, fiberglass batts might offer roughly R-2.9 to R-3.8 per inch, while cellulose may land around R-3.2 to R-3.8 per inch. Closed-cell spray foam can go even higher, often around R-6 to R-7 per inch.
Different materials can have the same total R-value if you adjust the thickness. Ten inches of lower-R material might deliver similar performance to fewer inches of higher-R material, as long as the installation is correct and gaps are minimized.
Why Climate Zones Matter
The amount of insulation you need depends heavily on where you live. Energy codes and federal guidelines divide the U.S. into climate zones. Warmer areas need less total R-value than very cold regions, but even in mild climates, an under-insulated attic can act like a big open window for heat loss or gain.
In many U.S. climate zones, recommended attic insulation levels fall roughly in the R-38 to R-60 range. Floors over unconditioned spaces (like garages) and exterior walls have lower recommended R-values but still benefit greatly from upgrades.
Air Sealing vs. Insulation
Insulation is only half the story. Air leaksaround recessed lights, attic hatches, plumbing penetrations, rim joists, and window framesact like expressways for hot or cold air. Even a thick blanket of insulation can’t perform well if air is constantly moving through it.
That’s why experts recommend sealing air leaks with caulk, foam, and weatherstripping before or while you add insulation. Think of it as putting on a warm coat and zipping it up.
The Main Types of Home Insulation (and Where They Shine)
Fiberglass Batts and Rolls
Fiberglass batts are the pink, yellow, or white fluffy blankets you’ve probably seen in every big-box home center. They’re affordable, widely available, and relatively easy for DIYers to install in open areas like unfinished attics or exposed wall cavities.
Pros: Budget-friendly, noncombustible, and a familiar choice. Batts for 2×4 walls often deliver around R-11 to R-15, while thicker batts for 2×6 walls or attic joists can reach R-19 and higher.
Cons: Fiberglass is picky about installation. Gaps, compression, or poorly cut pieces can dramatically reduce performance. If you’re going the DIY route, take your time, cut batts accurately, and avoid squishing them into too-small spaces.
Blown-In Cellulose and Loose-Fill Fiberglass
Blown-in insulation is made to fill irregular spacesperfect for attics and for dense-packing into existing walls. Cellulose is usually made from recycled paper treated for fire resistance. Loose-fill fiberglass consists of tiny glass fibers blown with a machine.
Pros: Great at filling odd corners and covering around obstructions. Cellulose in particular can help reduce air movement within the cavity, which boosts comfort and reduces drafts. Many DIY-friendly rental machines allow you to blow cellulose into your attic in a weekend.
Cons: The material can settle over time, reducing effective depth and R-value if installed too lightly. You also need two people for most DIY attic jobsone feeding the hopper and one on the business end of the hose.
Spray Foam Insulation
Spray foam comes in two main flavors: open-cell and closed-cell. Both expand to fill cavities and create an excellent air seal, but closed-cell foam is denser and delivers a higher R-value per inch.
Pros: High R-value, built-in air sealing, and good moisture resistance (especially closed-cell). It’s a favorite for tricky rim joists, cathedral ceilings, and situations where you want maximum performance in limited space.
Cons: Usually not a DIY job. Professional installation costs more up front, and once cured, foam is very difficult to remove or modify. You also need to follow safety and ventilation guidelines carefully during installation.
Rigid Foam Board
Rigid foam boardsoften made of polyisocyanurate, expanded polystyrene (EPS), or extruded polystyrene (XPS)are flat panels you can install on exterior walls, basement walls, or under slabs in some cases.
Pros: High R-value per inch, great for continuous insulation (covering framing to reduce thermal bridging), and helpful in basements where contact with masonry is an issue. They’re also handy for insulating attic hatches and garage doors.
Cons: Must be protected in living spaces (for fire safety), edges and seams need careful taping or foaming, and some types can be sensitive to sunlight or solvents.
Mineral Wool (Rock Wool)
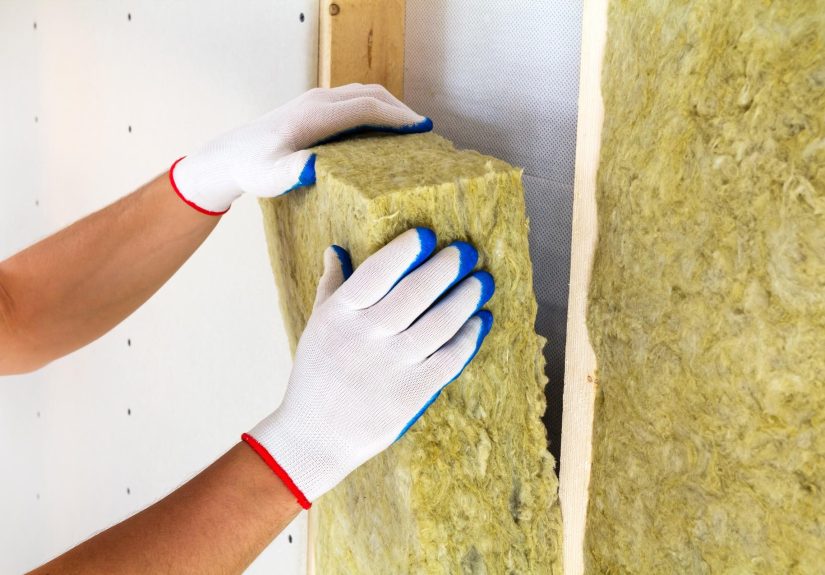
Mineral wool is made from spun rock or slag. It looks a bit like denser fiberglass but offers some unique advantages.
Pros: Excellent fire resistance, good sound control, and slightly higher R-value than standard fiberglass batts in many cases. It’s also water-resistant, which makes it appealing in basements, exterior walls, and around fireplaces.
Cons: Typically more expensive than fiberglass, and batts can be slightly stiffer to cut and fit around obstacles. A good utility knife and a little patience go a long way.
Where to Insulate First for Maximum Impact
1. The Attic
If you only tackle one insulation project, make it the attic. Heat loves to rise, and without enough attic insulation, it leaves your home faster than your kids when chores are mentioned. In many regions, you’ll want a total attic R-value of roughly R-38 to R-60.
Start by measuring the depth of existing insulation and identifying the type. Multiply the depth (in inches) by the approximate R-value per inch for that material. If your number falls short of recommendations for your climate zone, plan to add more.
2. Attic Hatch and Bypasses
Don’t forget the attic access hatch or pull-down stairs. These are common weak spots. Add weatherstripping around the lid and glue or screw rigid foam board to the underside of the hatch to boost its R-value.
3. Exterior Walls
Upgrading wall insulation is more challenging in an existing home, but it can be done. Options include dense-pack cellulose or fiberglass blown into wall cavities through small holes (from inside or outside) or upgrading insulation when you’re replacing siding or remodeling rooms.
4. Floors Over Unconditioned Spaces
If you have a room above a garage or a floor over a vented crawlspace, insulation here can dramatically improve comfort. Fiberglass or mineral wool batts can be installed between joists, and rigid foam can be added to the underside of floor framing in some assemblies.
5. Basements and Crawlspaces
Basements can be insulated on the interior (with rigid foam and framed walls) or on the exterior during major work. Crawlspaces can either be insulated along the floor above (traditional approach) or turned into a semi-conditioned space by sealing vents and insulating the foundation walls. The “right way” depends on your climate, moisture conditions, and local codes.
How to Evaluate Your Existing Insulation
Step 1: Visual Inspection
Grab a flashlight, a tape measure, and protective gear (mask, gloves, eye protection). Carefully peek into the attic and note:
- The type of insulation present (batts, blown-in, foam, etc.).
- The depth of insulation between and over joists.
- Any bare spots, compressed areas, or signs of moisture or mold.
Step 2: Estimate R-Value
Multiply the depth of insulation by its approximate R-value per inch. As an example, 8 inches of blown-in cellulose at about R-3.5 per inch gives you around R-28often less than what’s recommended for attics in many U.S. climates.
Step 3: Compare Against Recommendations
Check your climate zone and recommended R-values using federal guidelines or trusted energy resources. If you’re significantly below those numbersor if your home feels drafty, has uneven temperatures, or shows ice dams or condensationit’s a strong signal that an insulation upgrade is due.
DIY vs. Pro: What’s Safe to Tackle Yourself?
Good DIY Projects
- Adding fiberglass or mineral wool batts in an open attic with easy access.
- Blowing cellulose into attics using a rental machine from a home center, especially if the space is straightforward and free of major wiring or moisture issues.
- Air sealing small gaps and cracks with caulk and low-expansion spray foam, and adding weatherstripping to doors and attic hatches.
Jobs Better Left to Pros
- Spray foam installations, especially large areas or roof decks, due to chemical handling, safety, and the risk of improper application.
- Dense-pack wall insulation in existing walls, where the right equipment and technique ensure cavities are filled evenly without damage.
- Homes with knob-and-tube wiring, moisture problems, or suspected mold, which may require electrical upgrades or remediation before adding insulation.
If you’re unsure, consider an energy audit or home energy assessment. Pros use tools like blower doors and infrared cameras to pinpoint the biggest leaks and insulation gaps so you can spend your insulation budget where it counts most.
Costs, Savings, and Tax Credits
Costs vary widely by region, contractor, and material. As a rough idea, insulating an attic might range from under a dollar per square foot for DIY fiberglass to several dollars per square foot for professionally installed spray foam. Some projects, like blown-in cellulose, sit comfortably in the middle.
The payoff can be significant. Sealing air leaks and bringing your home up to recommended insulation levels can often cut heating and cooling bills by around 10% or more, depending on how leaky and under-insulated the home was to begin with.
Don’t forget incentives. Federal home energy credits now help offset the cost of energy-efficient upgrades like insulation and air sealing, typically covering a percentage of qualified project expenses up to an annual cap. Many states, utilities, and local programs also offer rebates or low-cost financing for insulation upgrades.
A Simple Planning Checklist
- Find your climate zone and recommended R-values for attic, walls, floors, and basement.
- Inspect your attic and other accessible areas to estimate current R-value and look for air leaks or moisture issues.
- Decide which insulation types fit your budget, skills, and priorities (fire resistance, sound control, eco-friendliness, etc.).
- Seal obvious air leaks before adding more insulation.
- Plan the work in stages if needed: attic first, then floors over unconditioned spaces, then walls and basement.
- Check available rebates, tax credits, or utility incentives to stretch your insulation dollars.
Real-World Experiences with Home Insulation Upgrades
It’s one thing to talk about R-values and climate zones; it’s another to drag twelve bags of cellulose up a ladder on a Saturday. Here are a few common “real-life” insulation experiences that many homeowners shareplus what you can learn from them.
The Drafty 1960s Ranch
Picture a single-story ranch with original attic insulationmaybe a few sad inches of old fiberglass batts that have seen better decades. The homeowners complain that the house is chilly in winter, hot in summer, and the furnace seems to run constantly.
They rent an insulation blower from a local home center, enlist a friend, and spend an afternoon air sealing around plumbing stacks, bath fans, and light fixtures. Then they blow cellulose over the whole attic until they reach the recommended R-value for their climate zone.
The results? The home feels less drafty, rooms are more evenly heated, and the furnace cycles less often. The energy bill doesn’t magically get cut in half, but the steady monthly savings add up, and comfort improves enough that they wish they’d done it years sooner.
The Bonus Room Over the Garage
Another classic story: a “bonus room” over the garage that is freezing in winter and sweltering in July. In many homes, the floor above the garage has minimal or poorly installed insulation, and the garage ceiling may have air gaps around ducts, electrical boxes, and framing.
In this scenario, homeowners (or a contractor) remove a portion of the garage ceiling drywall, carefully install mineral wool or fiberglass batts between joists, and use spray foam or caulk around penetrations. In some cases, they also add a layer of rigid foam across the bottom of the joists before new drywall goes up, reducing thermal bridging.
After this project, the bonus room often stops feeling like an unheated shed masquerading as a bedroom. Temperatures become more consistent with the rest of the house, and the heating and cooling system doesn’t have to overwork to handle that one stubborn space.
The Basement Comfort Makeover
Basements are notorious for being cool and damp. Homeowners who finish a basement without thinking about insulation sometimes end up with chilly walls and floors that make the space feel more like a cave than a family room.
A smarter approach involves adding rigid foam insulation directly to the masonry walls (properly attached and sealed), then framing and insulating interior stud walls. This keeps concrete walls warmer, reduces condensation risk, and makes the finished basement feel more like real living space, not a fancy storage locker.
Once the basement walls are insulated correctly, homeowners often find they can keep the thermostat a little lower upstairs while still feeling comfortable. That’s a nice bonus on top of the improved feel of the finished space.
Lessons Learned the Hard Way
Many insulation veterans share a few common “wish I had known” insights:
- Plan for ventilation: In attics, always protect soffit vents with baffles so new insulation doesn’t block airflow.
- Respect moisture: Don’t trap moisture against cold surfaces. Follow local building code guidance on vapor retarders and drainage.
- Label everything: After the work is done, keep notes: what material you used, how much, and where. It’s surprisingly helpful later.
- Take it in stages: You don’t have to upgrade everything in one weekend. Start with the worst areas and build from there.
The big takeaway from these real-world stories: insulation isn’t glamorous, but it’s one of the most satisfying upgrades you can make. Once your home stays warm without the furnace running nonstopand your summer AC bills stop making you gaspyou’ll appreciate every bag, batt, and board you installed.
Conclusion: Insulation Is a DIY Superpower
Learning the basics of home insulation is like getting x-ray vision for your house. Once you understand how heat moves, what R-values mean, and where your home is losing energy, you can make smart, targeted improvements that pay off in comfort and lower bills.
Start by checking your attic and sealing air leaks. Decide which insulation types fit your budget and your DIY comfort level. Use climate-based recommendations as your guide, and don’t forget to look into rebates and tax credits that can soften the financial hit.
Most of all, remember: good insulation doesn’t just help your home feel betterit helps your house work smarter, not harder, season after season.