Table of Contents >> Show >> Hide
- Why Maui’s Hook Is More Than a Giant Accessory
- Pick Your Build Style
- Materials & Tools Checklist
- Step-by-Step: EVA Foam “Convention-Ready” Maui Hook
- Step-by-Step: Insulation Foam “Carved Like Sculpture” Hook
- Sealing & Painting: The Difference Between “Foam” and “Mythical Relic”
- 3D Printing Path (Quick Overview)
- Common Mistakes (and How to Avoid Them)
- Prop Safety, Rules, and “Please Don’t Gas Yourself”
- Transport, Storage, and Repairs
- FAQ
- Final Thoughts
- Maker Stories: of Real-World Experience
If you’ve ever watched Moana and thought, “I, too, should carry around a legendary fish hook the size of a small refrigerator,” congratulationsyou are my kind of practical.
Maui’s hook is one of those props that looks impossible until you break it down into what it really is: a big, lightweight shape with bold carvings, a believable finish, and enough durability to survive
being dragged through a living room (or a convention hall) by an overexcited demigod-in-training.
This guide walks you through multiple build pathsfrom budget cardboard to convention-ready EVA foam to a carved insulation-foam “one big chunk” approachplus the finishing steps that make the difference between
“pool noodle energy” and “screen-inspired magic.” We’ll also talk safety, because nothing ruins a heroic montage like accidentally hot-gluing your thumb to a hook that’s supposed to save the world.
Why Maui’s Hook Is More Than a Giant Accessory
In the film, Maui’s hook isn’t just a weapon or a fancy fishing toolit’s tied to the character’s mythic identity, with stories across the Pacific that connect Māui to feats like pulling islands from the sea.
Disney’s filmmakers also leaned on cultural consultants during development to help ground the world and details in Oceanic cultures, which is one reason the visuals and motifs feel specific instead of generic “tropical.”
If you’re making the hook for cosplay, décor, or a themed event, it’s worth approaching the design with that same respect: build it with care, avoid turning cultural elements into a joke, and keep your version
clearly in the “fan-made prop inspired by the film” lane.
Pick Your Build Style
Before you buy anything, decide what you need your hook to do. Sit on a wall? Survive a Halloween parade? Pass convention prop check? Your answer determines your materials.
Option A: EVA Foam (Best for Cosplay)
Lightweight, flexible, easy to repair, and forgiving when you inevitably bump a doorway. Great for large props that must stay under a weight limit.
Option B: XPS Insulation Foam (Best for Carving Big Shapes)
If you want to carve the hook like a sculpture, insulation foam (often pink or blue boards) is a dream. You’ll want a tougher coating if it’s going to be handled a lot.
Option C: 3D Print (Best for Crisp Details)
Sharp carvings and repeatable parts, but sanding/filling takes time and large prints can get heavy. Excellent for display pieces or smaller scale hooks.
Option D: Cardboard + Foam Board (Best for Budget + Kids)
Shockingly effective for short-term use. It won’t love rain, but it can look great in photos with the right paint job.
Materials & Tools Checklist
Core Supplies (Most Builds)
- Reference images (screenshots, promotional stills, concept artanything to keep your proportions consistent)
- Paper or cardboard for templates
- Marker + measuring tape
- Utility knife + spare blades (dull blades = jagged cuts = sadness)
- Sandpaper (80/120/220 grit) or sanding sponges
For EVA Foam Builds
- EVA foam sheets (6–10mm for structure, 2–4mm for details)
- Contact cement (or high-strength foam-safe glue)
- Heat gun (for shaping and heat-sealing)
- Reinforcement core (PVC pipe, wooden dowel, fiberglass rod, or lightweight aluminumdepending on your comfort level)
For XPS Carved Builds
- XPS insulation foam board (thicker is easierstack if needed)
- Foam-safe adhesive (avoid solvents that melt foam)
- Hot wire cutter (optional but extremely satisfying)
- Hard coat (epoxy coating or other durable shell, depending on your desired finish)
Finishing Supplies (Choose Based on Method)
- Sealer/primer (examples: rubberized spray coatings, PVA-based sealers, or epoxy coatings)
- Acrylic paints (black, browns, bone/ivory tones, muted greens/teals if you want “sea-aged” vibes)
- Brushes for dry-brushing + a soft brush for washes
- Clear coat (matte or satin; pick what matches your look)
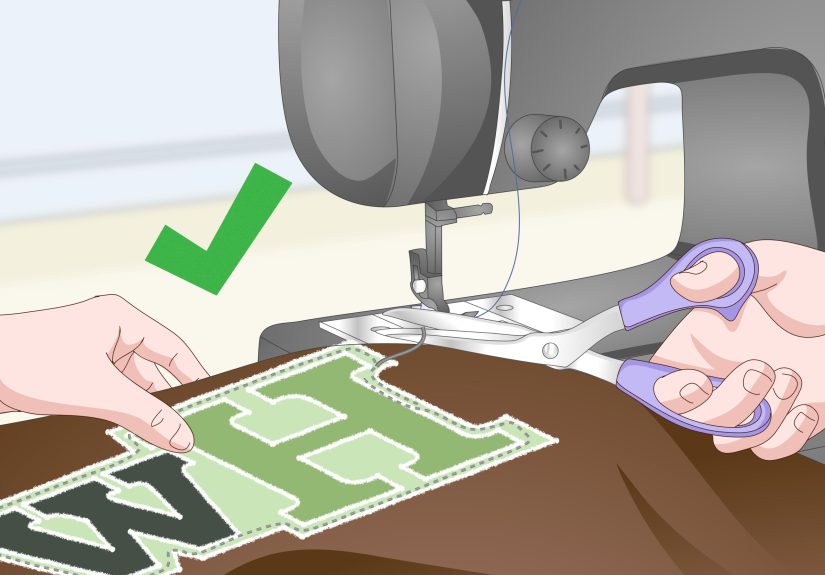
Step-by-Step: EVA Foam “Convention-Ready” Maui Hook
1) Choose a Size (and a Carry Plan)
A Maui hook looks best when it’s oversized, but your back (and event security) may disagree. For adults, a common cosplay-friendly approach is a hook that’s big in photos but still manageable in crowds.
Plan where your hands go, whether you need a hidden strap, and how you’ll transport it (more on that later).
2) Make a Full-Scale Template
Draw the hook silhouette on paper or taped-together poster board. Keep the outside curve bold and the inner curve wide enough to read visually from a distance.
Once you like the shape, cut it out and hold it like you would at an event. If it feels awkward now, it will feel worse after you spend 12 hours building it.
3) Build the “Sandwich” Structure
The easiest strong foam prop method is lamination: cut multiple identical hook shapes from thick EVA (6–10mm) and glue them into a stack.
This creates thickness without complex sculpting. For extra strength, embed a lightweight core along the “spine” of the hookespecially if you plan to swing it around for photos (gently, like a responsible hero).
4) Shape the Edges (This Is Where It Starts Looking Real)
Maui’s hook reads as a carved object: thick body, beveled edges, and defined planes. Use a sharp blade to bevel the outer and inner edges, then refine with sanding.
Don’t aim for perfect symmetryaim for believable hand-carved character. Tiny imperfections actually help it look less like a factory-cut foam outline.
5) Add Carved Motifs and Raised Details
The hook’s surface patterns are part of its identity. You can create them two ways:
- Engraved: Use a pencil/pen to sketch patterns, then lightly carve or heat-engrave lines. This is subtle and “carved.”
- Raised: Cut thin foam strips or shapes and glue them on, then bevel edges so they look integrated rather than pasted.
Pro tip: keep motifs large. Micro-detail disappears from six feet away and turns into visual noise in photos.
6) Heat-Shape and Heat-Seal
EVA foam behaves better when warmed and gently shaped. A heat gun can also “close” surface pores so sealers go on more smoothly.
Keep the heat movingthink “toasting a marshmallow,” not “summoning lava.”
Step-by-Step: Insulation Foam “Carved Like Sculpture” Hook
1) Rough Cut the Block
Transfer your template to insulation foam and cut the hook shape with a knife, saw, or hot wire cutter. If your foam isn’t thick enough, glue layers together and clamp or weight them flat while drying.
2) Carve the Profile
Carve in stages: silhouette first, then thickness, then bevels, then surface planes. A rasp or coarse sandpaper shapes quickly.
Vacuum oftenfoam dust gets everywhere and will absolutely show up in your paint job if you ignore it.
3) Add Surface Motifs
Use a pencil to map patterns, then carve shallow grooves. Insulation foam takes texture beautifully, which can mimic stone or weathered bone after paint.
4) Reinforce (If Needed)
For a large hook you’ll carry, consider a hidden spine: a dowel or PVC pipe embedded into a channel and glued in place.
This keeps the prop from snapping if it takes an accidental hit.
Sealing & Painting: The Difference Between “Foam” and “Mythical Relic”
Raw foam is porous. If you paint it directly, the finish can look blotchy, dull, and fragile. Sealing creates a smooth, paint-ready skin and improves durability.
Sealing Options (Pick One)
- Rubberized spray coating: Popular for EVA foam because it stays flexible and creates an even surface. Apply multiple light coats.
- PVA-based sealers: Brush-on and budget-friendly. Best for display props or lighter handling.
- Epoxy coating: Creates a tougher shell (great for carved insulation foam), but adds weight and requires careful safety practices.
Priming and Base Color
Once sealed, lay down a base coat that matches your target material. Maui’s hook can be interpreted as carved bone, aged stone, or a sea-worn artifact.
A strong approach is:
- Dark base: Charcoal or deep brown/black in recesses.
- Mid-tone layer: A warm bone/ivory or muted tan over most surfaces.
- Highlight: Dry-brush lighter ivory on edges and raised motifs.
Weathering (Because Brand-New Legendary Relics Look Suspicious)
Weathering sells scale. Use a thin dark wash in grooves and wipe back the excess so it stays in the carvings. Then add subtle grime around edges and high-contact areas (handle, inner curve).
For a “salt and sea” vibe, dab tiny touches of desaturated green/teal in cracksvery lightly. You want “ocean-aged,” not “mold experiment.”
Finish Coat
Seal your paint with a clear coat. Matte feels like stone or bone. Satin reads like polished artifact. Gloss reads like… a brand-new plastic toy.
Unless that’s your goal, keep shine under control.
3D Printing Path (Quick Overview)
If you’re printing, break the hook into sections that fit your printer bed. Use internal dowels/rods or alignment keys for strength, then glue and fill seams.
Prime, sand, prime again until the surface is clean. Then paint using the same base/mid/highlight/weathering logic above.
Common Mistakes (and How to Avoid Them)
- Too thin: A hook that’s a flat silhouette reads like a sign, not a relic. Add thickness and bevels.
- Too much micro-detail: Big motifs look cinematic. Tiny scratches look like accidental damage.
- Heavy paint in one coat: Thick coats can crack on flexible props. Build finish in layers.
- Skipping safety: Sprays and solvents need ventilation and protective gear. Your lungs are not replaceable parts.
Prop Safety, Rules, and “Please Don’t Gas Yourself”
Many adhesives and coatings produce fumes. Work in a well-ventilated area, follow product instructions, and keep away from flames or sparks.
If you’re spraying coatings or using solvent-based contact cement, consider respiratory protection rated for organic vapors and particulates, and always read the safety data sheets.
For events: check prop policies. Some conventions treat large props as “peace-bonded” items or require foam-only construction.
If your hook has a rigid internal core, keep edges padded and avoid anything that could be interpreted as a real weapon component.
Transport, Storage, and Repairs
Big props break in three places: the tip, the inner curve, and your patience. Transport it in a vehicle-friendly way (sometimes diagonally across the back seat is the only path to greatness),
and pack a tiny repair kit: contact cement or super glue (foam-safe), a small brush, matching paint, and tape for emergency stabilization.
FAQ
How long does it take to make Maui’s hook?
A budget cardboard version can be done in an afternoon. A cosplay-grade foam hook is commonly a weekend project (or longer if you want a flawless finish).
A carved foam + hard coat build can stretch longer because coatings and paint need cure time.
What’s the lightest method?
EVA foam is typically the best balance of lightness and durability for a carried prop. Insulation foam can be light too, but it needs protection if it’ll be handled a lot.
Can I sell the hook?
If you’re making a hook inspired by Disney’s film design, remember that characters and specific designs can be protected by intellectual property.
For most makers, it’s safest to treat this as a personal fan build, not a mass-produced product line.
Final Thoughts
The secret to a great Maui hook isn’t a magical materialit’s big shapes, clean bevels, bold motifs, and layered finishing.
Build it light, seal it properly, paint it like it’s been on adventures, and you’ll end up with a prop that makes people grin before you even say, “You’re welcome.”
Maker Stories: of Real-World Experience
Makers who tackle Maui’s hook usually discover the same truth around hour two: big props are mostly logistics disguised as art. The first “experience” is scale shock.
On paper, the template looks reasonable. The moment you cut it out and stand next to it, you realize you’ve created a foam roommate. People often downsize right therethen regret it later
when the hook doesn’t read as “legendary” in photos. The sweet spot tends to be “bigger than you think” but “small enough to fit through a doorway without turning sideways like a crab.”
The second common experience is the Great Bevel Awakening. New builders assume paint will do the heavy lifting. Then they spray a beautiful base coat over a flat silhouette
and it still looks flatbecause it is flat. The moment they bevel the edges and add a few broad planes, the hook suddenly looks like an object with mass.
It’s a satisfying before-and-after: same shape, totally different vibe. This is also where many makers learn that sanding is not a single step; it’s a lifestyle.
Next comes finishing drama. A classic story: someone sprays a thick “one-and-done” coat of sealer, gets drips and texture, and then spends an evening whispering threats at a sanding block.
The veterans always say the same thing: multiple light coats, patience between layers, and don’t spray like you’re trying to put out a fire. Another frequent plot twist is
“my paint cracked when I bent it.” That’s usually a clue the coating isn’t flexible enough (or it went on too thick). Builders who switch to thinner layers and flexible finishes
often report the prop suddenly behaves like a prop instead of a delicate art project.
Transport stories are the funniest, because they’re painfully relatable. Hooks get stuck in car doors, smacked into ceiling fans, and wedged into elevators at exactly the moment a stranger
decides to ask, “So… did you make that?” Many experienced cosplayers plan a detachable handle or a two-piece hook (hidden seam, magnets, dowels, or a snug friction fit)
so the prop can ride in a car without becoming the passenger. On the convention floor, the best experience hack is a rest positiona comfortable way to hold the hook low
and close to your body so you’re not accidentally clotheslining innocent bystanders while you pose for photos.
Finally, there’s the emotional payoff: the first time someone recognizes your hook from across a room, their face lights up like you just pulled an island out of the sea.
Makers consistently say that’s the moment the hours of cutting, beveling, sealing, and repainting stop feeling like “work” and start feeling like a story you get to carry.
And if the tip gets scuffed on day one? Congratulationsyou’ve already started your hook’s legend. Weathering, but make it real.