Table of Contents >> Show >> Hide
- Why Vintage Pendleton Blankets Make Such Great Pot Holder “Outerwear”
- A Quick Reality Check: What Makes a Pot Holder Safe (Not Just Pretty)
- Materials: The Dream Team for Upcycled Pendleton Pot Holders
- Sourcing Vintage Pendleton Blankets Without Crying Into Your Wallet
- Cleaning and Prep: Don’t Accidentally Shrink Your Treasure
- How to Make Pot Holders from Vintage Pendleton Blankets
- Testing Your Pot Holder (So You Don’t Learn the Hard Way)
- Care Tips for Wool-Forward Pot Holders
- Ideas for Using Scraps: Make a Whole Matching Kitchen Moment
- Conclusion: Small Project, Big Payoff
- Real-Life Experiences: What It’s Like Living with Upcycled Pendleton Pot Holders (The Good, The Great, and the “Oops”)
There are two kinds of kitchen people: the ones who grab a scorching skillet with whatever fabric is closest
(dish towel, T-shirt, possibly their own confidence), and the ones who own pot holders that actually work.
This article is for both groupsbecause if you’re going to save your hands, you might as well do it with
a piece of American textile history that looks like it could headline a cozy cabin magazine.
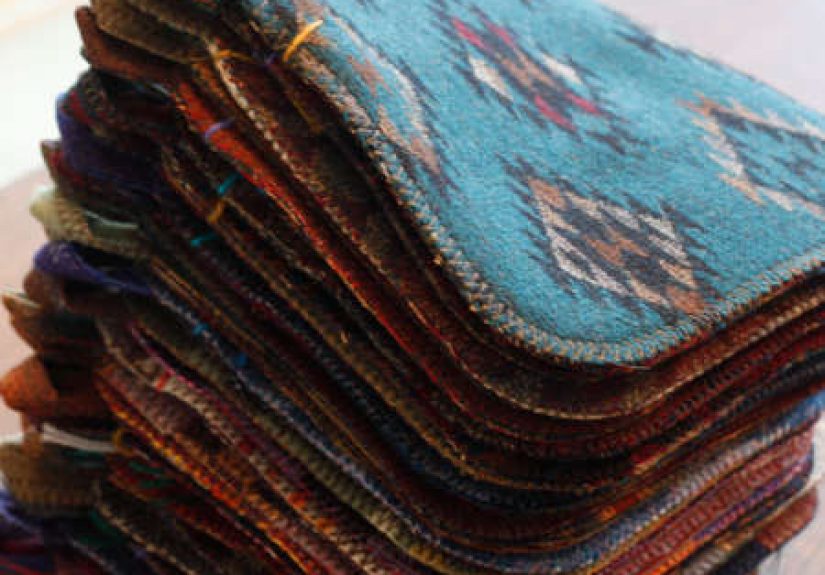
Pot holders made from vintage Pendleton blankets are the sweet spot where function meets
flex. You get the legendary lookbold stripes, geometric jacquards, colors that refuse to be boringand you
turn worn, moth-nibbled, or edge-frayed blankets into something useful that lives right by the stove.
It’s upcycling with a purpose: less waste, more personality, and fewer “ow-why-did-I-do-that” moments.
Why Vintage Pendleton Blankets Make Such Great Pot Holder “Outerwear”
1) The wool is tough (and it ages with style)
Wool blanketsespecially tightly woven onesare built for real life. Vintage pieces often have decades of
service behind them, which is a polite way of saying: they’ve already survived parties, pets, road trips,
and at least one mysterious stain that “definitely wasn’t chili.”
Wool also has natural qualities makers love: it’s durable, it can handle friction, and it tends to resist
ignition better than many synthetics. That doesn’t mean it’s magically heat-proof (more on that in a second),
but it’s an excellent outer layer when paired with the right insulation inside.
2) The patterns do half the design work for you
The most time-consuming part of making something cute is… making it cute. Vintage Pendleton blanket patterns
are already doing the heavy lifting. One well-placed stripe becomes “intentional design.” A centered motif
becomes “artisan.” A slightly off-center motif becomes “modern.” (We call this “creative confidence,” and it
pairs nicely with coffee.)
3) Upcycling makes the “too damaged to display” blanket useful again
Not every vintage blanket deserves to be a bedspread. Some are too worn, too holey, or too moth-challenged
to live their best life as décor. But those same blankets can be perfect for smaller projects where you can
cut around flaws, preserve the best sections, and give the textile a second career in your kitchen.
A Quick Reality Check: What Makes a Pot Holder Safe (Not Just Pretty)
Let’s get serious for a momentlike, “we’re removing a cast-iron pan from a 425°F oven” serious.
The outer fabric is only part of the story. The real MVP is the insulation stack.
Heat-resistance vs. heat-proof
Many makers use insulated batting (like thermal or reflective products) to help block heat transfer.
But no material turns your pot holder into a superhero cape. The goal is to slow heat down long enough for
you to move the hot thing safelythen set it down. If you plan to hold a heavy roasting pan for an extended
time, go thicker, double up, or use two pot holders. Your fingers will thank you, and your smoke alarm will
remain blissfully bored.
Avoid melty layers
For the layers closest to heat, prioritize natural fibers (cotton, wool) and purpose-made thermal products.
Some synthetic battings can melt at high temperatures, which is exactly the opposite of what we want near an
oven rack. Translation: if it looks like it belongs in a puffy jacket, it probably doesn’t belong in a pot holder.
Materials: The Dream Team for Upcycled Pendleton Pot Holders
Think of your pot holder as a tiny quilted sandwich. Here’s a reliable, kitchen-ready lineup:
| Layer | Best Choice | Why It Works |
|---|---|---|
| Outer | Vintage Pendleton wool blanket | Durable, iconic patterns, great structure |
| Lining (skin side) | Quilting cotton or cotton canvas | Comfortable grip, stable, easy to sew |
| Insulation | 2 layers cotton batting and/or thermal batting | Thickness blocks heat longer; thermal layer adds protection |
| Binding | Cotton bias tape (store-bought or DIY) | Clean edges, durable finish |
| Hanging loop | Cotton twill tape or folded bias strip | Strong, won’t stretch out |
Pro tip: If your vintage blanket is extra thick, you may not need as many internal layersbut
don’t guess. Make one test pot holder, then do a controlled heat test (details below).
Sourcing Vintage Pendleton Blankets Without Crying Into Your Wallet
1) Look for “imperfect” blankets
The best upcycling score is a blanket with edge wear, a small hole, or a faded sectiondamage that lowers
the price but doesn’t reduce the usable area for small cuts. Pot holders need squares and rectangles, not perfect corners.
2) Shop smart: where to find them
- Estate sales and thrift stores: The “why is this here?” section can be magical.
- Vintage shops: Pricier, but you can often inspect quality in person.
- Online marketplaces: Great selection; ask for close-ups of wear, labels, and any holes.
- Local resale groups: Sometimes you’ll find “I redecorated and don’t need this” deals.
3) Respect the brand (and be honest if you sell)
If you’re making these for gifts, go wild. If you plan to sell finished pot holders, keep your language accurate:
describe them as upcycled wool blanket pot holders and avoid implying an official brand partnership.
Also consider the cultural context of trade-blanket-inspired patternsbe thoughtful in how you market, name, and present them.
Cleaning and Prep: Don’t Accidentally Shrink Your Treasure
Vintage wool can be a little like an opinionated cat: beautiful, high-maintenance, and likely to punish you
if you ignore its rules. Before cutting:
- Inspect for moth damage: Hold it up to a bright window and look for pinholes.
- De-lint and de-fuzz: Use a lint roller or sweater brush.
- Spot clean first: Mild wool-safe cleaner and a damp cloth; avoid soaking.
- Consider professional cleaning: Especially if it smells like “attic with notes of mystery.”
If you’re using a blanket that’s labeled washable, follow its care label. If it’s traditional wool with dry-clean
instructions, treat it accordinglywashing can change size and texture in dramatic, irreversible ways.
How to Make Pot Holders from Vintage Pendleton Blankets
Below is a practical, sturdy method that feels good in the hand and holds up to real cooking. This is a “hot pad”
style pot holder (square), which is perfect for grabbing handles, lifting lids, or saving your countertop.
Cutting dimensions (makes one 8" x 8" pot holder)
- Outer (Pendleton wool): 2 squares, 9" x 9"
- Lining (cotton): 1 square, 9" x 9"
- Insulation: 2 squares cotton batting, 8" x 8" (plus optional thermal layer, 8" x 8")
- Binding: 40"–45" of 2" wide bias tape (or enough to go around the perimeter)
- Loop: 5" cotton twill tape or folded fabric strip
Step-by-step sewing instructions
-
Plan your pattern placement.
Lay the wool squares on the blanket so stripes line up or motifs center nicely. Cut around any thin spots or holes. -
Build the stack.
From bottom to top: wool (pretty side down), lining cotton (right side up), insulation layers centered on top.
Add your second wool square on top (pretty side up). You’re basically making a quilt sandwich with wool bread. -
Quilt the layers.
Sew diagonal lines corner-to-corner, then add parallel lines 1"–1.5" apart. Or do a grid. Or stitch in the ditch
along stripes for a stealthy look. Quilting prevents shifting and adds strength. -
Trim and square.
Trim the whole piece to 8.5" x 8.5" once quilted (or keep it slightly larger if you like a chunkier binding). -
Add the hanging loop.
Fold loop in half, tuck raw ends into one corner, and baste in place. -
Bind the edges.
Wrap bias tape around the perimeter. Sew slowly around corners, making neat folds. Backstitch at the end.
Congratulations: your pot holder now has a clean border and an identity.
Optional upgrades (because you’re fancy now)
- Extra grip: Use cotton canvas or twill for lining.
- Extra heat protection: Add another cotton batting layer.
- Extra durability: Use heavier thread and slightly longer stitch length when quilting wool.
- Extra style: Add a leather loop or a contrast binding color that frames the pattern.
Testing Your Pot Holder (So You Don’t Learn the Hard Way)
Make one “prototype” before producing a whole set. Then test like a responsible adult who still wants fun textiles:
- Hot iron test: Press a hot iron briefly on the pot holder. If heat comes through quickly, add insulation.
- Hot pan test: Lift a warm (not blazing) pan, hold for 3–5 seconds, and check comfort.
- Real oven test: When confident, use it briefly with a hot dishthen set it down promptly.
If you ever feel heat building fast, increase thickness or use two pot holders. Safety is the vibe.
Care Tips for Wool-Forward Pot Holders
- Shake out crumbs (your pot holder is not a plate, but it will try).
- Spot clean with a damp cloth and mild wool-safe detergent.
- Air dry flatno dryer tumble that could shrink or warp layers.
- Retire gracefully if insulation compresses over time. Old pot holders deserve rest.
Ideas for Using Scraps: Make a Whole Matching Kitchen Moment
Once you start cutting a vintage blanket, you’ll likely have offcuts that are too pretty to waste.
Consider:
- Mini trivets for mugs and small pans
- Jar grippers (small quilted squares for opening stubborn lids)
- Tea cozies with wool exterior and cotton lining
- Oven handle covers (the “why is this handle always lava?” solution)
Conclusion: Small Project, Big Payoff
Pot holders made from vintage Pendleton blankets are the rare DIY project that’s actually useful every single day.
They’re beautiful enough to leave out, rugged enough to work, and meaningful enough to feel like a tiny heritage
object you made with your own hands. Plus, you get the deep satisfaction of rescuing a textile that might otherwise
be forgotten in a closetnow living its best life guarding you from the wrath of cast iron.
Real-Life Experiences: What It’s Like Living with Upcycled Pendleton Pot Holders (The Good, The Great, and the “Oops”)
The first time you use a wool-forward pot holder you made yourself, you’ll feel like you just unlocked a new
domestic superpower. Not the “I alphabetized my spice rack” kind (although respect), but the “I lifted a bubbling
Dutch oven confidently, like an adult in a cooking show montage” kind. There’s something oddly satisfying about
grabbing a hot lid handle with a pot holder that looks like it belongs in a lodge at the edge of a national park.
In practice, the biggest surprise is how much the hand feel matters. Vintage wool has body. It doesn’t flop
around like a thin cotton square, and it doesn’t feel slippery. That structure makes the pot holder easier to aim,
especially when you’re doing that awkward oven reach where your brain says “careful” and your elbow says “panic.”
When you pair it with a sturdy cotton lining, the grip improves even moresuddenly you’re not just holding heat, you’re
controlling it.
You’ll also notice the visual joy factor. A good Pendleton-style stripe pattern has an unfair advantage: it makes
even a basic square look intentional. People will ask where you bought them. You will experience the quiet thrill of
saying, “Oh, I made those,” in the same tone a person uses when they casually mention they speak three languages.
(Your kitchen is now multilingual. It speaks “hot,” “handmade,” and “please don’t put that pan directly on the counter.”)
But let’s talk about the learning momentsbecause every DIY kitchen item comes with at least one. The most common “oops”
is underestimating how fast heat can travel through a thinner stack. If you made your first pot holder with just one layer
of batting because it felt thick enough, you might get a quick reminder that “thick” and “insulated” are related but not
identical. The fix is easy: add another cotton batting layer, quilt it securely, and suddenly you’ve got a pot holder that
feels calm under pressure (like the friend who always has a phone charger).
Another real-world discovery: light-colored wool shows kitchen life more quickly. Steam, splatter, and the occasional
“I swear that sauce jumped” moment can leave little marks. That’s not failure; it’s proof your pot holders work for a living.
Spot cleaning becomes part of the rhythmwipe, air dry, repeat. And if you’re using a blanket with sentimental value,
you’ll probably reserve the prettiest motifs for “company pot holders” and use the darker, sturdier ones for everyday chaos.
Yes, this is a real thing. No, you don’t need to justify it.
The best experience, though, is gifting them. Upcycled pot holders are the rare handmade item that people actually use.
They’re not fragile. They’re not decorative-only. They’re a practical luxurylike giving someone a beautiful tool instead of
another candle that smells like “coastal spreadsheet.” When you tell the storyvintage wool, rescued textile, carefully layered
insulationpeople get it. The gift feels thoughtful, not random. And every time they pull something hot from the oven, they’ll
think of you in the nicest possible way: as the person who prevented a minor kitchen tragedy.