Table of Contents >> Show >> Hide
- Why a China Cabinet Makes a Surprisingly Great Wine Bar
- Plan the Makeover Before You Touch a Paintbrush
- Tools and Materials Checklist
- Step-by-Step: From China Cabinet to Fab Wine Bar
- 1) Empty it completely and label the parts
- 2) Clean like you mean it
- 3) Repair dents, fill holes, and fix what bugs you
- 4) Sand or degloss for better paint adhesion
- 5) Prime strategically (this is where pros quietly win)
- 6) Paint with patience (thin coats = smooth finish)
- 7) Upgrade the interior: the “secret weapon” move
- 8) Add bottle storage that fits your life
- 9) Install stemware storage (because dangling glasses look fancy)
- 10) Add lighting for instant “upscale bar” energy
- 11) Swap hardware to modernize fast
- 12) Seal high-touch areas
- Make It Work Like a Real Bar (Without Making It Complicated)
- Wine Storage Basics for Your New Cabinet
- Styling Tricks That Make It Look “Designer,” Not DIY
- Common Mistakes (and How to Avoid Them)
- Budget-Friendly Variations That Still Look Amazing
- Real-Life Experiences: What This Project Is Actually Like (500+ Words)
- Wrap-Up: Your Cabinet’s Second Act
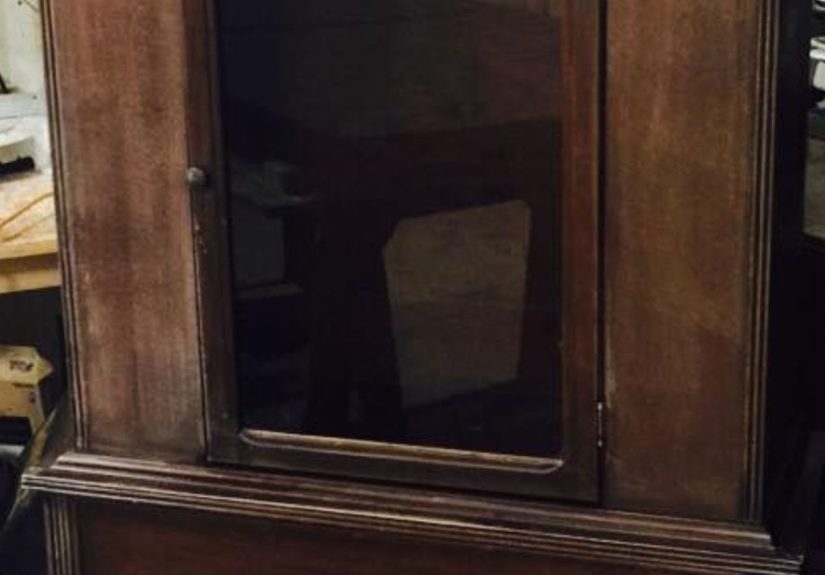
Every house has at least one “honestly, what do we do with this?” piece of furniture. A dated china cabinet is a classic:
too formal for everyday life, too big to ignore, and somehow always beige. The good news? A china cabinet is basically
begging to become a wine barbecause it already has the two things a great bar needs: display space and storage.
Add a few smart upgrades (paint, lighting, bottle storage, maybe a little drama in the back panel), and you’ll have a
showpiece that looks like it wandered in from a boutique hotel lobby.
This guide walks you through turning an old china cabinet into a functional, stylish wine bar setupperfect for adult
households (21+ in the U.S.) and equally fun as a “sparkling bar” for non-alcoholic bottles, fancy sodas, and glassware.
Either way, you’re upgrading your space and rescuing a perfectly good cabinet from a tragic fate: becoming a dust museum.
Why a China Cabinet Makes a Surprisingly Great Wine Bar
It’s already designed for “show and stash.”
China cabinets were made to display pretty things behind glass and hide the practical stuff below. That’s exactly the bar
life: glassware up top, supplies down low, and a surface in the middle where you can actually do something besides admire
your own reflection.
It can look expensive with a few strategic tweaks.
Paint changes the whole vibe. Add updated hardware, warm lighting, and a styled interior, and suddenly the cabinet reads
“custom bar” instead of “grandma’s wedding registry era.” (No disrespect to grandmashe had impeccable taste; it’s the
cabinet’s marketing that needs a refresh.)
It’s modular in a way modern furniture often isn’t.
Many hutches have adjustable shelves, removable glass doors, and sturdy frames. That flexibility makes it easier to add
bottle racks, stemware storage, or a dedicated “mixing zone” without reinventing the wheel.
Plan the Makeover Before You Touch a Paintbrush
Pick the right location (your cabinet deserves a good seat).
Place your future wine bar away from direct heat sources (ovens, radiators, sunny windows). If you plan to add lighting,
choose a spot near an outlet so you can keep cords tidy. If you’ll store any bottles longer than “this weekend,” aim for a
cooler, more stable part of the house.
Measure for real-life bottle and glass sizes.
Standard wine bottles are about 12–13 inches tall, but sparkling bottles can be taller and wider. Stemware needs clearance,
tooespecially if you’re installing an under-shelf stemware rack. Measure the inside depth of shelves so bottles won’t
awkwardly stick out like they’re trying to escape.
Decide what your bar needs to do.
- Display: Glassware, decanters, a favorite bottle (or NA options), a small piece of art.
- Serve: A clear counter space for pouring and prepping.
- Store: Bottles, openers, napkins, coasters, extra glassware, and “where did I put the corkscrew?” items.
Safety first: stabilize and anchor if needed.
China cabinets can be top-heavy, especially once loaded with glass. If your piece is tall or wobbly, use furniture straps
to anchor it to wall studs. Also plan weight distribution: heavier bottles down low, lighter items up top.
Tools and Materials Checklist
You can adapt based on your finish choice (paint, stain, or a mix), but these basics cover most cabinet-to-bar makeovers:
- Screwdriver set (for removing doors, hardware, hinges)
- Cleaner/degreaser (or warm soapy water plus a rinse-and-dry routine)
- Sandpaper (medium and fine grit) or a deglosser for shiny finishes
- Wood filler and putty knife (for dents, holes, old hardware marks)
- Primer (especially important if the piece is glossy, stained, or knotty)
- Paint (cabinet/furniture enamel works great) and a quality brush + foam roller
- Topcoat (optional but helpful for durability on high-touch surfaces)
- New hardware (pulls/knobs) and optional new hinges
- LED puck lights or LED strip lighting (plug-in is easiest)
- Wine bottle rack insert or DIY lattice pieces (optional, but very “wow”)
- Stemware rack (under-shelf mounted) or hanging rail system
- Peel-and-stick wallpaper or paint for the back panel (optional, highly recommended)
Step-by-Step: From China Cabinet to Fab Wine Bar
1) Empty it completely and label the parts
Remove shelves, doors, and hardware. Take photos of hinge placement (future-you will be grateful). Put screws in labeled
bags. If your cabinet has glass panels, handle them gently and store them upright somewhere safe.
2) Clean like you mean it
Cabinets collect a special kind of grimedust plus mystery residue plus “why is it sticky?” Clean all surfaces, including
corners, trim details, and inside edges. Let everything dry fully before sanding or priming.
3) Repair dents, fill holes, and fix what bugs you
Fill old hardware holes if you’re switching to a different pull size. Patch chips and gouges with wood filler. Once dry,
sand smooth so the repairs disappear instead of becoming “little monuments to regret” under glossy paint.
4) Sand or degloss for better paint adhesion
If the finish is glossy, you’ll need to knock down the shine so primer and paint can grip. A light scuff sanding often
does the job. For ornate trim, a sanding sponge helps get into curves. Wipe away dust thoroughly before priming.
5) Prime strategically (this is where pros quietly win)
Primer prevents bleed-through from old stains and helps paint bond evenly. If the piece is dark, stained, or has knots, a
stain-blocking primer is your best friend. Thin, even primer coats reduce drips and keep details crisp.
6) Paint with patience (thin coats = smooth finish)
Use a foam roller on flat areas for a smoother look, and a brush for trim. Apply thin coats, let them dry, and lightly
sand between coats if you want that “factory finish” vibe. Two coats is common; three is not a personal failure.
7) Upgrade the interior: the “secret weapon” move
Want your wine bar to look custom? Treat the back panel like an accent wall. Options:
- Paint the back panel a contrasting color (deep navy, soft sage, warm black).
- Add peel-and-stick wallpaper for pattern and depth (botanical, geometric, grasscloth look).
- Install a mirror for a classic bar effect and extra light bounce.
This is the part people notice when the doors open or the lights turn onand it’s often the difference between “nice
makeover” and “wait, you bought that where?”
8) Add bottle storage that fits your life
If you’re storing a handful of bottles for easy access, you may only need a simple rack insert on one shelf. For a more
built-in look, create a lattice:
- Measure the interior width and depth of the cabinet shelf area.
- Cut thin wood strips to form a grid (squares sized for wine bottles).
- Sand edges, paint/stain to match, and secure the grid in place.
Keep bottles low if possible, both for stability and because your back will eventually file a complaint if you store the
heavy stuff up high.
9) Install stemware storage (because dangling glasses look fancy)
Under-shelf stemware racks create that classic bar feel and free up shelf space. Make sure your shelves have enough depth
so glasses don’t bump the cabinet frame. If you prefer flexibility, keep glasses upright on a traystill stylish, less
committing.
10) Add lighting for instant “upscale bar” energy
Lighting is the glow-up multiplier. Plug-in LED puck lights or LED strips are typically the easiest for DIY. Place lights
toward the front of shelves to reduce shadows and highlight glassware. If you’re using adhesive strips, clean surfaces
well so they actually stick (and don’t slowly slide off like a sad spaghetti noodle).
For anything hardwired, follow manufacturer instructions and consider a licensed electricianespecially if you’re not
experienced with electrical work.
11) Swap hardware to modernize fast
New pulls and knobs are like shoes for furniture: suddenly the whole outfit makes sense. Warm brass is popular, matte
black is bold, and polished nickel is timeless. If your doors look slightly misaligned after reinstalling, adjust hinges
before blaming the cabinet for your life choices.
12) Seal high-touch areas
If your cabinet includes a countertop surface (or you add one), consider a durable topcoat for easier wipe-downs. Spills
happen. Even if you only serve sparkling water, someone will still manage to drip something sticky. It’s a law of hosting.
Make It Work Like a Real Bar (Without Making It Complicated)
Create zones: display, serve, store
- Top display: Glassware, decanters, a few bottles, a small framed print or vase.
- Serving shelf/counter: Tray, opener, napkins, small cutting board for garnishes (or snack bowls).
- Lower storage: Backup bottles, mixers, soda water, extra glasses, bar tools, and coasters.
Stock “essentials,” not clutter
The best home bars aren’t overflowing; they’re intentional. A basic set of tools usually covers most needs:
- Corkscrew/wine key
- Bottle stopper(s)
- Jigger or small measuring cup
- Cocktail shaker or stirring glass (optional, depending on your style)
- Bar spoon (or a long spoon that lives a double life)
- Coasters and cocktail napkins
If you’re setting up a “wine bar” primarily for hosting, a tray is a game-changer: it corrals bottles and tools, and it
looks styled even when you’re mid-party.
Wine Storage Basics for Your New Cabinet
Let’s keep it real: a repurposed cabinet is excellent for short-term storage and serving, and it can be
fine for longer storage if your home stays cool and stable. Wine tends to do best when it’s protected from big
temperature swings, bright light, strong odors, and vibration. Many experts point to roughly 55°F as a
common “sweet spot” for storing wine across styles.
Quick practical rules
- Keep it cool and steady: temperature consistency matters more than chasing a perfect number.
- Avoid sunlight: light can degrade wine over time; cabinets with solid doors help.
- Store corked bottles on their side if you’re keeping them longer-term, so corks don’t dry out.
- Don’t store next to strong odors: wine can pick up aromas through the cork over time.
If you’re building a serious collection, consider a dedicated wine fridge. But if your goal is a beautiful home bar that
keeps a few favorites ready for adult entertaining (or keeps sparkling water and fancy glasses ready for everyone), your
cabinet will do the job with style.
Styling Tricks That Make It Look “Designer,” Not DIY
Use a backdrop on purpose
Art above the cabinet, a sconce nearby, or a bold interior back panel instantly makes the setup feel intentional. Think of
it as giving your bar a stage. Even a small framed print can make the cabinet look curated instead of “furniture that
happened.”
Build little vignettes
Group similar items: glasses together, bottles together, tools together. Add one organic element (a plant, fresh greenery,
or a bowl of citrus) and one “shiny” element (a metal tray, mirrored surface, or polished decanter). You’re aiming for
layered, not crowded.
Mix materials for depth
Wood + glass + metal is a classic combo. If your cabinet is painted, add warmth with wood boards or rattan trays. If it’s
stained, add contrast with matte black hardware or clear acrylic organizers.
Common Mistakes (and How to Avoid Them)
- Skipping prep: paint hates grease and glossy finishes. Clean and degloss/sand first.
- Rushing dry time: “dry to the touch” isn’t the same as “ready for doors and hardware.” Be patient.
- Overloading top shelves: keep heavy bottles low to avoid tipping and stress on shelves.
- Forgetting cord management: plan where lighting cords run so the final look stays clean.
- Too much stuff on display: leave breathing room so the cabinet looks elevated, not chaotic.
Budget-Friendly Variations That Still Look Amazing
- No-drill lighting: battery puck lights (great for renters or commitment-averse DIYers).
- Removable interior flair: peel-and-stick wallpaper on foam board panels you can swap later.
- Thrifted style upgrades: vintage glassware, a secondhand tray, or a single statement decanter.
- Wine bar, but make it inclusive: stock NA sparkling, craft sodas, bitters for mocktails, and fun garnishes.
Real-Life Experiences: What This Project Is Actually Like (500+ Words)
The internet makes cabinet makeovers look like a breezy montage: you wipe, you paint, you twirl once in slow motion, and
suddenly you own a magazine-worthy wine bar. In real life, a repurposed china cabinet project is still totally doablebut
it has a few predictable “character-building moments.” Knowing what those moments are ahead of time can save you time,
money, and the kind of frustration that makes people whisper, “Maybe we should just buy a new one.”
First, there’s the cleaning phase surprise. Older cabinets can hold onto years of dust, furniture polish,
and kitchen-adjacent residue. Even if the cabinet lived in a dining room, it might still have a slick film from polish
that repels paint like it’s on a mission. Most DIYers realize quickly that cleaning isn’t a single wipe-downit’s a few
rounds: wash, rinse, dry, and then a more detailed pass in grooves and trim. The payoff is huge: when paint goes on
smoothly and doesn’t fisheye, you’ll feel like you unlocked a cheat code.
Next comes the decision spiral: “Should we paint it? Stain it? Two-tone it? Wallpaper the back? Add a
mirror? Replace the glass? Remove the doors?” This is normal. The easiest way through is choosing one “main character”
element and letting everything else support it. For example, if your back panel will be a bold wallpaper, keep the cabinet
color simpler. If your cabinet color is dramatic (like deep green or near-black), choose a quieter interior (warm white,
soft pattern, or a mirror). Real-life projects go off the rails when every element tries to be the star.
Then you hit the hardware reality check. You remove the old knobs and discover either (a) the holes don’t
match modern pulls, (b) there are dents or shadows where old hardware lived for decades, or (c) the doors are slightly
sagging and were only behaving because the original hinges had a “we’ve accepted our fate” relationship with gravity.
None of this is catastrophic. Wood filler and sanding solve the cosmetic issues, and hinge adjustments solve most alignment
problems. This is also the moment many DIYers upgrade hinges and feel like geniuses afterward.
Painting itself often becomes a lesson in patience and thin coats. The temptation is to slap on thick
layers to “just finish already.” But thick coats drip, pool in corners, and dry unevenlyespecially on detailed trim.
People who end up with that smooth, professional look usually do three unglamorous things: they use primer when needed,
apply thin coats, and wait longer than they want to between steps. The project feels slower, but the finish looks
dramatically better.
The fun partwhere motivation comes roaring backis usually the interior transformation. Adding wallpaper
to the back panel or painting the inside a contrasting color makes the cabinet look custom almost instantly. It’s also one
of the most forgiving steps. If your wallpaper panel is slightly off, your shelves and glassware will visually break it up.
If your interior paint isn’t absolutely perfect, the lighting and styling will distract from tiny imperfections. This is
why designers love interior “moments”: they deliver big impact.
Lighting is another real-life highlight. The first time you switch on warm LED lights inside the cabinet, you’ll get that
“oh wow” effect that makes the whole project feel worth it. Many DIYers find that lighting also changes what they display:
glassware suddenly sparkles, a mirrored tray looks richer, and even non-alcoholic bottles look fancy when they’re lit like
they’re headlining a concert.
Finally, there’s the styling learning curve. Most people start by putting everything they own in the
cabinetevery glass, every bottle, every toolbecause they want it to feel “complete.” Then they step back and realize it
looks busy. The cabinet looks most expensive when it’s edited: a few favorite glasses, a tray for tools, a small stack of
napkins, and enough open space that the eye can rest. The best “experience-based” styling tip is simple: store backups in
the bottom cabinet and keep the top looking like a display.
In short, the real experience of turning a china cabinet into a fab wine bar is a mix of practical problem-solving and
surprisingly satisfying design wins. You’ll clean more than you expected, wait longer than you wanted, and feel extremely
proud every time someone says, “Hold onthis used to be a china cabinet?”
Wrap-Up: Your Cabinet’s Second Act
A repurposed china cabinet wine bar is one of those rare projects that checks every box: it’s practical, it’s stylish,
it’s budget-friendly compared to buying new, and it makes your home feel more intentional. Do the prep work, add a little
lighting magic, and style it with restraintand you’ll end up with a piece that looks custom, not crafty.