Table of Contents >> Show >> Hide
- Step 1: Identify the Fiber Before You Do Anything Else
- Step 2: Match the Dye to the Fabric
- Step 3: Prewash the Fabric First
- Step 4: Use the Right Setting Agent, Not a Random Kitchen Myth
- Step 5: Give the Dye Enough Time to Bond
- Step 6: Rinse Thoroughly, Then Wash Out the Loose Dye
- Step 7: Consider a Commercial Dye Fixative for Problem Fabrics
- Step 8: Wash New Dyed Fabric Separately for the First Few Washes
- Step 9: Keep Heat Under Control
- Step 10: Maintain the Fabric Like You Want the Color to Survive
- Common Mistakes That Make Dyed Fabric Bleed More
- Conclusion
- Real-World Experiences With Setting Dyed Fabric
- SEO Tags
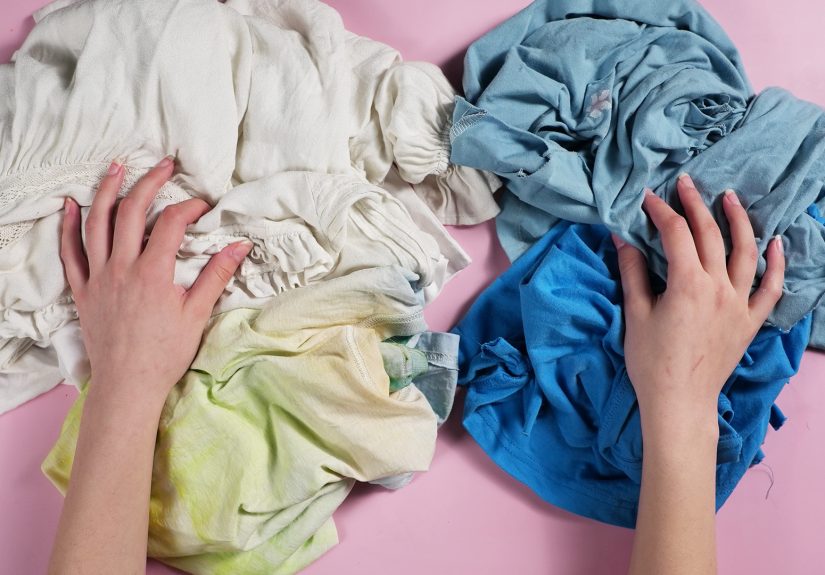
If you have ever dyed a shirt, scarf, pillow cover, or mystery thrift-store fabric and then stared at the rinse water like it personally betrayed you, welcome. You are among friends. The good news is that setting dyed fabric is possible. The slightly annoying news is that there is no single magic trick that works for every fabric, every dye, and every “why is this still bleeding?” moment. Sorry, vinegar.
The real secret to setting dyed fabric is understanding what you dyed, what you dyed it with, and what kind of aftercare helps the color stay put. Cotton behaves differently than wool. Nylon is its own dramatic little cousin. Polyester usually demands more heat and a dye designed just for synthetics. And commercially dyed clothing that keeps bleeding often needs a different solution than a freshly tie-dyed tee from your kitchen-table craft session.
So let’s make this practical. Below are ten simple, realistic steps to help you set dye in fabric, improve colorfastness, and reduce the chances that your laundry basket turns into abstract art.
Step 1: Identify the Fiber Before You Do Anything Else
This step is boring only until it saves your project.
Before you try to stop dye bleeding or lock in color, figure out whether your fabric is:
- Cellulose-based: cotton, rayon, linen, ramie
- Protein-based: wool, silk
- Synthetic: polyester, acrylic, acetate, spandex, nylon
Why does this matter? Because the best method for how to set dye in fabric changes with the fiber. Cotton and linen usually respond best to fiber-reactive dyes and soda ash. Wool and silk typically work best with acid dyes plus heat. Nylon can take some acid dyes too. Polyester is the high-maintenance one in the room and usually needs a dye made specifically for synthetic fibers.
If you skip this step, you may spend an afternoon following the wrong instructions with the confidence of a cooking show host and the results of a raccoon in a craft store.
Step 2: Match the Dye to the Fabric
Not all dyes bond to fabric the same way. Some form a stronger bond than others, and that bond is what determines whether the color becomes beautifully wash-fast or exits dramatically during the first rinse.
For cotton, rayon, and linen
Fiber-reactive dye is the gold standard for vivid, long-lasting color. This is the kind of dye often used in serious tie-dye and many hand-dyeing projects. It chemically bonds with cellulose fibers, which is why properly dyed cotton can be impressively colorfast.
For wool, silk, and often nylon
Acid dye is usually the better choice. Despite the alarming name, the “acid” part usually comes from something like vinegar or citric acid in the dye bath. These dyes need heat to bond well, especially on protein fibers.
For polyester and some synthetics
You usually need a synthetic-specific dye and higher heat. A casual soak in lukewarm water is not going to convince polyester to change its personality.
If your fabric is already dyed and bleeding, you are no longer in the “choose the perfect dye” phase. You are in the “damage control with smart washing and possibly a dye fixative” phase, which we will get to shortly.
Step 3: Prewash the Fabric First
If you want dye to bond well, start with clean fabric. That means washing out:
- factory finishes
- softeners
- oils from handling
- dust and residue
Prewashing seems small, but it can make a big difference in how evenly the color takes. Fabric that still has invisible finishes on it may resist dye in random spots, leading to patchiness, lighter areas, or the dreaded “it looked intentional until I admitted it wasn’t.”
Use a simple detergent, skip fabric softener, and rinse well. If you are dyeing secondhand clothes or home textiles, prewashing is even more important because those items may already contain detergent buildup, perfume, or finishing sprays.
Step 4: Use the Right Setting Agent, Not a Random Kitchen Myth
Let’s address the household legend: soaking fabric in vinegar or salt after dyeing does not magically fix every color problem.
Here is the smarter version:
- Soda ash is commonly used to help fiber-reactive dye bond to cotton and other cellulose fibers.
- Vinegar or citric acid is useful during the dye process for many acid dyes on wool, silk, or nylon.
- Salt may be added in some dye baths to improve dye uptake, especially with certain dye types, but it is not a magical aftercare fix.
So yes, vinegar has a job. It is just not the universal superhero the internet sometimes claims it is. On cotton dyed with a fiber-reactive dye, vinegar is basically showing up to the wrong party.
If you are trying to set tie-dye on a cotton shirt, soda ash is usually the more relevant helper. If you are dyeing a silk scarf with acid dye, vinegar and heat make far more sense.
Step 5: Give the Dye Enough Time to Bond
One of the most common reasons dyed fabric bleeds later is simple impatience. The dye may not have had enough time to fully react with the fiber.
For many cold-batch fiber-reactive dye projects, especially tie-dye on cotton, the dyed fabric needs to stay damp and sit for several hours. Deep shades often benefit from a longer batch time than pale colors. If the fabric dries out too soon or gets rinsed too early, more loose dye may remain, and the final color may look weaker.
For acid dyes, heat and hold time matter. Gradual heating and enough time in the dye bath help the dye fully attach. Pulling the fabric out too early can lead to disappointing color depth and more runoff later.
In plain English: don’t rush the chemistry just because you are excited to see the reveal. The reveal will still be there. Hopefully with less bleeding.
Step 6: Rinse Thoroughly, Then Wash Out the Loose Dye
This is where a lot of people stop too soon.
Even when the dye has bonded correctly, there is often unattached dye left in the fabric. If you do not remove it, that extra dye can transfer during later washing and make you think the whole project failed.
A good rinse routine usually looks like this:
- Rinse out excess dye carefully.
- Keep rinsing until the water becomes much clearer.
- Wash the item with a mild detergent or a detergent designed for dyed textiles.
- For some darker shades, do a second wash if needed.
This step is especially important for black, red, navy, and heavily saturated colors. These shades love drama. A proper washout helps remove the drama before it reaches your favorite white towels.
Step 7: Consider a Commercial Dye Fixative for Problem Fabrics
If you are dealing with fabric that continues to bleed, a dye fixative may help. This is especially relevant for some all-purpose dyes, direct dyes, or commercially dyed garments that are not very colorfast.
Commercial fixatives are not a cure-all, and they do not work equally well on every dye type. But for certain fabrics, they can reduce bleeding better than folk remedies ever will.
This is particularly useful when:
- you dyed fabric with an all-purpose dye and want better wash performance
- you have a dark garment that keeps bleeding in the wash
- you want to improve color retention before regular laundering
Always follow the product instructions carefully. More is not always better, and using the wrong product for the wrong dye type will not turn chaos into science.
Step 8: Wash New Dyed Fabric Separately for the First Few Washes
Even well-set dyed fabric deserves a little personal space at first.
For the first few washes, keep newly dyed fabric away from lighter items. Use cool or cold water, turn garments inside out when appropriate, and wash with similar colors. This is especially smart for jeans, deeply dyed cotton, red garments, and hand-dyed projects with bold shades.
Cold water helps reduce additional bleeding and fading. It also tends to be gentler on many fabrics. That does not mean every fabric wants cold water forever, but for preventing dye bleeding early on, it is a smart default.
Example: If you just dyed a cotton sweatshirt a deep indigo shade, do not toss it into a mixed load with beige socks and optimism. Wash it alone or with other darks first.
Step 9: Keep Heat Under Control
Heat is not the enemy. Random heat is the enemy.
During dyeing, the right heat can improve bonding, especially for acid dyes and many synthetic dye methods. But after dyeing, too much heat at the wrong time can encourage color loss, fading, or set transferred dye onto the wrong fabric.
That means:
- Use the heat your dye method actually requires during the dye bath.
- Avoid unnecessary hot washing for fabrics prone to bleeding.
- Be cautious with high dryer heat, especially if you are still testing colorfastness.
If a bright item accidentally bleeds onto something else in the wash, do not put the stained item into the dryer right away. Heat can make a bad moment much more committed.
Step 10: Maintain the Fabric Like You Want the Color to Survive
Setting the dye is only half the story. The other half is caring for the fabric afterward.
To keep dyed fabric looking good:
- wash gently
- avoid overcrowding the machine
- use the right water temperature for the item
- sort by color
- avoid harsh treatment unless the fabric can handle it
- test questionable items before washing with lighter clothes
Also remember that fading and bleeding are not always your fault. Some commercially dyed garments were not dyed or rinsed well in the first place. If a shirt keeps bleeding no matter how nicely you treat it, the problem may be the original dye job, not your laundry skills.
Common Mistakes That Make Dyed Fabric Bleed More
If you want the short version of what not to do, here it is:
- Using the wrong dye for the fiber
- Skipping the prewash
- Rinsing too soon
- Not washing out excess dye thoroughly
- Believing vinegar can solve every problem
- Washing a fresh dye project with light-colored laundry
- Using high heat before you know the fabric is truly colorfast
If your dyed fabric is still bleeding after all the right steps, test a small area, repeat the washout, and consider a commercial fixative. A second thoughtful round is often more useful than ten random internet hacks.
Conclusion
The best way to set dyed fabric is not a magic soak. It is a process: choose the right dye, prep the fabric properly, use the correct setting chemistry, allow enough bonding time, rinse thoroughly, and wash with care. In other words, colorfast fabric is usually the result of good technique, not luck.
If you remember only one thing, make it this: match the method to the fiber. Cotton usually wants fiber-reactive dye and soda ash. Wool and silk often want acid dye, acid, and heat. Already-dyed problem garments may need a commercial fixative and smarter washing habits. Once you stop treating all fabric like it behaves the same, your dye projects become a lot more predictable and a lot less emotionally exhausting.
And that, honestly, is the dream.
Real-World Experiences With Setting Dyed Fabric
Anyone who dyes fabric more than once eventually collects stories. Usually humbling stories. One person learns the hard way that a red hand-dyed tea towel can tint an entire batch of dishcloths pink. Another discovers that a beautifully dyed black cotton shirt looks perfect until the first wash, when the rinse water turns dark gray and panic sets in. Then there is the classic tie-dye moment: you unwrap a shirt, love the pattern, and immediately assume the project is done. It is not done. The rinse phase is where many projects either earn their bragging rights or reveal all their weaknesses.
A very common experience is realizing that cotton and silk do not play by the same rules. Someone who has great luck with cotton tie-dye may try the same logic on a silk scarf, use soda ash because “it worked last time,” and end up disappointed. On the flip side, a person who swears by vinegar because it helped with wool may be baffled when it does almost nothing for a cotton garment that keeps bleeding. These moments feel frustrating, but they teach the most important lesson in fabric dyeing: the fiber decides a lot.
Another real-life pattern shows up after the project seems finished. Many dyers report that their fabric looked darker, richer, and almost flawless when wet, then dried lighter than expected. That is normal, and it can lead beginners to overcorrect by adding too much dye the next time. The better approach is to improve prep, batch time, and washout rather than simply dumping in extra color and hoping for a miracle.
People also learn quickly that dark colors have strong opinions. Reds, blacks, navies, and deep purples often require more patience during rinsing and aftercare. Experienced dyers tend to wash those items separately for the first few cycles, not because they enjoy extra laundry, but because they have already lived through one or two colorful disasters and would rather not repeat them.
And then there is the moment many hobby dyers eventually reach: the calm, slightly smug confidence that comes from doing the process correctly. They prewash automatically. They know whether the fabric is cellulose, protein, or synthetic. They stop reaching for vinegar as though it were a universal emergency button. They rinse until the water really is clearer, not just “clear enough because I am tired.” That experience changes everything. Dyeing becomes less random, the results become more repeatable, and the fabric holds color better over time. In the end, most success stories about setting dyed fabric are not about a secret ingredient. They are about understanding the material, respecting the process, and learning that good color lasts longest when technique comes first.


