Table of Contents >> Show >> Hide
- Why Air Plant Propagation Is Different
- Before You Start: What a Healthy Parent Plant Looks Like
- Method 1: Let the Pups Stay Attached and Form a Clump
- Method 2: Separate Mature Pups Into New Plants
- Method 3: Grow Air Plants From Seed
- Which Propagation Method Is Best?
- Care Tips That Help New Air Plants Thrive
- Real-World Experiences With Propagating Air Plants
- Conclusion
Air plants are the little rebels of the houseplant world. They do not want soil, they do not care about your pot collection, and they somehow make a chunk of driftwood look expensive. Naturally, once you keep one alive long enough to bloom, the next thought is obvious: can I make more of these weird little beauties without buying another one?
The answer is yes. In fact, learning how to propagate air plants is one of the easiest ways to stretch a single Tillandsia into a whole mini collection. The trick is knowing what kind of “more” you want. Do you want a fuller clump? A separate baby plant? A long, patient, very nerdy seed-growing project? Good news: all three are possible.
And here is the slightly nerdy-but-useful truth up front: if we are being botanically precise, air plants reproduce mostly by offsets and seed. But for everyday indoor gardeners, there are three simple ways to propagate air plants: let pups stay attached and form a cluster, separate mature pups into new plants, or grow new Tillandsia from seed. One method is delightfully easy, one is satisfying and practical, and one is basically a character-building exercise.
Why Air Plant Propagation Is Different
Air plants are not your usual houseplants. They are epiphytes, which means they naturally grow attached to trees, branches, rocks, and other surfaces instead of rooting into potting soil. Their roots are mostly for anchoring, not for slurping up water like a thirsty pothos. That means propagation is less about sticking a cutting in water and more about understanding the plant’s life cycle.
Most Tillandsia bloom once in their lifetime. After blooming, the mother plant gradually declines. That sounds dramatic, but it is not bad news. It is the plant’s normal rhythm. Before it fades away, it usually produces offsets, commonly called pups, around its base. Those pups are the easiest path to propagation and the reason one healthy air plant can become many.
Some air plants can also produce seed, especially when flowers are pollinated. Seed propagation is real, but it is much slower than working with pups. So if you are here because you want free plants before next week, pups are your best friends. If you are here because you enjoy horticultural patience and tiny victories, seeds may also call your name.
Before You Start: What a Healthy Parent Plant Looks Like
Propagation works best when the parent plant is healthy. Look for firm leaves, good color, no mushy base, and no signs of rot. A little curling can mean it is thirsty. Brown, crispy tips may suggest dry air or inconsistent watering. A soft, dark center is a bigger problem and usually means excess moisture got trapped where it should not have.
It also helps to give your plant the basics before you ask it to make babies. That means bright, indirect light, decent airflow, regular watering, and enough drying time after every soak or rinse. Think of it this way: a plant that is barely hanging on is not in the mood to become a parent.
Method 1: Let the Pups Stay Attached and Form a Clump
Best for beginners and anyone who likes a fuller look
This is the easiest method of all because, honestly, the plant does most of the work. When pups appear at the base of the mother plant, you can simply leave them in place. Over time, the air plant becomes a cluster or clump, which often looks bigger, more dramatic, and more natural than a single plant floating solo in a shell.
If your goal is not “I need ten separate air plants right now,” this is a fantastic way to propagate. You are still increasing your plant material, just not splitting it apart yet. Many growers actually prefer this method because clusters can be stunning once they fill out.
How to do it
- Wait for the parent plant to bloom and begin producing pups.
- Keep caring for the whole plant as usual with bright indirect light and regular watering.
- Remove dead or papery leaves from the mother plant as it declines.
- Allow the pups to keep growing together into a clump.
That is it. No knife, no tiny surgery, no sweaty hands wondering whether you just ruined your favorite Tillandsia. Just patience and basic care.
Why this method works so well
Pups staying attached continue to benefit from the parent plant for a while. They have time to size up, toughen up, and become less fragile. You also avoid the most common beginner mistake: separating offsets too early because they look cute and independent when they are actually still very much toddlers.
The only downside is obvious. If you want separate plants to mount in different spots, gift to friends, or multiply fast, leaving everything attached will not scratch that itch. But if you want a lush, sculptural specimen, this method is the easiest win on the board.
Method 2: Separate Mature Pups Into New Plants
The classic way to propagate air plants
If Method 1 is the lazy Sunday version of propagation, this is the proper “let’s make more plants” version. Once pups are large enough, you can gently remove them from the mother plant and treat them as independent air plants.
This is the method most people mean when they talk about how to propagate air plants. It is simple, effective, and fast enough to feel rewarding without requiring a PhD in patience.
When to separate air plant pups
The golden guideline is to wait until the pup is at least one-third the size of the parent plant. Some growers prefer waiting until it reaches half size, especially if they want the strongest possible new plant. Either way, bigger is usually safer than too soon.
Do not separate a baby air plant the minute you spot it. Tiny pups may look ready because they resemble miniature versions of the mother, but appearances can be rude. If removed too early, they may stall out, weaken, or fail completely.
How to separate pups step by step
- Inspect the base. Find where the pup connects to the mother plant. Work in good light so you can see what you are doing.
- Hold the parent plant gently. Support it with one hand so you do not bend or crush the leaves.
- Twist or tug gently. Some pups come off with a careful twist and pull.
- Use a clean, sharp blade if needed. If the attachment point is stubborn, use a sterilized knife or scissors to make a clean cut.
- Let the plant rest in a dry, airy spot. Give the separation point time to stay dry before the next watering.
- Resume normal care. Treat the new pup like a small air plant: bright indirect light, regular watering, and excellent airflow.
What to do after separation
Once separated, your new plant does not need soil. That point deserves repeating because air plants attract well-meaning chaos. Do not tuck it into potting mix. Do not bury the base. Do not “help” it by treating it like a pothos. Air plants prefer open displays, mounts, or airy containers where water cannot sit around the crown for too long.
Keep the new plant somewhere with bright, filtered light and good ventilation. Water it regularly, but always let it dry thoroughly afterward. New pups are small, so they can dry out quickly, but they can also rot if trapped in a damp display. Air plants are funny that way: they like water, just not lingering water. Kind of like cats and affection.
Common mistakes to avoid
The biggest mistakes are separating pups too early, planting them in soil, and displaying them in enclosed containers with weak airflow. Another classic mistake is watering and then putting them right back into a glass orb before they have fully dried. Cute display, bad life choice.
Method 3: Grow Air Plants From Seed
The slow method for patient plant people
Yes, you can grow air plants from seed. No, it is not fast. No, it is not the easiest method. And yes, it is still deeply satisfying if you enjoy the challenge.
Seed propagation is the most natural form of reproduction in the wild, but indoors it is less common because flowers may not be pollinated. Even when you do get viable seed, the growing process is slow enough to make a glacier look efficient. This is not the route for anyone seeking instant plant gratification.
When seed propagation makes sense
Grow from seed if you love experimentation, want to raise many plants over time, or simply enjoy the process more than the speed. It is also useful if you are working with rare species or collecting air plants the way some people collect vinyl records, fountain pens, or oddly specific opinions about coffee.
How to start air plants from seed
- Use fresh seed whenever possible. Fresh seed is more reliable than old seed that has been sitting around waiting for a motivational speech.
- Sow on an airy surface. Air plant seed needs light, moisture, and airflow, so breathable surfaces work better than soggy media.
- Keep conditions warm and bright. Think bright indirect light, gentle humidity, and good air circulation.
- Mist lightly and consistently. The goal is moisture without swampiness.
- Be patient. Seedlings stay tiny for a long time before they finally hit a stronger growth phase.
Seed-grown Tillandsia are a long game. You may wait years, not weeks, to see a flowering-size plant. But for some growers, that slow journey is the whole appeal. It is less “weekend project” and more “small botanical saga.”
Which Propagation Method Is Best?
If you want the simplest answer, here it is: separating mature pups is the best method for most indoor gardeners. It is faster than seed, easier than seed, and gives you separate plants without much fuss.
If you want the least stressful answer, let pups stay attached and enjoy a clump. If you want the most ambitious answer, try seed propagation and settle in for the long haul. There is no single right choice. It depends on whether your goal is faster multiplication, a fuller display, or the thrill of raising a plant from the very beginning.
Care Tips That Help New Air Plants Thrive
Give them bright, indirect light
New air plants do best where they get plenty of filtered light. A bright window works well, especially if the sun is softened rather than blasting the leaves directly all afternoon.
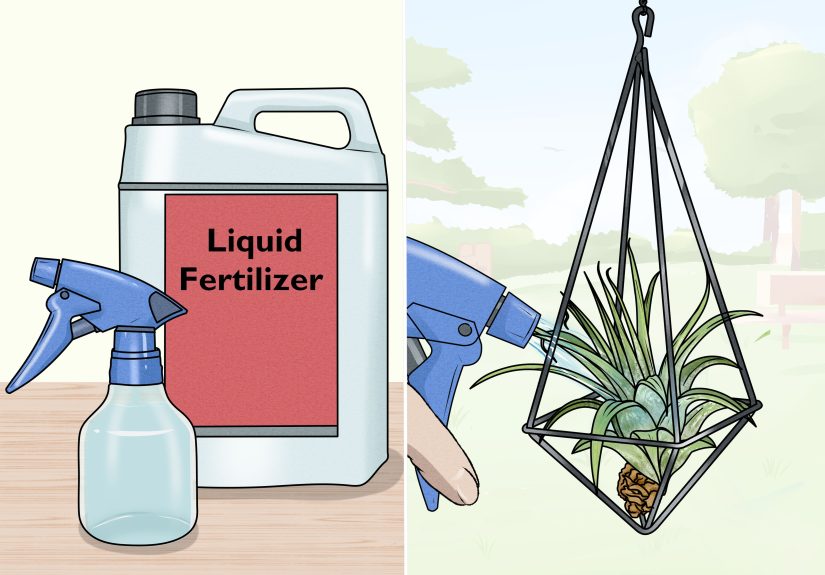
Water regularly, then dry thoroughly
A weekly soak or thorough rinse works for many homes, though your schedule may vary with heat, humidity, and species. What matters most is complete drying afterward. Trapped water is the villain in a surprising number of air plant tragedies.
Skip the soil
This is not negotiable. Air plants are not secretly waiting for potting mix to complete them. They are fine as they are.
Prioritize airflow
Fresh air helps prevent rot and keeps plants healthier overall. If your display is beautiful but airless, the plant may disagree with your design choices.
Real-World Experiences With Propagating Air Plants
One of the most common experiences people have with air plant propagation starts with mild overconfidence. You buy one Tillandsia because it looks adorable on a shelf. Then it blooms, and suddenly you are checking its base every other day like an expectant parent with a magnifying glass. At first, the pup is tiny enough to make you question whether you are seeing a new plant or just a weird leaf angle. Then one morning it is unmistakable: there is a baby air plant attached to the side, and now you are emotionally invested.
Another very real experience is learning that patience matters more than enthusiasm. Many beginners see that first pup and immediately want to pull it off. The logic seems sound. It is there, it is cute, and obviously it wants its own apartment. But air plants do not care about your excitement. If you separate a pup too early, it often just sits there looking offended and not growing much. Waiting longer feels boring in the moment, but it usually pays off with a sturdier, easier-to-grow baby plant.
There is also the strange joy of watching the mother plant decline without panicking. For anyone used to regular houseplants, this can feel wrong at first. The bloom fades, the parent slowly looks worse, and every instinct says something must be fixed. But with air plants, that fade is often part of the normal cycle. Once you understand that, the whole process becomes less stressful and more fascinating. You stop trying to rescue the old growth at all costs and start focusing on the healthy new pups coming in behind it.
People also learn quickly that display style affects propagation success. A plant mounted beautifully in a tight glass globe may look like it belongs in a boutique, but if it cannot dry well, problems show up fast. By contrast, a less flashy setup with better airflow often produces healthier pups. This is one of those humbling plant lessons: the Instagram version is not always the thriving version.
Then there is the collecting problem. It starts innocently. You separate one pup successfully, feel like a genius, and suddenly one air plant becomes three. Then you want different shapes, different textures, maybe one that blushes red, maybe one that curls like it just woke up from a dramatic nap. Before long, you are defending a shelf full of Tillandsia by saying they take up almost no space, which is technically true and spiritually misleading.
Perhaps the best experience of all is how air plant propagation changes your relationship with slow gardening. These plants do not reward impatience. They reward observation. You notice leaf texture, color shifts, tiny offsets, drying time, and the subtle signs of stress or growth. Propagating air plants teaches you to pay attention in a quieter way. It is less about forcing growth and more about noticing when the plant is ready. And honestly, that may be the most satisfying part.
Conclusion
If you want to propagate air plants successfully, keep it simple. Let pups cluster if you love a fuller look. Separate them when they are mature if you want more individual plants. Try seeds if you have patience to spare and enjoy the long game. However you do it, the key is not some secret grower trick. It is giving Tillandsia what they already like: bright indirect light, fresh air, regular water, and time. Lots of time. Air plants may be low on soil, but they are high on personality, and once you learn their rhythm, multiplying them feels a lot less mysterious.