Table of Contents >> Show >> Hide
- Why This Cherry Pie Recipe Works
- Ingredients for Cherry Pie with a Lattice Crust
- How to Make the Pie Dough
- How to Make the Cherry Filling
- How to Assemble a Cherry Pie with a Lattice Crust
- How to Bake Cherry Pie So It Actually Sets
- Lattice Crust Tips for Beginners
- Common Mistakes to Avoid
- Serving and Storage
- Cherry Pie with a Lattice Crust: A Longer Baking Experience
- Conclusion
There are two kinds of homemade pies in this world: the ones that look casually charming, and the ones that walk into the room like they pay property taxes. A cherry pie with a lattice crust belongs firmly in the second category. It is glossy, golden, dramatic, and just rustic enough to make everyone believe you are effortlessly talented, even if your kitchen currently looks like a flour storm met a cherry crime scene.
This recipe is built for real life and real bakers. It gives you a flaky, buttery crust, a thick cherry filling that actually slices instead of sprinting across the plate, and an easy method for weaving a classic lattice top without needing the hands of a pastry school graduate. It also leaves room for flexibility, because cherry pie can be a little high-maintenance. Some cherries are tart, some are sweet, some release enough juice to start their own weather system, and some pies come out perfect only after a good long cool-down. That is normal. Pie humbles us all.
In this in-depth guide, you will learn how to make the dough, build a balanced cherry filling, weave a lattice crust, bake the pie so the center bubbles properly, and cool it long enough to get neat slices. You will also get practical troubleshooting tips, serving ideas, storage advice, and a longer reflection on why this dessert still feels like one of the great American baking victories. Whether you are baking for a summer cookout, a holiday table, or just because you saw cherries at the market and lost all self-control, this homemade cherry pie recipe is ready for the job.
Why This Cherry Pie Recipe Works
A truly good lattice crust cherry pie needs three things: sturdy dough, a flavorful filling, and patience. The crust has to stay cold enough to bake up flaky. The filling needs enough thickener to become glossy and sliceable, but not so much that it turns gummy. And the finished pie needs time to cool so the juices can settle. Ignore that last step and you do not have pie slices. You have cherry lava.
This version uses a double crust dough with plenty of butter for flavor and texture, plus a cherry filling brightened with lemon juice, rounded out with vanilla, and gently nudged toward greatness with a whisper of almond extract. The almond note is not mandatory, but cherries and almond are such a good pair that skipping it feels a little like inviting peanut butter to the party and forgetting the jelly.
The filling can be made with sweet cherries, tart cherries, or a mix of both. A blend gives the most balanced flavor, but the recipe still works beautifully with whichever cherries you can actually find. That matters, because “use what is available” is one of the most important home-baking skills nobody talks about enough.
Ingredients for Cherry Pie with a Lattice Crust
For the pie dough
- 2 1/2 cups all-purpose flour
- 1 tablespoon granulated sugar
- 1 teaspoon kosher salt
- 1 cup unsalted butter, cut into cubes and kept very cold
- 6 to 8 tablespoons ice water
For the cherry filling
- 5 cups pitted cherries, halved if large
- 3/4 to 1 cup granulated sugar, depending on how sweet your cherries are
- 1/4 cup cornstarch
- 1 tablespoon lemon juice
- 1 teaspoon vanilla extract
- 1/4 teaspoon almond extract
- 1/4 teaspoon kosher salt
- 1 tablespoon unsalted butter, cut into small pieces
For finishing
- 1 egg
- 1 tablespoon milk or water
- Coarse sugar for sprinkling, optional but strongly encouraged
Using fresh cherries for pie gives the brightest flavor, but frozen cherries work too. If you use frozen fruit, keep in mind that it can release more liquid, so letting the filling sit briefly before assembling the pie is especially helpful. If your cherries are very sweet, stay closer to 3/4 cup sugar. If they are sharply tart, go toward 1 cup.
How to Make the Pie Dough
In a large bowl, whisk together the flour, sugar, and salt. Add the cold butter and work it into the flour using your fingertips, a pastry cutter, or two knives until the mixture looks shaggy with some pea-size pieces and some slightly larger flakes. Those uneven bits of butter are not a mistake. They are future flakiness.
Drizzle in 6 tablespoons of ice water and mix gently. Add more water, 1 tablespoon at a time, only until the dough holds together when pressed. Divide the dough into two disks, with one disk slightly larger for the bottom crust. Wrap both disks well and refrigerate for at least 2 hours.
Cold dough is not optional here. Warm dough gets sticky, tears easily, and behaves like a grumpy toddler in a grocery store checkout line. Chilled dough rolls more cleanly and helps the crust keep its shape in the oven.
How to Make the Cherry Filling
In a large bowl, toss the cherries with sugar, cornstarch, lemon juice, vanilla, almond extract, and salt. Let the mixture stand for about 10 minutes. This helps the fruit begin releasing juices so the sugar and starch distribute more evenly.
If your cherries are especially juicy, spoon off a few tablespoons of the liquid into a small saucepan and simmer it for 2 to 3 minutes until slightly syrupy, then pour it back into the bowl. This small move helps build a richer, thicker filling without making the pie taste stiff or over-thickened.
The butter pieces go on top of the filling right before the lattice crust is added. They melt into the cherries during baking and add richness without stealing the spotlight. Cherry pie should taste like cherries first, not like somebody dropped a stick of butter into a fruit bowl and hoped for the best.
How to Assemble a Cherry Pie with a Lattice Crust
Step 1: Roll the bottom crust
On a lightly floured surface, roll the larger dough disk into a 12-inch round. Transfer it to a 9-inch pie plate and gently press it into the bottom and sides without stretching it. Trim the overhang to about 1/2 inch if needed, leaving enough dough for sealing later.
Step 2: Add the filling
Spoon the cherry filling into the crust and spread it evenly. Dot the top with the small butter pieces. If your filling looks like a lot, that is a good sign. Fruit pies shrink as they bake, and nobody has ever cut into a pie and said, “Wow, I wish this had less cherry filling.”
Step 3: Roll and cut the lattice strips
Roll the second dough disk into a 12-inch round. Use a pizza cutter or sharp knife to cut it into 8 to 10 strips, about 3/4 inch to 1 1/2 inches wide. Thin strips look delicate, wider strips look rustic, and both are correct. Pie does not need a personality test.
Step 4: Weave the lattice
Lay half the strips across the pie in one direction, spacing them evenly. Fold back every other strip halfway. Place one strip across the center in the opposite direction, then unfold the folded strips over it. Next, fold back the alternate strips and add another cross strip. Keep repeating until you have a woven lattice pattern.
Trim the ends, tuck them into the bottom crust edge, and crimp to seal. A lattice top is not just decorative. It lets steam escape, which helps the fruit filling bake properly and keeps the pie from becoming an overexcited bubbling disaster.
Step 5: Chill before baking
Place the assembled pie in the refrigerator for 15 to 20 minutes. This step helps the crust firm up again after handling, which means cleaner lattice lines and better texture after baking.
Step 6: Egg wash and sugar
Whisk the egg with the milk or water, then brush it over the lattice and edges. Sprinkle with coarse sugar. This adds shine, crunch, and the sort of sparkle that makes people assume you know what laminated dough is.
How to Bake Cherry Pie So It Actually Sets
Preheat the oven to 425°F. Put a rimmed baking sheet in the oven while it heats. Set the chilled pie on the hot baking sheet and bake for 15 to 20 minutes. Then reduce the oven temperature to 375°F and continue baking for 35 to 45 minutes more.
The pie is done when the crust is deeply golden and the filling is bubbling in the center, not just around the edges. That center bubbling matters because it tells you the thickener has fully activated. If the edges brown too quickly, tent them loosely with foil.
Once baked, transfer the pie to a wire rack and cool it completely, ideally for at least 4 hours. Yes, that is a long time. Yes, you will be tempted. No, steam escaping from a cut pie does not mean it is ready. It means the cherries are plotting against your clean slices.
Lattice Crust Tips for Beginners
If this is your first lattice pie, take a breath. It is far easier than it looks. Start with evenly cut strips, work on a lightly floured surface, and do not panic if one tears. Dough is forgiving. Patch the strip, chill it if needed, and keep going. Once baked and sugared, nobody will notice a tiny repair except you, and you are currently too close to the situation.
Wider strips are easier to handle, especially if you are new to weaving. You can also lay all the strips down in one direction before weaving, which makes the pattern easier to visualize. If the dough gets soft at any point, stop and chill it for 10 minutes. Pie rewards calm people and cold butter.
Common Mistakes to Avoid
Using warm dough
Warm dough sticks, stretches, and bakes up less flaky. Keep it cool from start to finish.
Skipping the thickener
Cherries release a lot of juice. Without enough cornstarch, your filling may taste good but slice like soup.
Underbaking the center
A beautifully bronzed crust means very little if the filling is not bubbling in the middle. Check the center before pulling the pie from the oven.
Slicing too early
This is the big one. Fresh-from-the-oven pie is aromatic, dramatic, and structurally unreliable. Let it cool so the filling can set.
Serving and Storage
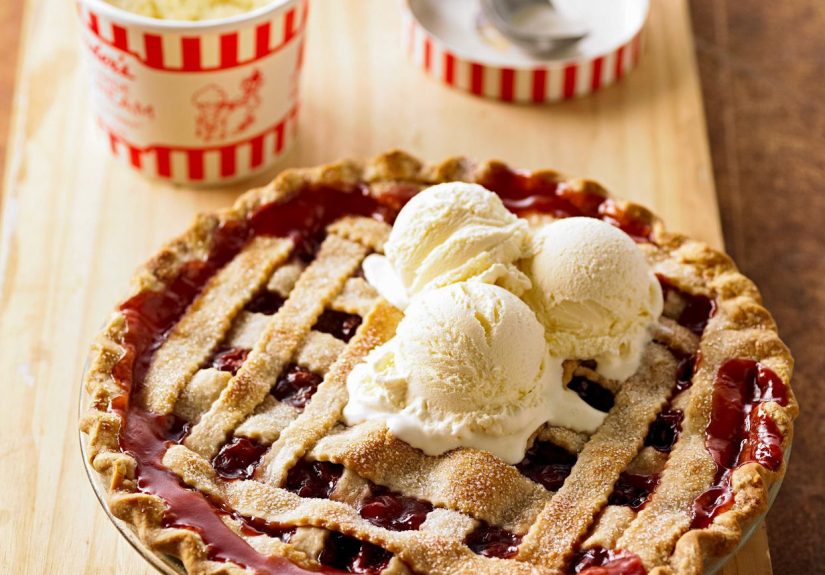
Serve this homemade cherry pie with lattice crust on its own, with softly whipped cream, or with a scoop of vanilla ice cream if you are in the mood to make dessert feel like a celebration. The tartness of the cherries and the rich crust are especially good with cold cream on the side.
The pie can sit at room temperature for about a day if your kitchen is cool, but for longer storage it is better refrigerated. Cover leftovers loosely and refrigerate for up to 4 days. The crust softens slightly over time, but the flavor stays excellent. A quick warm-up in the oven helps bring back some of that just-baked magic.
You can also make the dough a couple of days ahead and refrigerate it, or freeze it for longer storage. The fully baked pie freezes reasonably well too, though a freshly baked lattice will always win the beauty contest.
Cherry Pie with a Lattice Crust: A Longer Baking Experience
There is something wonderfully theatrical about making a cherry pie from scratch. It starts with optimism. Maybe the cherries looked gorgeous at the market. Maybe you wanted a weekend baking project that felt wholesome and impressive. Maybe you simply thought, “How hard can pie be?” That is usually the moment pie quietly laughs from across the room.
The first experience most bakers have with cherry pie is not elegance. It is logistics. You wash the cherries, pit the cherries, and then realize you are somehow wearing cherry juice on your elbow. You look down and discover the cutting board resembles evidence from a very fruity detective show. It is humbling, but also part of the charm. Cherry pie asks you to participate. This is not a tear-open-a-box dessert. This is dessert with opinions.
Then there is the dough, which has a way of teaching patience whether you wanted that lesson or not. The minute you try to rush pie dough, it pushes back. Too warm, and it sticks. Too dry, and it cracks. Too much handling, and it gets tough. But when you slow down, chill it properly, and roll it out with a little care, it transforms into something gorgeous. That feels like the secret reward of pie baking: the crust looks simple, yet it is one of the most satisfying kitchen skills to develop.
The lattice is where the emotional arc really kicks in. Before you begin weaving, the strips look like a problem. Halfway through, they look like a craft project that may or may not end in tears. And then suddenly, almost unfairly, they become a pie top that looks far fancier than the effort you remember spending. It is the culinary version of making your bed and feeling like you have your life together for at least six minutes.
The smell is another reason cherry pie keeps winning people over. As it bakes, the kitchen fills with butter, fruit, sugar, and that little almond-vanilla note that makes the whole place smell like a very successful summer memory. Even people who were not paying attention to your baking project will begin wandering in, pretending they just happened to be nearby. No one is ever casually nearby when cherry pie is in the oven. They have been summoned.
Then comes the hardest part: cooling. Not making the dough. Not pitting the fruit. Not weaving the lattice. Cooling. Waiting for pie to set requires a level of personal growth that many of us simply do not possess on the first try. Yet once you finally cut a fully cooled pie and get that clean wedge with glossy, thick filling tucked beneath a golden lattice, the discipline suddenly feels worth it. It is one of those small kitchen victories that punches above its weight.
And maybe that is why cherry pie with a lattice crust still feels special. It is not just dessert. It is effort you can see. It is flavor with structure. It is old-fashioned without feeling dull. It is a little messy, a little dramatic, and incredibly rewarding when it all comes together. In other words, it is exactly the kind of baking project that earns a permanent place in a home cook’s rotation.
Conclusion
A great cherry pie with a lattice crust recipe is not about making the fanciest dessert on the table. It is about balancing flavor, texture, and technique so that every slice looks beautiful and tastes even better. With cold dough, a properly thickened filling, a simple woven top, and enough time to cool, this pie delivers the kind of classic homemade result that feels both nostalgic and impressive. It is bright, buttery, deeply fruity, and exactly the sort of dessert that disappears faster than you planned. Consider yourself warned.