Table of Contents >> Show >> Hide
- What Is Pole Wrap, Exactly?
- Why Pole Wrap Works So Well on Shelves and Cabinets
- Best Places to Use Pole Wrap
- Tools and Materials You Will Need
- How to Do an Easy Shelf & Cabinet Makeover With Pole Wrap
- 1. Choose the makeover area carefully
- 2. Remove hardware and prep the surface
- 3. Measure twice, cut once, and then measure one more time for luck
- 4. Dry-fit every piece before using adhesive
- 5. Finish before installation or after installation depending on the project
- 6. Apply adhesive the smart way
- 7. Press firmly and let it cure
- 8. Clean up the edges
- 9. Repaint the surrounding cabinets or shelves if needed
- Painted vs. Stained Pole Wrap
- Design Ideas That Look Great With Pole Wrap
- Mistakes to Avoid
- How Long Does a Pole Wrap Cabinet Makeover Take?
- Experience-Based Lessons From Real Pole Wrap Makeovers
- Final Thoughts
- SEO Tags
Note: Clean HTML body only for web publishing; no source-markup artifacts included.
If your shelves or cabinets are functional but visually stuck in a time warp, pole wrap might be your new favorite shortcut. It adds texture, warmth, and that expensive-looking fluted detail designers love, without requiring you to replace perfectly good cabinetry. In other words, it is the DIY version of giving your storage a glow-up instead of a total personality transplant.
This project works because pole wrap is flexible, easy to cut, and surprisingly forgiving once you understand where it belongs. Use it on flat cabinet sides, open shelf back panels, bookcase edges, island ends, or even simple drawer fronts, and suddenly that basic storage unit starts looking custom. The best part is that you do not need a full workshop, a reality-TV film crew, or a dramatic demolition montage to pull it off.
In this guide, you will learn exactly how to do an easy shelf and cabinet makeover with pole wrap, from planning and prep to finishing details that make the project look intentional instead of “I had a free Saturday and feelings.”
What Is Pole Wrap, Exactly?
Pole wrap was originally made to cover basement support columns, but creative DIYers quickly realized it could do a lot more. Today, similar fluted and tambour-style panels are used for cabinet fronts, bookshelves, bar wraps, accent walls, islands, and furniture makeovers. That is why the material shows up so often in modern DIY cabinet refresh ideas: it brings texture without the bulk of traditional trim.
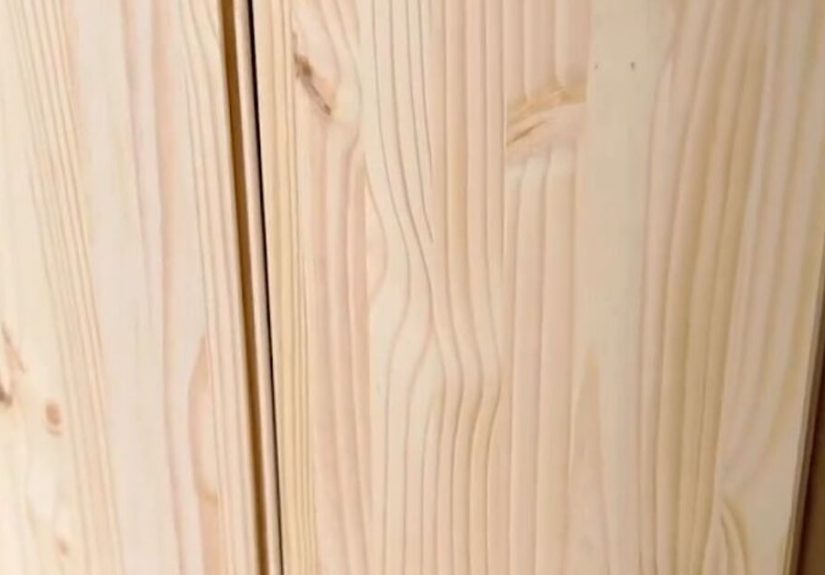
Most pole wrap products come in wood, wood veneer over MDF, or paintable MDF. Some are unfinished, which is great if you want to stain, paint, or clear-coat them. Others are prefinished, which speeds up the project but gives you less freedom on color. For an easy shelf makeover, the unfinished options are usually the sweet spot because you can tailor the finish to your room instead of hoping the room adapts to the panel.
Why Pole Wrap Works So Well on Shelves and Cabinets
A shelf and cabinet makeover with pole wrap is popular for one simple reason: the material adds architectural detail fast. Flat cabinets can look plain. Pole wrap gives them rhythm, shadow, and texture, which makes even builder-grade storage feel more designed.
It also works especially well when you want a high-impact update without replacing cabinet boxes. If your cabinets are structurally sound, there is no need to send them into early retirement. A surface makeover can dramatically change the look for much less effort and money than a full replacement.
Visually, pole wrap helps in three big ways:
- It makes basic shelves look more custom and built-in.
- It softens boxy cabinet shapes with fluted or slatted texture.
- It creates a furniture-style finish on vanities, media units, and bookcases.
That means you can use it in a living room, office, mudroom, laundry room, bathroom vanity area, or kitchen accent zone. You are not limited to columns anymore. Pole wrap has officially left the basement.
Best Places to Use Pole Wrap
Great candidates
- Cabinet side panels
- Bookcase sides
- Open shelf backing
- Simple slab drawer fronts
- Kitchen island end panels
- Media console fronts
- Bathroom vanity faces
Places to think twice
- Raised-panel doors with deep profiles
- Warped or damaged cabinet surfaces
- Areas that get direct soaking unless fully sealed
- Cabinets with tight-clearance doors or drawers that may rub after the added thickness
The easiest win is usually a flat vertical surface. If you are brand-new to DIY, start with the exposed side of a cabinet or the face frame area of a simple bookcase. You will get the visual payoff without fighting hinges, odd corners, or complicated trim returns.
Tools and Materials You Will Need
- Pole wrap or tambour-style fluted panel
- Tape measure
- Pencil
- Level or straightedge
- Fine-tooth saw or sharp utility knife, depending on the product
- Construction adhesive
- Brad nailer or pin nails, optional
- Sandpaper
- Wood filler or paintable filler
- Primer, paint, stain, or clear finish
- Caulk for tiny perimeter gaps, if needed
- Painter’s tape and drop cloths
- Degreaser or mild cleaner
Not every project needs every item, but almost every good-looking project needs patience. That is the tool people forget to buy.
How to Do an Easy Shelf & Cabinet Makeover With Pole Wrap
1. Choose the makeover area carefully
Before you buy anything, decide exactly where the pole wrap will go. Are you covering the cabinet side, the shelf backing, the front of a drawer bank, or the face of a bookcase base? Take measurements and think about door swing, drawer clearance, and whether the added thickness will interfere with surrounding trim or hardware.
If you are applying pole wrap to cabinet doors or drawer fronts, slab-front pieces are easiest. Intricate routed doors are not impossible, but they are not what anyone would call “easy,” and this article made a promise in the title.
2. Remove hardware and prep the surface
Take off knobs, pulls, and removable shelves. If you are working on kitchen or bathroom cabinets, clean the surface thoroughly. Cabinets collect grease and mystery residue at a level that deserves its own documentary. If the base surface is dirty, your adhesive and finish will not perform well.
Once the surface is clean and dry, lightly sand glossy areas. You are not trying to destroy the finish; you just want to dull the sheen and help primer or adhesive grip better. Wipe away all dust before moving on.
If the existing surface has dents, chipped laminate, or nail holes, fill and sand them first. Pole wrap looks best over a flat, solid base.
3. Measure twice, cut once, and then measure one more time for luck
Measure the height and width of each section carefully. Mark the panel on the back side. Some pole wrap products can be cut lengthwise with a utility knife, while others are best cut with a fine-tooth saw. Follow the product style you bought.
When cutting multiple pieces, keep the slat pattern consistent. A beautiful makeover gets a lot less beautiful when one section runs slightly off and the next one announces it to the whole room.
4. Dry-fit every piece before using adhesive
This step matters more than people think. Hold each cut panel in place and check the fit, especially near corners, toe kicks, shelf edges, and door gaps. Dry-fitting lets you spot small problems while your mood is still stable.
It is also smart to plan the direction of the slats at this stage. Vertical lines tend to make cabinets look taller and more tailored. Horizontal lines can look modern, but they usually feel better on wider furniture pieces than on upper cabinets or narrow towers.
5. Finish before installation or after installation depending on the project
You have two good options here. You can pre-finish the pole wrap before attaching it, or install it first and finish it in place.
Pre-finishing is easier when you want a stain or clear coat and want to avoid drips in corners. Finishing after installation is better when you want a seamless painted look across cabinets, trim, and paneling.
If you are staining unfinished wood or veneer, lightly sand first, test the color, and work with the grain. A clear protective coat afterward will make the surface more durable. If you are painting MDF or wood veneer, prime first and use a cabinet-grade or trim-grade paint for better durability.
6. Apply adhesive the smart way
Use a quality construction adhesive on the backer side of the pole wrap. Apply it in consistent beads rather than in random blobs that create uneven adhesion. Press the panel onto the clean, dry, flat surface and work from one edge outward so you do not trap air behind it.
For longer pieces, optional brad nails can help hold the panel in place while the adhesive cures. If you use them, keep them discreet and plan to fill the holes later. The goal is “custom cabinetry,” not “woodpecker visited.”
7. Press firmly and let it cure
After positioning the panel, press it firmly across the full surface. Use your hands, a clean block, or a roller-style tool if you have one. Pay attention to edges and corners so the material sits tight and flat.
Then let the adhesive cure fully before reinstalling hardware, loading shelves, or declaring victory on social media. Rushing this part is how good projects turn into repair projects.
8. Clean up the edges
This is the stage that separates a casual craft from a polished makeover. Fill tiny nail holes, sand rough cuts, and caulk only where appropriate. In many cases, less caulk is better. Over-caulked fluted panels can lose their crisp detail fast.
If needed, add trim at the sides or top for a framed built-in look. Even a slim edge detail can make the whole piece feel intentional.
9. Repaint the surrounding cabinets or shelves if needed
Sometimes the pole wrap is the star and the surrounding cabinet color needs to calm down and support it. A fresh coat of paint on the cabinet body can make the texture stand out beautifully. Soft white, warm greige, muted olive, navy, charcoal, and natural wood tones all pair well with fluted detailing.
If you are painting cabinet interiors too, use a durable enamel or cabinet paint and give it enough time to cure before putting dishes, books, or baskets back in place.
Painted vs. Stained Pole Wrap
Choose paint if you want:
- A clean built-in look
- One color across cabinet boxes and textured detailing
- A softer, more contemporary finish
- A better option for MDF-based products
Choose stain if you want:
- A warmer natural wood look
- Contrast against painted cabinetry
- A more furniture-like finish
- The slat texture to stand out more dramatically
Choose clear coat only if you want:
- The raw wood tone to stay visible
- A Scandinavian or organic-modern look
- A fast finish with minimal color testing
A common design move is pairing painted cabinet boxes with stained pole wrap on an island end, vanity face, or bookshelf base. That contrast looks rich without trying too hard. It says, “I have style,” not “I watched one design reel and lost all restraint.”
Design Ideas That Look Great With Pole Wrap
- Bookcase makeover: Add pole wrap to the lower cabinet area of a built-in or IKEA-style bookcase for a custom furniture feel.
- Bathroom vanity refresh: Cover flat vanity fronts and paint the whole piece in a moody color for a boutique-hotel vibe.
- Kitchen island detail: Apply pole wrap to the island ends or back panel instead of every cabinet in the room.
- Open shelf backing: Use fluted paneling behind floating shelves for depth and shadow.
- Media console update: Pair natural-finish pole wrap with matte black hardware for a modern, low-profile look.
Mistakes to Avoid
- Skipping surface cleaning before adhesive or paint
- Installing over warped, loose, or crumbling material
- Forgetting to account for drawer and door clearance
- Using too much caulk and flattening the detail
- Painting without proper primer on slick or porous surfaces
- Ignoring moisture protection in bathrooms or kitchens
- Choosing a slat direction that fights the shape of the cabinet
The biggest mistake, though, is going too wide too fast. Doing every cabinet surface in one weekend sounds ambitious and cinematic. In reality, it can leave you sitting on the kitchen floor eating cereal over the sink while adhesive cures. Start with one zone, get it right, and expand only if the first section looks great.
How Long Does a Pole Wrap Cabinet Makeover Take?
For a small shelf or cabinet project, a weekend is realistic. Day one is usually for cleaning, measuring, cutting, and dry-fitting. Day two covers installation, touch-ups, paint or stain, and reassembly. Larger kitchens, multiple bookcases, or detailed finishes can take longer, especially if you are layering primer, paint, and topcoat properly.
The good news is that the visual return on effort is high. A little texture goes a long way, and you usually do not need to rework the whole room to make the update feel noticeable.
Experience-Based Lessons From Real Pole Wrap Makeovers
Here is what people tend to discover after actually living through a shelf and cabinet makeover with pole wrap. First, the project looks deceptively simple until you start measuring around real-life obstacles. Cabinets are rarely as perfectly square as they appear from across the room. Shelves have tiny bows. Walls lean just enough to humble your confidence. The DIY experience gets much smoother the moment you stop expecting machine perfection from an older home.
Another big lesson is that prep work makes the finish look expensive. Not the fun answer, I know. Everybody wants to jump straight to attaching the pretty fluted panel and admiring the transformation. But the projects that end up looking custom are almost always the ones where someone took the time to clean grease, sand lightly, test a cut, and dry-fit the panel before committing. Five minutes of patience can save an hour of trying to explain away a crooked seam.
Most DIYers also realize quickly that pole wrap has a surprisingly strong visual presence. In the store or online, it can seem subtle. Once it is on a cabinet face, though, it becomes the focal point. That is why a little often looks better than a lot. One island panel, one bookcase base, or one vanity front can carry the room beautifully. Covering every possible surface can make the texture feel busy instead of tailored.
Finishing choices also change the mood more than people expect. A painted pole wrap treatment feels polished and architectural, especially in white, deep green, navy, or warm mushroom tones. A stained finish feels cozier and more furniture-like. A natural clear coat often lands right in the sweet spot for modern organic spaces. The experience of choosing the finish is not just about color. It is about deciding whether you want your piece to blend in, stand out, or quietly show off.
There is also the practical lesson of touch. Fluted surfaces invite people to reach out and run a hand across them. That means durability matters. On bookshelves and decorative side panels, almost any good finish works. On vanities, kitchens, and heavily used storage, tougher paint or a protective clear coat earns its keep. The makeover may be cosmetic, but the wear is real.
One of the most satisfying parts of the project is that it often changes how the entire room feels, even when the actual footprint stays the same. A dated bookcase suddenly reads like millwork. A plain vanity starts looking boutique. A rental-style cabinet side begins to feel like a design feature instead of background noise. That is the magic of textured detail: it creates depth without demanding square footage.
Finally, people tend to remember how doable the project feels once they stop trying to make it perfect. A small seam hidden by a side angle, a slightly uneven wall, or a tiny filled nail hole will not ruin the result. What matters is the overall impression. If the makeover feels intentional, cohesive, and well-finished, nobody is going to crouch down with a flashlight and a measuring tape. And if they do, maybe do not invite them over during your next DIY weekend.
Final Thoughts
If you want an affordable way to upgrade storage, pole wrap is one of the easiest materials to use for a shelf and cabinet makeover. It delivers texture, warmth, and custom style without requiring new cabinet boxes or advanced carpentry. With the right prep, careful cuts, good adhesive, and a finish that suits your room, you can turn basic cabinetry into something that looks thoughtful, modern, and far more expensive than it actually was.
Start small, take your time, and let the texture do the heavy lifting. Your shelves and cabinets do not need a full identity crisis. They just need better clothes.