Table of Contents >> Show >> Hide
- What You’ll Make (And Why It’s Worth It)
- Materials and Setup
- Origami Terms in Plain English
- How to Fold an Origami Lily: Step-by-Step Instructions
- Step 1: Start With a Square and Make Your Guide Creases
- Step 2: Collapse into a Square Base (The “Magic Collapse” Moment)
- Step 3: Make a Kite Shape on Each Side
- Step 4: Do the Petal Fold to Create Long Petal Points
- Step 5: Fold Down the Petal Tips (So It Actually Becomes a Flower)
- Step 6: Open the Lily Bloom
- Step 7: Shape and Curl the Petals for a Realistic Look
- Troubleshooting: Fixes for the Most Common Origami Lily Problems
- Make It Look Amazing: Style Ideas for Your Paper Lily Flower
- Quick FAQ: Origami Lily Instructions for Beginners
- Extra : Real-World Folding “Experiences” That Make You Better (Fast)
- Conclusion: Your Lily Is DoneNow Make It Yours
Want a flower that never wilts, never needs watering, and won’t judge you for forgetting it on a windowsill? Meet the
origami lily: a classic paper flower that looks fancy, feels magical, and is surprisingly beginner-friendly once you learn the rhythm.
This guide walks you through how to fold an origami lily with clear, calm steps, plus the little “why” behind each movebecause nothing
is more frustrating than following directions that act like paper can read your mind.
By the end, you’ll have a crisp paper lily flower you can curl, shape, and show off in a bouquetor proudly display as proof that you
are, in fact, a wizard with stationary.
What You’ll Make (And Why It’s Worth It)
The traditional origami lily is a single-sheet model with four petals that open into a clean, elegant bloom. It’s a great “next step” after super-basic
folds (like boats or cranes), because it teaches a few core skillsclean creasing, symmetrical folding, and shapingwithout requiring a PhD in Paper Engineering.
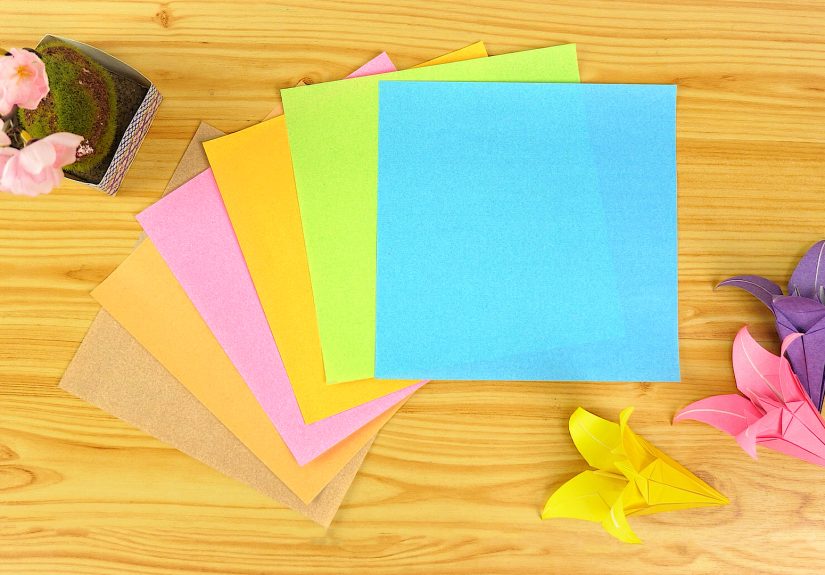
Materials and Setup
Pick the Right Paper
- 1 square sheet of paper (6 in x 6 in / 15 cm x 15 cm is a comfy beginner size)
- Two-sided (duo) origami paper is optional but gorgeousone color for petals, another for the inside accents
- Lightweight paper folds more easily; thick cardstock tends to fight back like it has opinions
Helpful (But Optional) Tools
- A flat surface (tables are great; your lap is… brave)
- A fingernail or bone folder for sharp creases
- A pencil or chopstick for curling petals at the end
Origami Terms in Plain English
Origami instructions sometimes sound like they were translated from Ancient Scroll. Here are the only “special words” you really need:
- Valley fold: fold paper toward you so the crease dips like a valley.
- Mountain fold: fold paper away so the crease sticks up like a ridge.
- Crease: press the fold firmly so it remembers its life choices.
- Squash fold: open a flap and flatten it into a new shape.
- Petal fold: a move that narrows a flap into a long “petal” by opening and collapsing along creases.
How to Fold an Origami Lily: Step-by-Step Instructions
These steps describe a classic “traditional” origami lily workflow: make guiding creases, collapse into a base, narrow the sides, then open and shape the bloom.
Go slowly at first. Speed comes later. Beauty comes from accuracy.
Step 1: Start With a Square and Make Your Guide Creases
- Place your paper colored side down (if you have one colored side and one white side).
- Fold diagonally corner to corner to make a triangle. Crease, then unfold.
- Fold diagonally the other way. Crease, then unfold. You should see an “X” of creases.
- Flip the paper over.
- Fold in half horizontally (edge to opposite edge). Crease, then unfold.
- Fold in half vertically. Crease, then unfold. Now you have a crease “asterisk”: plus sign + X.
Why this matters: These creases are like lanes on a highwaylater folds “snap” into place when the structure is prepared.
Skipping this is how you get a lopsided lily that looks like it’s leaning into the wind dramatically.
Step 2: Collapse into a Square Base (The “Magic Collapse” Moment)
- Hold the paper so it forms a shallow bowl with the colored side on the outside.
- Gently push two opposite corners inward so the paper starts collapsing along the creases.
- Bring the remaining two corners together and flatten into a smaller square (diamond shape) with layered flaps.
- Orient the model so the open flaps face downward (like a little paper skirt).
Tip: If it resists, don’t force it. Re-crease the lines and try again. Paper likes confidence, but it hates bullying.
Step 3: Make a Kite Shape on Each Side
- On the top layer, take the right edge and fold it to the center line (the vertical crease). Crease.
- Fold the left edge to the center line. Crease. You should now have a neat “kite” shape.
- Repeat for the other layers by turning the model and folding each side’s edges to the center.
Why this matters: You’re narrowing the layers so the lily will have clean, defined petals laterlike tailoring a suit, but for a flower.
Step 4: Do the Petal Fold to Create Long Petal Points
This is the step where your lily starts looking like it’s happening. Take it slow and keep everything aligned.
- Pick one side (one “kite” face) and open the top flap slightly.
- Fold the top point down to make a small crease guide near the top, then unfold that small fold (this helps the collapse land cleanly).
- Open the flap, then squash and collapse it upward along the existing creases, turning the kite into a long, narrow diamond.
- Flatten firmly so the new long shape holds.
- Repeat this petal fold on the remaining three sides.
Common feeling: “Am I breaking it?” Probably not. Petal folds feel dramatic. That’s normal.
Step 5: Fold Down the Petal Tips (So It Actually Becomes a Flower)
- On each long side, you’ll see a sharp point at the top. Fold that top point downward slightly (how far is up to you).
- Crease and repeat for all four sides.
Why this matters: Those tiny folds define the petal edge and help the lily open more naturally instead of looking like a paper spear.
Step 6: Open the Lily Bloom
- Turn the model so the “open end” is at the top.
- Gently separate the four petal sections.
- Pull them outward one at a time, easing the flower open into a cup shape.
Go slowly. If you yank, you’ll crease in places you didn’t invite to the party.
Step 7: Shape and Curl the Petals for a Realistic Look
- Use a pencil, chopstick, or your finger to curl each petal outward.
- Curl a little at a timesmall curves look more natural than one big dramatic roll.
- Adjust the flower opening by gently pressing the center or easing the petals wider.
Pro look: Curl two petals a bit more than the others. Real flowers are rarely perfectly symmetricalnature also refuses to use a ruler.
Troubleshooting: Fixes for the Most Common Origami Lily Problems
“My lily is uneven.”
Uneven lilies usually come from slight misalignment early on. Fix it by:
- Re-creasing the guide folds carefully in Step 1.
- Making sure edges meet the center line exactly in Step 3.
- Flattening each petal fold completely before moving on.
“The petal fold won’t collapse nicely.”
This happens when creases aren’t strong enough. Before you squash:
- Pinch along the existing crease lines to “remind” the paper where it should bend.
- Open the flap wider so you can guide the collapse rather than wrestling it.
“My paper is tearing.”
Tearing usually means the paper is too thick, too dry, or being folded too aggressively.
Try thinner origami paper, crease with a lighter touch, and avoid re-folding the same line repeatedly.
“It looks more like a paper pineapple than a lily.”
Honestly? You’re still doing arts and crafts, so you’re winning. But usually this means the bloom wasn’t opened evenly.
Separate petals gently, then curl them outward to shift the silhouette from “spiky” to “flowery.”
Make It Look Amazing: Style Ideas for Your Paper Lily Flower
Choose colors that help the folds “read”
- Solid colors: clean and classic.
- Duo paper: gives a beautiful inner-petal contrast when the flower opens.
- Patterned paper: best with subtle patterns; loud prints can hide your crisp lines.
Add a stem (without ruining the origami vibes)
If you want a bouquet, you have a few easy options:
- Fold a simple origami stem from green paper (a long rolled or folded strip works great).
- Use floral wire and slide it into the base carefully (go slow so you don’t tear the center).
- Use a paper straw for a kid-friendly stem that won’t poke anyone at a birthday party.
Turn one lily into a whole event
- Make three lilies in different sizes for a centerpiece.
- Use white lilies as place cards (write names on the petals in tiny letters).
- Make a “thank you” bouquet that costs $0.37 and looks like you tried very hard (because you did).
Quick FAQ: Origami Lily Instructions for Beginners
How long does it take to fold an origami lily?
The first one might take 10–20 minutes, mostly because you’ll pause to check alignment. After a few, you’ll move faster and your creases will get cleaner.
Can I use printer paper?
You can, but it’s thicker and less cooperative. If you do use printer paper, start with a smaller lily only if your folds are already sharp.
Otherwise, use lightweight origami paper for a smoother experience (and fewer rage-folds).
What size paper is best?
A 6-inch (15 cm) square is a popular, comfortable size for most traditional origami flower models. Smaller paper makes tiny, cute liliesbut demands more precision.
Why do my petals look flat?
Shaping is the secret sauce. Open the bloom wider, curl the petals outward, and vary the curl slightly so it looks organic instead of like a perfectly folded snack wrapper.
Extra : Real-World Folding “Experiences” That Make You Better (Fast)
Folding an origami lily is one of those crafts where the instructions are only half the storythe other half is what you learn through the small, predictable moments
that happen while you’re making it. Most beginners share the same mini-journey, and knowing what’s normal can make the process way more enjoyable.
First, there’s the “this is just a square… how is this going to be a flower?” phase. That’s completely normal. The early steps are all structure:
creases, symmetry, and set-up. It can feel like you’re doing paperwork for your paper. But the payoff is realwhen you reach the collapse into the square base,
it suddenly feels like the model wakes up. People often describe that collapse as the moment they “get” origami: the paper stops being flat material and starts acting
like a designed object.
Next comes the crease confidence lesson. Almost everyone’s first lily is a little soft around the edges because the creases weren’t firm enough.
Then they try a second lily and naturally press more deliberatelyand the difference is dramatic. Clean creases make every later fold easier, especially the petal fold.
A common experience is realizing that origami isn’t about strength; it’s about clarity. When the creases are clear, the paper practically tells you where it wants to go.
Then there’s the petal fold panic. This is the “Did I just ruin it?” moment, usually followed by “Wait… it worked?” The petal fold involves opening layers
and collapsing them into a longer shape, and it feels counterintuitive at first. Many folders find it helps to pause and check that the edges still line up with the center
before pressing flat. One practical trick people discover is to use two fingers to “guide” the collapse along the crease lines, instead of flattening everything at once.
That small change reduces crumples and keeps the lily looking sharp.
After a couple of lilies, many people start experimenting without meaning to. They’ll fold the tips down a little more, or open the bloom wider, or curl one petal more than
the others. This is a great sign: it means you’re moving from “following directions” to “shaping a result.” Origami lilies are perfect for this because the final look is
heavily influenced by how you finish the flower. Two lilies folded from the same paper can look totally different depending on petal curl and bloom openness.
Finally, there’s the surprisingly satisfying experience of making a bouquet. The first lily is a project. The third lily is a vibe. By the time you make five,
you start noticing patterns: which folds you rush, where you misalign, and what steps deserve more attention. People often find that folding a set (even just three lilies)
is the fastest way to improve, because repetition turns confusing steps into muscle memory. And as a bonus, a small bouquet makes an inexpensive gift that looks thoughtful,
intentional, andlet’s be honestway more impressive than it has any right to be.
Conclusion: Your Lily Is DoneNow Make It Yours
Once you know how to fold an origami lily, you’ve unlocked a classic paper flower that works for gifts, décor, classroom crafts, and relaxing “hands-busy” breaks.
Keep your folds aligned, crease with intention, and spend an extra minute shaping the petalsbecause the final shaping is what turns “folded paper” into “wait, you made that?”
If you want a fun next step, try making lilies in different sizes, experimenting with duo paper, or pairing them with simple folded stems for a full bouquet.
The best part? Your new flowers won’t die on you. They’ll just sit there looking pretty and quietly boosting your confidence.