Table of Contents >> Show >> Hide
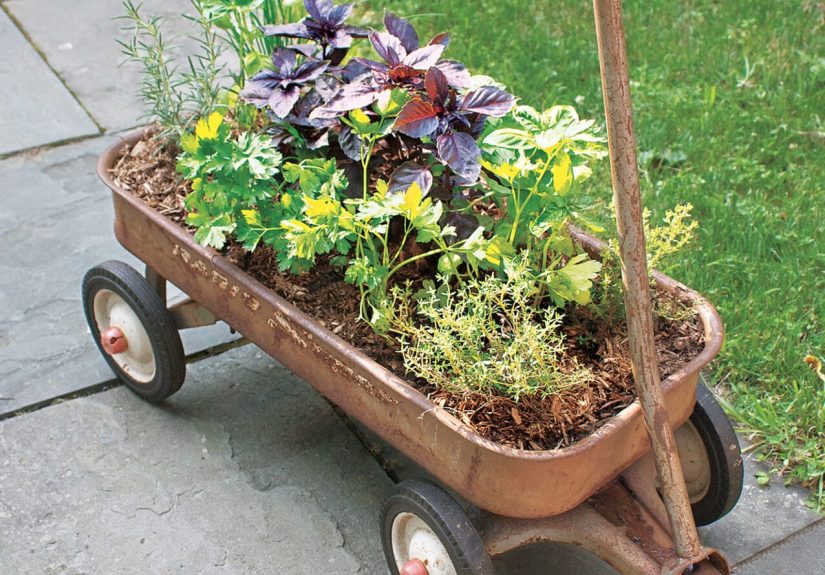
- Turn an Old Wagon Into the Cutest Herb Garden on the Block
- Why Use a Wagon as an Herb Planter?
- Best Herbs for a Wagon Planter
- Materials You Will Need
- Step 1: Choose the Right Wagon
- Step 2: Clean and Prep the Wagon
- Step 3: Add Drainage Holes
- Step 4: Line the Bottom Without Blocking Drainage
- Step 5: Fill With the Right Potting Mix
- Step 6: Plan Your Herb Layout
- Step 7: Plant the Herbs
- Step 8: Place the Wagon in the Right Spot
- Step 9: Water Wisely
- Step 10: Feed Lightly
- How to Harvest Herbs From a Wagon Planter
- Design Ideas for a Beautiful Wagon Herb Planter
- Common Mistakes to Avoid
- Seasonal Care Tips
- Experience Notes: What Actually Happens When You Make a Wagon Herb Planter
- Conclusion
- SEO Tags
Note: This guide is written as publish-ready HTML body content for a web article. It focuses on a practical, beginner-friendly DIY herb planter project using a repurposed wagon, real container gardening principles, and easy care tips for healthy culinary herbs.
Turn an Old Wagon Into the Cutest Herb Garden on the Block
If you have an old wagon sitting in the garage, shed, or behind a stack of things you swear you will “organize next weekend,” congratulations: you may already own the beginning of a charming, mobile herb garden. A wagon herb planter is one of those rare DIY projects that checks every box. It is useful, affordable, adorable, and just quirky enough to make visitors say, “Wait, is that basil growing out of a wagon?” Yes. Yes, it is.
Learning how to make an herb planter from a wagon is a smart project for small patios, balconies, porches, backyard corners, and even sunny kitchen-side outdoor spaces. Unlike a traditional raised bed, a wagon planter can be moved to follow the sun, rolled away during harsh weather, and styled to match your outdoor decor. It also gives new life to an item that might otherwise rust, crack, or become a spider condominium.
The best part? You do not need to be a master carpenter, landscape designer, or person who owns seventeen mysterious drill bits. With a basic wagon, drainage holes, quality potting mix, and a handful of herbs, you can create a container herb garden that produces fresh flavor all season long.
Why Use a Wagon as an Herb Planter?
A wagon works beautifully as a planter because it has built-in character and mobility. Most herb gardens are stationary, but a wagon gives you the freedom to move your plants where they perform best. If your basil wants more morning sun, roll it over. If a storm is coming, move the wagon under cover. If you are hosting a backyard dinner, park your fresh herbs right next to the grill and pretend you planned your whole life this well.
Wagon planters are also excellent for renters and small-space gardeners. You do not have to dig up a yard, build a permanent bed, or ask a landlord if you can “slightly transform the patio into a farm.” The entire garden stays contained. That makes it ideal for apartments, townhomes, decks, and urban backyards.
Another benefit is accessibility. A wagon planter raises herbs slightly above ground level, making harvesting easier than bending down to a traditional garden bed. If you use a taller decorative cart or add a platform inside the wagon, you can make the planter even more comfortable to reach.
Best Herbs for a Wagon Planter
Most culinary herbs grow well in containers as long as they receive enough light, drainage, and room for their roots. A wagon planter is especially useful for herbs because you can group plants with similar needs together.
Great herb choices for beginners
Basil is a warm-weather favorite that loves sunshine and regular harvesting. It is perfect for pesto, pasta, salads, sandwiches, and making you feel like a person who casually says “fresh basil” in conversation.
Parsley is easygoing and useful in soups, sauces, salads, and roasted vegetables. Flat-leaf parsley has a bold flavor, while curly parsley adds decorative texture.
Chives grow in tidy clumps and offer a mild onion flavor. They are excellent for eggs, potatoes, dips, and baked dishes.
Thyme is compact, fragrant, and great for smaller wagon planters. It prefers excellent drainage and works well with rosemary, oregano, and sage.
Oregano brings strong flavor to pizza, marinades, grilled meats, and tomato-based recipes. It can spread, so give it room or keep it in a separate pot within the wagon.
Rosemary likes sun, airflow, and well-drained soil. It can become woody and larger over time, so plant it near a wagon corner where it will not crowd smaller herbs.
Mint is delicious but mischievous. It spreads aggressively, so the safest approach is to keep mint in its own small pot and nest that pot inside the wagon planter. Otherwise, mint may attempt a hostile takeover of your entire herb neighborhood.
Materials You Will Need
Before starting, gather everything in one place. This prevents the classic DIY problem of discovering halfway through that your drill battery is dead, your gloves are missing, and your wagon is still full of beach toys from 2018.
- One old metal, plastic, or wooden wagon
- Power drill with a bit suitable for the wagon material
- Work gloves and safety glasses
- Landscape fabric, fine mesh, or a piece of window screen
- High-quality potting mix, not heavy garden soil
- Compost or slow-release organic fertilizer
- Herb seedlings or seeds
- Small stones or pot feet to slightly elevate the wagon if needed
- Optional: exterior paint, rust-resistant primer, wood sealer, plant labels, and decorative handles
Step 1: Choose the Right Wagon
The best wagon for an herb planter is sturdy, shallow to medium-depth, and easy to move. A classic red metal wagon looks charming, but plastic and wooden wagons can also work. The wagon does not have to be perfect. A few dents or scratches add character. However, avoid wagons with peeling lead-based paint, sharp rusted edges, or structural damage that makes them unsafe to handle.
If the wagon is very deep, you do not need to fill the entire thing with potting mix. Herbs generally prefer good drainage and moderate root depth, so you can create a false bottom with upside-down nursery pots, lightweight filler, or a fitted platform. Just make sure water can still drain freely.
Also consider where the wagon will live. A metal wagon can heat up quickly in intense sun, especially in hot climates. If your summers are scorching, place the wagon where it gets morning sun and light afternoon shade, or choose heat-tolerant herbs such as rosemary, thyme, oregano, and sage.
Step 2: Clean and Prep the Wagon
Wash the wagon thoroughly with mild soap and water. Remove old dirt, grease, leaves, and anything that looks like it once had plans to become a science experiment. Let the wagon dry completely before drilling or painting.
For metal wagons, inspect for rust. Light surface rust can be sanded smooth and covered with rust-resistant primer and exterior paint. For wooden wagons, check for soft spots or rot. Sand rough edges and apply an outdoor-safe sealer if needed. For plastic wagons, make sure the bottom is strong enough to hold moist potting mix without sagging.
If you plan to paint the wagon, do it before planting. Choose exterior paint designed for the wagon material. Bright red, sage green, white, navy, or matte black can all look great, depending on your garden style. Let paint cure fully before adding soil and plants.
Step 3: Add Drainage Holes
Drainage is the difference between a happy herb planter and a swamp with parsley. Herbs need moisture, but they do not want their roots sitting in water. Without drainage holes, potting mix can become soggy, oxygen disappears from the root zone, and plants may decline quickly.
Turn the wagon over or tilt it carefully. Drill several drainage holes across the lowest points of the wagon bed. For a small wagon, six to eight holes may be enough. For a larger wagon, add more. Space the holes evenly so water can escape from different areas instead of pooling in one sad little corner.
If the wagon has a flat bottom, drill holes throughout the base. If it has ridges or channels, place holes where water naturally collects. After drilling, smooth sharp edges with sandpaper or a file. This is especially important for metal wagons.
Step 4: Line the Bottom Without Blocking Drainage
Place landscape fabric, fine mesh, or a piece of old window screen over the drainage holes. This helps keep potting mix inside the wagon while still allowing water to pass through. Do not use a solid plastic liner unless you cut drainage holes through it. A sealed liner may protect the wagon, but it can also trap water and create root problems.
Some gardeners add gravel to the bottom of containers, but gravel does not replace drainage holes. The most important thing is that water can actually leave the planter. A thin layer of mesh or fabric is usually enough to prevent soil loss without turning the wagon into a miniature pond.
Step 5: Fill With the Right Potting Mix
Use a quality potting mix made for containers. Do not fill the wagon with dense backyard soil. Garden soil can compact in containers, drain poorly, and become heavy enough to make the wagon difficult to move. A good potting mix is lighter, drains better, and gives herb roots the air pockets they need.
For Mediterranean herbs such as rosemary, thyme, oregano, sage, and lavender, consider mixing in a little extra perlite or coarse material to improve drainage. For herbs that like more consistent moisture, such as basil, parsley, cilantro, and chives, a standard all-purpose potting mix works well.
Fill the wagon until the soil surface sits about one to two inches below the rim. This gap gives you room to water without sending potting mix over the sides like a tiny landslide.
Step 6: Plan Your Herb Layout
Before planting, place the herbs on top of the soil in their nursery pots and test the arrangement. Think about height, spread, sunlight needs, and harvesting convenience.
Put taller herbs such as rosemary, dill, or basil toward the back or center, depending on how the wagon will be viewed. Place trailing or low-growing herbs such as thyme and oregano near the edges. Keep aggressive growers, especially mint, in their own pot. If you want a neat look, use plant labels. If you prefer a cottage-garden look, mix textures and let the plants spill naturally over the sides.
Try not to overcrowd the wagon. Small herb seedlings may look lonely at first, but they grow fast in warm weather. Crowded herbs compete for water and nutrients, and poor airflow can encourage disease. Give each plant enough space to mature.
Step 7: Plant the Herbs
Gently remove each herb from its nursery pot. If the roots are circling tightly, loosen them with your fingers. Dig a hole slightly larger than the root ball, set the plant in place, and fill around it with potting mix. Keep the plant at the same depth it was growing in its original container.
Press the soil lightly around each plant, but do not pack it down aggressively. Roots need air as well as moisture. After planting, water thoroughly until water drains from the bottom of the wagon. This settles the soil around the roots and gives the plants a strong start.
Step 8: Place the Wagon in the Right Spot
Most culinary herbs need plenty of sunlight. A location with six or more hours of direct sun per day is ideal for many favorites, including basil, rosemary, thyme, oregano, and sage. Parsley, cilantro, mint, and chives can tolerate a little less light, especially in hot climates.
The beauty of a wagon planter is that you can experiment. Watch your plants for a week or two. If basil looks stretched and pale, it may need more sun. If cilantro bolts quickly in heat, try moving the wagon to a spot with afternoon shade. If the soil dries out too fast, shift the planter away from reflected heat near concrete or brick walls.
Step 9: Water Wisely
Container herbs dry out faster than herbs planted in the ground. Check moisture by sticking your finger about an inch into the potting mix. If it feels dry at that depth, water. If it still feels damp, wait.
Water slowly and deeply so moisture reaches the root zone. Avoid quick splashes that only wet the surface. In hot, windy weather, a wagon planter may need water daily. In cool or rainy weather, it may need much less. The goal is evenly moist soil for herbs like basil and parsley, and slightly drier conditions for woody herbs like rosemary and thyme.
Because the wagon has wheels, you can also move it during heavy rain. That is a major advantage. Herbs appreciate water, but they do not appreciate being left outside during a three-day downpour like they are auditioning for a swamp documentary.
Step 10: Feed Lightly
Herbs usually do not need heavy fertilizing. Too much fertilizer can produce lots of soft leafy growth with weaker flavor. Mix a small amount of compost or slow-release organic fertilizer into the potting mix at planting time, then feed lightly during the growing season if plants seem pale or slow.
Always follow product directions. More fertilizer does not mean more flavor. It often means stressed plants, burned roots, or herbs that grow like they are training for a jungle competition.
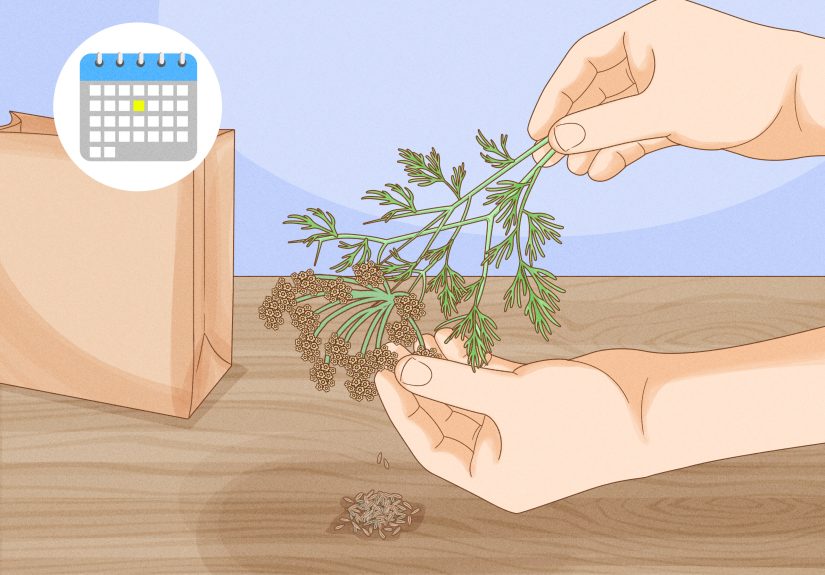
How to Harvest Herbs From a Wagon Planter
Regular harvesting keeps many herbs compact and productive. For basil, pinch leaves just above a pair of leaf nodes to encourage branching. For parsley and chives, harvest outer stems first. For thyme, oregano, and rosemary, snip small sprigs as needed without removing more than one-third of the plant at a time.
Harvest in the morning after dew dries but before the heat of the day if possible. This is when many herbs have strong aroma and fresh texture. Use clean scissors or garden snips to avoid tearing stems.
If herbs begin to flower, their flavor may change. Basil, cilantro, and parsley often benefit from regular trimming to delay flowering. However, herb flowers can attract pollinators, so you may choose to let some blooms remain if your wagon planter sits outdoors near other garden plants.
Design Ideas for a Beautiful Wagon Herb Planter
A wagon herb garden can be practical and decorative at the same time. Paint the wagon to match your patio furniture, add copper plant labels, or attach a small chalkboard sign that says “Fresh Herbs” or “Tiny Flavor Farm.” Use trailing thyme near the edge for a soft look. Mix purple basil with green parsley for contrast. Add edible flowers such as nasturtiums or calendula if the wagon has enough room and sunlight.
For a rustic farmhouse style, leave a weathered wooden wagon natural and pair it with terracotta pots. For a clean modern look, paint a metal wagon matte black and use simple white labels. For a playful family garden, let kids paint wooden markers for basil, mint, parsley, and chives.
You can also theme the planter by cooking style. A pizza wagon might include basil, oregano, thyme, and parsley. A tea wagon could feature mint, lemon balm, chamomile, and lavender. A grilling wagon might include rosemary, sage, thyme, and chives.
Common Mistakes to Avoid
Skipping drainage holes
This is the number one mistake. Even a beautiful wagon planter will fail if water cannot escape. Always drill drainage holes or use separate pots inside the wagon that can drain properly.
Using heavy garden soil
Garden soil may seem convenient, but it often becomes compacted in containers. Use potting mix for better drainage, lighter weight, and healthier roots.
Planting mint directly with everything else
Mint is wonderful in drinks, desserts, and sauces, but it grows aggressively. Keep it in its own pot unless you want it to become the landlord of the entire wagon.
Overcrowding the planter
Give herbs room to grow. Crowding reduces airflow, increases competition, and makes harvesting messy.
Forgetting the wagon gets heavy
Moist potting mix adds weight. Make sure the wagon wheels and handle are strong enough before filling it completely. Test movement carefully after planting.
Seasonal Care Tips
In spring, plant after the danger of frost has passed for tender herbs like basil. Hardy herbs such as chives, thyme, oregano, and parsley can tolerate cooler conditions, but young plants still appreciate protection from sudden cold.
In summer, monitor watering closely. Containers heat up and dry out quickly. Move the wagon into partial shade during extreme heat if herbs wilt even with proper watering.
In fall, harvest generously before frost. You can dry herbs, freeze chopped herbs in ice cube trays with water or olive oil, or bring selected potted herbs indoors. If you nested individual pots inside the wagon, moving herbs indoors is much easier.
In winter, empty and clean the wagon if you live in a cold climate. Store it under cover to prevent rust, cracking, or weather damage. If the wagon is wooden, keeping it dry during winter will extend its life.
Experience Notes: What Actually Happens When You Make a Wagon Herb Planter
The first thing you learn when making an herb planter from a wagon is that the project feels easier than it looks, but the details matter. The wagon itself brings instant charm, so even a simple planting job looks intentional. A scratched-up old wagon that seemed ready for the donation pile can suddenly look like something from a garden magazine, especially once basil, thyme, and chives start spilling over the edges.
One useful experience is to test the wagon’s movement before filling it all the way. Dry potting mix seems light, but after watering, the planter becomes much heavier. If the wheels wobble when the wagon is empty, they will not magically become stronger after you add soil, plants, and water. Tighten bolts, check the handle, and roll the wagon over the surface where it will actually live. A wagon that moves beautifully on a garage floor may complain loudly on gravel.
Another lesson is that drainage is not optional. Many beginners worry about drilling into a cute wagon because they do not want to “ruin it.” But the real way to ruin it is to create a waterlogged herb soup. Drill the holes. Add mesh. Let the water leave. Your herbs will reward you by not fainting dramatically after the first rainstorm.
Plant selection also teaches patience. At first, you may want to buy every herb at the garden center because they all smell amazing and suddenly you are convinced you are one herb away from becoming a professional chef. Resist the urge. A wagon has limited space. Start with five to seven herbs you truly use. Basil, parsley, chives, thyme, rosemary, oregano, and mint-in-a-pot make a strong beginner lineup. If you cook often, you will quickly learn which herbs deserve more room next season.
Watering becomes a small daily ritual. In warm weather, you may find yourself stepping outside in the morning with coffee in one hand and a watering can in the other, inspecting the wagon like a tiny green kingdom. This is when the project becomes more than decoration. You notice which plants grow fast, which ones need trimming, and which herbs smell strongest after a sunny day. The planter becomes part of your routine.
Harvesting is where the wagon planter really shines. Instead of buying a plastic clamshell of herbs, using two sprigs, and discovering the rest has turned into refrigerator sadness, you can snip exactly what you need. A handful of basil for pasta, chives for scrambled eggs, thyme for roasted potatoes, mint for iced teafresh herbs make basic meals feel upgraded without much effort.
The biggest surprise is how much personality the wagon adds to the garden. A regular pot is useful, but a wagon tells a story. It feels nostalgic, creative, and slightly funny in the best way. It invites conversation. It also makes gardening feel approachable. You do not need a perfect backyard or expensive raised beds. You need a sunny spot, a wagon, drainage, good potting mix, and a willingness to get a little dirt under your fingernails.
Conclusion
Making an herb planter from a wagon is a simple DIY garden project with a big payoff. It transforms an unused item into a mobile, charming, and productive container garden. With proper drainage, quality potting mix, smart herb selection, and regular harvesting, your wagon planter can provide fresh flavor for months.
Whether you place it on a porch, patio, balcony, or backyard path, a wagon herb planter adds beauty and usefulness in equal measure. It is practical enough for everyday cooking and cute enough to make your neighbors wonder why their planters do not have wheels. Start small, plant what you love to eat, and let your little rolling herb garden become one of the most cheerful projects in your outdoor space.