Table of Contents >> Show >> Hide
- Why Scratch Hot Chocolate Beats a Packet (Every Single Time)
- Ingredients That Matter (and the Ones That Don’t)
- The Core Recipe: Better-Than-Mix Hot Chocolate (2 Big Mugs)
- Technique Upgrades That Make It Taste “Fancy”
- Common Problems (and How to Fix Them Without Crying)
- Flavor Variations That Still Taste Like Real Chocolate (Not a Candle)
- Make-Your-Own “Mix” (That’s Still From Scratch)
- Serving Ideas That Make People Think You Tried Harder Than You Did
- Experience Section: 10 Real-Life Hot Chocolate Lessons (So You Don’t Have to Learn Them the Hard Way)
- Conclusion
Instant hot chocolate packets have their place. Like training wheels. Or that one “emergency” tie in your glove box.
But if you’ve ever taken a sip and thought, Why does this taste like sweet brown sadness?good news:
making hot chocolate from scratch is easier than people make it sound, and the payoff is wildly unfair to powdered mixes.
This guide shows you how to build a mug that’s deeply chocolatey, silky, and customizablewhether you want
a cozy weekday cocoa or a “cancel my plans” level of decadent drinking chocolate.
We’ll cover ingredients, technique, troubleshooting, and a few variations that will make you feel like you own a tiny café.
Why Scratch Hot Chocolate Beats a Packet (Every Single Time)
Most store-bought mixes lean hard on sugar, dairy powders, flavorings, and stabilizers. They’re designed for convenience,
not greatness. Scratch hot chocolate is different because you control:
- Chocolate intensity (dark and bold vs. sweet and mellow)
- Texture (thin and sippable vs. thick, spoon-coating “European” style)
- Sweetness (balanced instead of candy-sweet)
- Flavor (vanilla, cinnamon, espresso, orange zest, maltchoose your adventure)
And here’s the real flex: you can make it smoother than most cafés by using one simple techniquecreating a cocoa paste
(or “blooming” your cocoa) before adding the rest of the liquid.
Ingredients That Matter (and the Ones That Don’t)
You don’t need a pantry that looks like a chocolate laboratory. You need a few solid basics, and one decent whisk.
Here’s what actually moves the needle:
1) Cocoa Powder: Natural vs. Dutch-Process
Either can work for homemade hot chocolate. Dutch-process cocoa tends to taste smoother and look darker.
Natural cocoa can be a bit sharper and brighter. Since we’re not baking (no leavening drama here),
choose what you likeor keep both and pretend it’s a “tasting flight.”
2) Real Chocolate: The Shortcut to Richness
If you want hot chocolate that tastes like, well, chocolateadd actual chocolate.
A bar around 60% cacao is a sweet spot: deep flavor, not overly bitter, and it melts smoothly.
Prefer creamier and sweeter? Use some milk chocolate.
Want grown-up intensity? Go darker and reduce the sugar.
3) Milk (and Friends)
Whole milk gives the best everyday balance. Want it more luxurious? Replace part of the milk with
half-and-half or a splash of heavy cream.
Dairy-free? Oat milk tends to be the creamiest substitute, but almond, soy, and coconut can work toojust expect flavor differences.
4) A Pinch of Salt (Yes, Really)
Salt doesn’t make it salty. It makes it taste more like chocolate instead of sweet cocoa-flavored milk.
Think of it as turning up the contrast on your TV.
5) Optional Thickener: Cornstarch
If you want a thicker, silkier mugespecially “Italian-style” hot chocolateuse a little cornstarch.
It helps suspend cocoa solids and gives that plush, velvety body.
You only need a small amount to feel like you upgraded to first class.
The Core Recipe: Better-Than-Mix Hot Chocolate (2 Big Mugs)
This is the “goldilocks” version: rich, smooth, and chocolate-forward, without requiring a second mortgage in couverture chocolate.
You can scale it up easily.
Ingredients
- 2 cups (480 ml) whole milk
- 1/2 cup (120 ml) half-and-half or heavy cream (optional, but extremely persuasive)
- 2 tablespoons unsweetened cocoa powder (natural or Dutch-process)
- 2 to 3 tablespoons sugar (granulated or light brown), to taste
- 3 to 4 ounces (85–115 g) semisweet or bittersweet chocolate, chopped (around 60% cacao is a great starting point)
- 1/8 teaspoon kosher salt (or a good pinch)
- 1/2 teaspoon vanilla extract
- Optional (for thicker texture): 1 teaspoon cornstarch
Step-by-Step Instructions
-
Make a cocoa paste (the anti-lump move).
In a small bowl (or right in the saucepan), whisk cocoa powder, sugar, salt, and (if using) cornstarch.
Add 2–3 tablespoons of the milk and whisk until smoothlike glossy chocolate paint. -
Warm the rest of the milk.
Add remaining milk (and half-and-half/cream if using) to the saucepan.
Heat over medium, whisking often, until steaming and just shy of a simmer. Don’t boil; boiling is how milk gets ideas about burning. -
Melt the chocolate.
Add chopped chocolate and whisk until fully melted and smooth.
Keep the heat gentle and stir all the way to the bottom of the pot. -
Finish like a pro.
Remove from heat and whisk in vanilla.
Taste and adjust sweetness (or add a pinch more salt if the chocolate tastes flat). -
Serve hot.
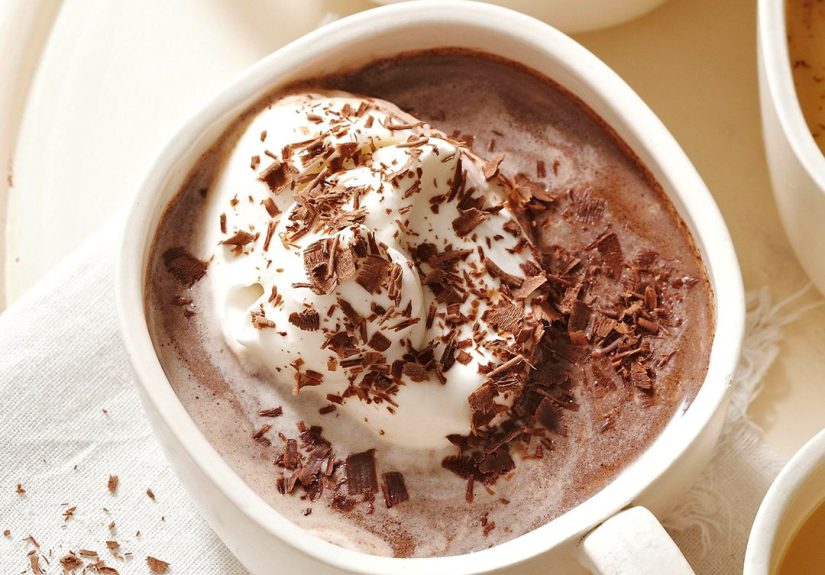
Pour into warm mugs. Top with whipped cream, marshmallows, chocolate shavings, or all threeno judgment.
Technique Upgrades That Make It Taste “Fancy”
Blooming Cocoa: The Flavor Booster You’re Allowed to Brag About
Blooming means mixing cocoa powder with a hot liquid to unlock more aroma and dissolve stubborn clumps.
Some recipes bloom cocoa in a small amount of hot water before adding milk and chocolate. Others build a cocoa paste first.
Either way, you get a deeper chocolate flavor and a smoother texturelike you used a secret ingredient, except the secret is “whisking.”
Froth for a Café Feel
If you want that airy, silky top layer, use:
- an immersion blender (10 seconds, carefully)
- a milk frother
- or vigorous whisking like you’re trying to win a tiny whisking Olympics
Don’t Boil It (Unless You Enjoy Scrubbing Pots)
Boiling can scorch milk, dull chocolate flavor, and create a skin on top that looks like it’s trying to escape.
Heat gently until steaming and barely simmering.
Common Problems (and How to Fix Them Without Crying)
“My cocoa is lumpy.”
Make a cocoa paste first (cocoa + sugar + a splash of milk). Cocoa powder repels liquid at first like it’s playing hard to get.
A paste solves the drama.
“It tastes watery.”
Add more chocolate (the most joyful fix), use some half-and-half/cream, or add a small amount of cornstarch for body.
Also: make sure you’re using enough cocoa and not a sad teaspoon trying to do the work of tablespoons.
“It tastes flat.”
Add a pinch of salt, a splash of vanilla, or a tiny bit of espresso powder.
Chocolate often needs contrast to taste more like itself.
“My melted chocolate got grainy.”
Chocolate can seize if overheated or shocked. Keep the heat low and add chocolate gradually.
If it gets grainy, whisk in more warm milk or cream little by littleoften you can bring the emulsion back.
Flavor Variations That Still Taste Like Real Chocolate (Not a Candle)
Mexican-Inspired Spiced Hot Chocolate
- Add 1/4 teaspoon cinnamon
- Add a tiny pinch of cayenne or chile powder
- Optional: orange zest for a bright twist
This one hits warm, spicy, and cozy. It’s like your hot chocolate put on a sweater and learned to dance.
“Italian-Style” Thick Hot Chocolate
Use the optional cornstarch (or increase to 2 teaspoons) and slightly increase chocolate.
Cook gently until it thickens enough to coat a spoon. Serve in a smaller cup because it’s basically dessert with a handle.
Malted Hot Chocolate
Add 1 to 2 tablespoons malted milk powder. It brings a nostalgic, toasted sweetness that makes your mug taste like a premium milkshake’s winter cousin.
Mocha Hot Chocolate
Add 1/4 teaspoon espresso powder or replace a small splash of milk with strong brewed coffee.
The goal isn’t “coffee-flavored cocoa”it’s “chocolate turned up to 11.”
Dairy-Free Hot Chocolate That’s Actually Creamy
Use oat milk for best body, plus real chocolate for richness. Consider adding a teaspoon of coconut cream or a small spoon of almond butter for extra silkiness.
Sweeten to taste and don’t skip the salt.
Make-Your-Own “Mix” (That’s Still From Scratch)
If you love the convenience of packets but hate the flavor, make a jar of your own.
Many great mixes combine cocoa powder, sugar, salt, and a little cornstarch for body.
Some versions add powdered milk so you can just add hot water, while others include finely ground chocolate for extra richness.
Quick Homemade Cocoa Mix (Makes About 12 Servings)
- 1 cup cocoa powder
- 1 cup sugar (or slightly less if you prefer darker chocolate flavor)
- 1 tablespoon cornstarch
- 1/2 teaspoon salt
- Optional: 1 to 2 tablespoons powdered vanilla (or add vanilla when you make a mug)
- Optional, richer: 4 to 6 ounces finely chopped/grated chocolate mixed in
To make one mug: whisk 2 to 3 tablespoons mix into 1 cup hot milk (or hot water if you included powdered milk in your mix).
Heat gently and whisk until smooth.
Serving Ideas That Make People Think You Tried Harder Than You Did
- Whipped cream + a pinch of flaky salt (sweet-salty magic)
- Marshmallows (classic, chaotic good)
- Chocolate shavings (easy elegance)
- A cinnamon stick (stirrer + aroma boost)
- Warm your mugs with hot water first so the drink stays hot longer
Experience Section: 10 Real-Life Hot Chocolate Lessons (So You Don’t Have to Learn Them the Hard Way)
After making hot chocolate from scratch more times than I’m willing to admit to a dentist, here are the lessons that actually stick.
Consider this the “field notes” portionhalf practical, half emotional support.
Lesson 1: Cocoa powder is a diva. If you dump cocoa straight into warm milk and expect it to behave,
it will punish you with floating clumps like tiny chocolate life rafts. The cocoa paste step looks fussy,
but it’s the difference between “silky café” and “campfire cocoa with debris.”
Lesson 2: Chocolate percentage matters more than brand hype. You don’t need a bar wrapped in gold leaf and poetic tragedy.
You need something you’d happily snack on. Around 60% cacao is forgiving: it melts smoothly, tastes rich,
and doesn’t demand that you balance bitterness like a sommelier.
Lesson 3: A pinch of salt is the quiet hero. The first time you add salt, you’ll worry you ruined it.
Then you’ll taste it and realize chocolate got louder, rounder, and more “finished.”
Salt isn’t a twist; it’s a seatbelt.
Lesson 4: “Just a splash of cream” is never just a splash. You start with one tablespoon of heavy cream,
because you’re being responsible. Then you taste it and think, What if I were slightly less responsible?
Suddenly you’re measuring half-and-half with the confidence of someone who owns a velvet robe.
Lesson 5: Cornstarch is for texture, not cheating. People hear “cornstarch” and think it’s a shortcut.
It’s not a shortcut; it’s a style. If you like thick European hot chocolate, cornstarch is how you get that plush body
without needing a full pound of chocolate per mug (unless that’s your brand, in which case I respect your hustle).
Lesson 6: Stir the bottom of the pot like it owes you money. Chocolate and cocoa love to hang out down there
where heat is strongest. If you only whisk the surface, the bottom can scorch and your whole batch tastes faintly like regret.
A steady, thorough whisk prevents the dreaded “burnt whisper” flavor.
Lesson 7: Vanilla goes in last. Vanilla is aromatic. High heat can mute it.
Add it after you turn off the heat so it smells like comfort instead of a faint memory of vanilla.
Lesson 8: Espresso powder is not about coffee. It’s about making chocolate taste more like chocolate.
If someone says, “Is there coffee in this?” you used too much. If they say, “Why is this so good?” you nailed it.
Lesson 9: Your toppings are part of the recipe. Whipped cream isn’t decoration; it’s a texture contrast
and a temperature buffer. Marshmallows aren’t childish; they’re structural engineering.
Even a dusting of cocoa on top changes the first sip.
Lesson 10: The best mug is the one you’ll actually make. Some nights you’ll do the full chopped-chocolate,
half-and-half, whisk-until-glossy ritual. Other nights you’ll use cocoa, sugar, milk, and a bar of whatever’s in the drawer.
Both are valid. The point is: once you learn the technique, you can “wing it” and still beat the packet by a mile.
Conclusion
Making hot chocolate from scratch isn’t complicatedit’s just a few smart steps that unlock better flavor and texture.
Start with a cocoa paste (goodbye, lumps), use real chocolate for depth, keep the heat gentle, and finish with salt and vanilla.
From there, you can customize endlessly: thicker, spicier, dairy-free, malted, mochayour mug, your rules.
Once you taste the real thing, powdered packets start to feel like they’re trying to impersonate chocolate… in a fake mustache.