Table of Contents >> Show >> Hide
- What counts as a “sandwich wrap” (and why it’s so easy to mess up)
- The Wrap Blueprint: a simple formula that always works
- Step-by-step: How to make and roll a sandwich wrap that stays together
- Step 1: Warm the wrap (yes, even if it’s “soft”)
- Step 2: Add the spread (but keep it off the edges)
- Step 3: Build a moisture barrier (the anti-soggy secret)
- Step 4: Place fillings in the right spot
- Step 5: Roll it burrito-style (the classic wrap fold)
- Step 6: Seal it (optional, but highly satisfying)
- How to cut, wrap, and pack it like a deli pro
- Recipe ideas: 10 sandwich wraps you can rotate all week
- 1) Chicken Caesar Crunch Wrap
- 2) Turkey Club Wrap (Lunch Counter Energy)
- 3) Italian Grinder-Style Chicken Salad Wrap
- 4) Hummus Veggie Wrap (The “I’m Trying” Wrap)
- 5) Buffalo Chicken Ranch Wrap
- 6) Tuna Pickle Wrap (Salty, Crunchy, Reliable)
- 7) Southwest Black Bean & Corn Wrap
- 8) Breakfast Burrito Wrap (Morning MVP)
- 9) Mediterranean Chicken Wrap
- 10) Peanut Butter Banana Crunch Wrap (Yes, it’s allowed)
- Troubleshooting: Fix the 7 most common wrap disasters
- of real-life wrap experiences (aka: how I stopped ruining lunch)
- Conclusion: A great wrap is built, not hoped for
A sandwich wrap is basically a portable peace treaty between “I want a sandwich” and “I do not want crumbs in my car.” Done right, it’s neat, sturdy, and makes you feel like you have your life together. Done wrong, it’s a tortilla-based confetti cannon that explodes the moment you take bite #2. Let’s aim for the first one.
This guide walks you through choosing the right wrap, building it so it doesn’t get soggy, and rolling it tight enough to survive a lunchbox commute. Then we’ll hit recipe ideas you can mix-and-match all week. Yes, there will be options for “I have five minutes” and “I accidentally bought a family-sized tub of hummus.”
What counts as a “sandwich wrap” (and why it’s so easy to mess up)
A sandwich wrap is any handheld meal where the outside layer (usually a tortilla or flatbread) encloses fillings the way bread wouldjust with fewer crumbs and more potential for structural failure.
Common wrap “shells” and when to use them
- Large flour tortillas (10-inch): the classic, easiest to roll, most forgiving.
- Whole wheat tortillas: similar rollability, often a bit sturdier.
- Flavored wraps (spinach, tomato basil): fun color; read labels if you’re picking for fiber/whole grains.
- Lavash: thinner and wider; great for tight rolls, pinwheel-style slices, and deli vibes.
- Pita: better for pockets than burrito-style rolling (unless you enjoy cracks and regrets).
- Lettuce wraps: crisp and fresh, but they’re not “pack it for later” friendly unless you plan carefully.
The biggest wrap myth: “Wraps are automatically healthier than sandwiches.” Sometimes they are, sometimes they’re a sneaky giant tortilla delivering bread-level calories plus a side of “why did I do this.” The base, size, and fillings decide the outcomeso we’ll build smarter, not sadder.
The Wrap Blueprint: a simple formula that always works
Think of wrap-making like architecture. You need a foundation, a moisture plan, and a way to keep the whole thing from sliding into chaos.
The 6-part wrap formula
- Wrap base (tortilla/lavash/flatbread)
- “Glue” spread (hummus, cream cheese, pesto, mayo, mashed avocado)
- Barrier layer (greens, cheese, deli meatsomething that blocks wet ingredients)
- Protein (chicken, turkey, beans, tofu, tuna, eggs)
- Crunch + bulk (cabbage, romaine, carrots, peppers, cucumberskept dry)
- Sauce (placed strategically so it flavors, not floods)
The “leave-a-border” rule (your wrap’s personal space)
Most wraps fail because fillings go edge-to-edge like they’re paying rent. Leave: 2 inches on the left and right, and a generous 3–4 inches at the top. That empty space is what turns “mess” into “masterpiece.”
Step-by-step: How to make and roll a sandwich wrap that stays together
Step 1: Warm the wrap (yes, even if it’s “soft”)
Cold tortillas crack and tear. Warm tortillas stretch. Your goal is “pliable,” not “crispy.”
- Skillet method: Heat a dry pan over medium. Warm the tortilla about 20–30 seconds per side.
- Microwave method: Stack tortillas under a lightly damp paper towel and heat briefly until flexible.
- Oven method (for a batch): Wrap a stack in foil and warm so they steam and stay soft.
Step 2: Add the spread (but keep it off the edges)
Spreads do two jobs: flavor and traction. A thin, even layer helps “grab” fillings so they don’t skate out the side. Leave that border uncovered so the tortilla can seal against itself.
Step 3: Build a moisture barrier (the anti-soggy secret)
Soggy wraps happen when wet ingredients sit directly on the tortilla for hours. The fix is simple: put a dry-ish layer between tortilla and wet stuff.
- Best barrier layers: romaine/spinach, shredded cabbage, sliced cheese, deli meat, or a thin egg omelet.
- Wet ingredients strategy: keep tomatoes, cucumbers, pickles, slaws, and dressings closer to the center.
- Extra credit: pat watery veggies dry; drain canned ingredients well.
Step 4: Place fillings in the right spot
Put fillings in a tidy line across the lower third of the tortilla (closer to you), not dead-center like a chaotic salad dump. You want a compact “log,” not a filling galaxy.
Step 5: Roll it burrito-style (the classic wrap fold)
- Fold in the sides over the filling (left and right), like you’re giving it a little blanket tuck.
- Fold the bottom up over the filling, pulling it snug to compress the contents.
- Roll forward tightly, keeping side flaps tucked in as you go.
- Finish seam-side down and let it rest 30–60 seconds so the tortilla “sets.”
Step 6: Seal it (optional, but highly satisfying)
If you want a wrap that laughs in the face of gravity, place it seam-side down in a dry skillet for 30–60 seconds. That little toast helps seal the seam and adds a slight crunch. It’s like giving your wrap a seatbelt.
How to cut, wrap, and pack it like a deli pro
The diagonal slice: not just for Instagram
Cutting on a diagonal gives a larger surface area, shows off layers, and makes the wrap easier to bite without pushing fillings out the back. Use a sharp knife and a confident motion (hesitation is how tomatoes escape).
Wrap the wrap (for travel, meal prep, and dignity)
If you’re packing it, wrap it snugly in parchment paper (or foil if it’s warm). A good wrap job does two things: it keeps the roll tight, and it helps you eat cleanly by unwrapping only as you go.
Meal prep rules: how to avoid the dreaded “lunchbox sponge”
- Cool hot ingredients before rolling. Steam trapped inside = soggy tortilla.
- Keep dressings thick (or pack them on the side) if you’re storing overnight.
- Choose sturdier greens like romaine or cabbage over delicate spring mix.
- Store seam-side down so the wrap holds its shape.
- Don’t overfilla wrap should close easily without wrestling.
Recipe ideas: 10 sandwich wraps you can rotate all week
Each idea below follows the wrap blueprint. Mix and match, swap proteins, and use whatever’s in your fridge that’s quietly begging to be eaten.
1) Chicken Caesar Crunch Wrap
What you need: tortilla, Caesar dressing, romaine, cooked chicken, Parmesan, crushed croutons (or toasted breadcrumbs).
Build it: Light dressing smear, romaine barrier, chicken + Parmesan, sprinkle crunch, roll tight, optional skillet-seal.
2) Turkey Club Wrap (Lunch Counter Energy)
What you need: mayo or avocado, romaine, turkey, bacon, tomato (patted dry), cheddar or Swiss.
Build it: Spread, greens, turkey + cheese, bacon, tomato in the center line, roll burrito-style.
3) Italian Grinder-Style Chicken Salad Wrap
What you need: rotisserie chicken, chopped deli meats (ham/salami), provolone, banana peppers, a little creamy dressing, shredded lettuce.
Build it: Provolone down first (barrier + flavor), add lettuce, then the chicken salad mixture, roll and seal.
4) Hummus Veggie Wrap (The “I’m Trying” Wrap)
What you need: hummus, spinach, shredded carrots, cucumber (dry), bell pepper strips, feta, olives (optional).
Build it: Hummus + spinach barrier, pile veggies in a tight line, sprinkle feta, roll. Add lemon zest if you want it to pop.
5) Buffalo Chicken Ranch Wrap
What you need: chicken tossed with buffalo sauce, ranch (or blue cheese dressing), romaine, shredded carrots, celery slices.
Build it: Ranch thin layer, romaine barrier, buffalo chicken in center, crunch veg, roll tight. Skillet-seal makes it elite.
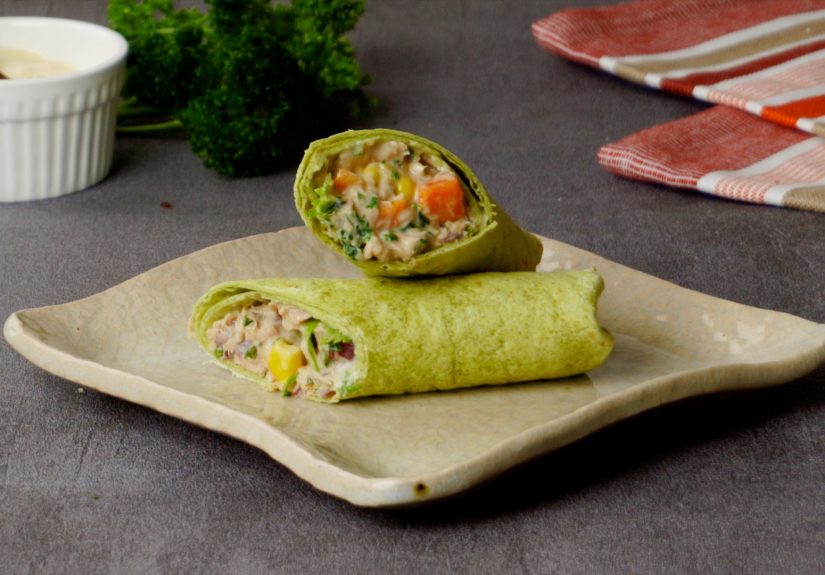
6) Tuna Pickle Wrap (Salty, Crunchy, Reliable)
What you need: tuna salad (Greek yogurt or mayo), celery, dill pickles (well-drained), lettuce, black pepper.
Build it: Lettuce barrier, tuna line, celery + pickles centered, roll and wrap in parchment for best hold.
7) Southwest Black Bean & Corn Wrap
What you need: black beans (drained), corn, shredded lettuce, pepper jack, salsa (thick), chipotle yogurt or sour cream.
Build it: Cheese barrier, lettuce, beans/corn line, dot thick salsa, roll. Optional: toast seam-side down.
8) Breakfast Burrito Wrap (Morning MVP)
What you need: scrambled eggs, shredded hash browns, cheddar, salsa, optional sausage or black beans.
Build it: Cheese down first, eggs + hash browns, salsa centered, roll tight. Skillet-seal is basically mandatory happiness.
9) Mediterranean Chicken Wrap
What you need: tzatziki, grilled chicken, cucumber (dry), tomato (dry), red onion, spinach, feta.
Build it: Thin tzatziki layer, spinach barrier, chicken, veggies, feta, roll. Add a squeeze of lemon right before eating.
10) Peanut Butter Banana Crunch Wrap (Yes, it’s allowed)
What you need: tortilla, peanut butter, banana, granola, honey (optional), pinch of salt.
Build it: Peanut butter spread, banana slices, granola line, roll tight. Quick skillet toast makes it dessert-adjacent magic.
Troubleshooting: Fix the 7 most common wrap disasters
Disaster #1: It tears while rolling
- Warm the tortilla more (pliable beats stubborn).
- Use a larger tortilla (10-inch is your friend).
- Stop overfilling. Your tortilla is not a suitcase with an expandable zipper.
Disaster #2: It gets soggy by lunchtime
- Use a barrier layer (greens/cheese) between tortilla and wet fillings.
- Keep dressing thick or pack it separately.
- Pat tomatoes/cucumbers dry and drain canned items well.
Disaster #3: The fillings slide out the back
- Build in a compact line, not a wide pile.
- Roll tighter and rest seam-side down.
- Wrap in parchment to keep compression while it travels.
Disaster #4: It tastes bland
- Add acid (lemon, pickles, banana peppers, vinegar-based slaw).
- Add texture (crunchy veg, toasted nuts, seeds, croutons).
- Season the filling, not just the outside. A pinch of salt changes everything.
Disaster #5: The tortilla feels chewy and sad
- Lightly toast the wrap in a skillet after rolling.
- Use a fresher tortilla; older ones dry out and crack.
Disaster #6: It won’t stay closed
- Use a “glue” spread (hummus/cream cheese) and keep it near the seam area.
- Skillet-seal the seam side down for 30–60 seconds.
Disaster #7: It’s too thick to bite
- Flatten bulky ingredients (slice chicken thin, shred lettuce, crush crunchy add-ins).
- Use fewer “big” items and more shredded/chopped components.
of real-life wrap experiences (aka: how I stopped ruining lunch)
The first wrap I ever tried to “meal prep” was a confident disaster. I treated the tortilla like bread: spread sauce everywhere, dumped fillings across the whole surface, rolled it up like a sleeping bag, and congratulated myself on being a forward-thinking adult. The next day, I unwrapped a tortilla that had absorbed dressing like a paper towel. When I took a bite, half the filling performed a synchronized dive into my lap. It wasn’t a lunch. It was a lesson.
Here’s what fixed it: warming the tortilla and respecting the border. The moment I started heating tortillas for even 20–30 seconds, rolling got easier, tearing stopped, and everything felt less like a craft project. The border rule was even bigger. Leaving a couple inches on the sides and a big gap at the top felt “wrong” at firstlike I was being stingy with ingredients. But it turned out that empty space is what makes the wrap close cleanly. It’s the difference between a tidy cylinder and a tortilla wearing its fillings like a hat.
My second breakthrough was accepting that wet ingredients need a chaperone. Tomatoes, cucumbers, pickles, slawsthese are great, but they can’t be trusted alone with a tortilla for six hours. Once I started putting romaine or cheese down first, the tortilla stopped turning gummy. I also learned to stop adding dressing like I’m trying to win an argument with a salad. A little goes a long way in a wrap because everything is pressed together. If you need more, pack it on the side and dip. Dipping feels fancy anyway. It’s basically “wrap fondue.”
Then came the parchment paper era. Wrapping the wrap sounds silly until you do it once and realize it’s how deli sandwiches stay intact. That little paper jacket adds gentle compression, keeps the wrap tight, and gives you a clean way to eat: unwrap a bit, take a bite, repeat. It’s like a burrito with manners. For road trips, it’s a game-changer. For lunches, it’s the difference between “I’m doing great” and “why is there lettuce in my backpack pocket?”
Finally, the skillet-seal. The first time I toasted a rolled wrap seam-side down, I felt like I’d unlocked a hidden level. The seam actually stayed shut. The outside got lightly crisp. The fillings warmed just enough to taste cohesive without turning into a steamy mess. If you’ve ever wished your wrap had the confidence of a grilled sandwich, this is the move. Now, when a wrap goes wrong, it’s usually because I ignored my own rules: I overfilled, skipped the barrier, or tried to roll a cold tortilla straight from the fridge like some kind of tortilla daredevil. The wrap always wins.
Conclusion: A great wrap is built, not hoped for
If you remember nothing else, remember this: warm tortilla, leave a border, build a moisture barrier, roll tight, and pack it like it’s going on a tiny adventure. Once you’ve got the technique, you can turn leftovers into lunch, build a week of different wrap recipes, and finally stop eating “salads” that fall apart after two bites. Your wrap can be sturdy, flavorful, and lunchbox-proof. It just needs a plan (and maybe parchment paper).