Table of Contents >> Show >> Hide
- Why Make Your Own Soft Plastic Lures?
- What You’ll Need Before You Start
- How to Make Soft Plastic Lures: 14 Steps
- Step 1: Choose the Lure Style You Want to Make
- Step 2: Pick the Right Mold
- Step 3: Set Up a Safe, Dedicated Workspace
- Step 4: Mix the Plastisol Thoroughly Before Heating
- Step 5: Measure Your Plastisol Into a Heat-Safe Cup
- Step 6: Heat the Plastisol Slowly and in Stages
- Step 7: Add Colorant and Control the Shade
- Step 8: Add Glitter, Scent, and Any Performance Additives
- Step 9: Prepare the Mold
- Step 10: Pour or Inject the Plastic
- Step 11: Top Off and Hold Pressure if Needed
- Step 12: Let the Lure Cool Before Demolding
- Step 13: Demold, Trim, and Inspect
- Step 14: Cure, Oil, Store, and Test the Bait
- Common Mistakes Beginners Make
- Final Thoughts
- Workshop Experience: What Making Soft Plastic Lures Really Feels Like
- SEO Tags
There are two kinds of anglers: the ones who buy soft plastic lures by the dozen, and the ones who eventually stare at an empty peg in the tackle aisle and whisper, “Fine. I’ll make my own.” If you’ve reached that glorious stage of fishing evolution, welcome. Making your own soft plastic lures is part workshop project, part mad-scientist hobby, and part excuse to create the exact bait color your local bass have apparently decided is the only acceptable menu item this week.
The good news is that learning how to make soft plastic lures is not reserved for full-time bait companies with giant machines and dramatic background music. With the right mold, plastisol, heat-safe tools, and a healthy respect for hot liquid plastic, you can make worms, craws, swimbaits, grubs, and creature baits right at home. Better yet, you can customize softness, color, glitter, scent, and sink rate until your lure box starts looking suspiciously like a candy store for fish.
This guide breaks the process into 14 practical steps, from choosing a mold to curing and storing your finished baits. Along the way, you’ll also learn the mistakes beginners make, the tricks that help you get cleaner pours, and why a digital thermometer might become your new favorite fishing tool that never touches water.
Why Make Your Own Soft Plastic Lures?
Homemade soft plastic lures give you control that store-bought baits simply cannot. You can match local forage, tweak durability, make a bait float or sink faster, and experiment with color combinations that big brands may never sell. If you fish often, lure making can also save money over time, especially once you start reusing scraps and dialing in a few reliable molds.
Just as important, making your own baits teaches you how lure action really works. A softer tail kicks differently. A harder body lasts longer. A little glitter can add flash; too much can make the lure look like it lost a fight with a disco ball. When you pour your own baits, you stop guessing and start engineering.
What You’ll Need Before You Start
- Plastisol
- Soft plastic bait mold
- Heat-safe Pyrex-style cup
- Dedicated microwave or controlled heat source
- Digital thermometer
- Stir stick or metal spoon
- Liquid colorant
- Heat-resistant glitter
- Optional scent, softener, hardener, salt, or floating additive
- Injector for injection molds
- Clamps for molds if needed
- Worm oil or mold release aid
- Heat-resistant gloves
- Eye protection
- Long sleeves, long pants, and closed-toe shoes
- Strong ventilation or a properly set up bait-making area
How to Make Soft Plastic Lures: 14 Steps
Step 1: Choose the Lure Style You Want to Make
Start with a simple bait profile. A straight-tail worm, small swimbait, grub, or craw is easier for beginners than some wild, ultra-thin appendage bait that looks like an underwater chandelier. Pick a bait you already fish with confidence. Familiarity helps because you already know what size, body shape, and action you want.
If you are brand-new, one good aluminum mold is better than five random ones you bought because they looked cool at 2 a.m. online. Start practical, then get weird later.
Step 2: Pick the Right Mold
Soft plastic lure molds typically come in hand-pour and injection styles. Hand-pour molds are great for beginners who want maximum control and easy color layering. Injection molds are faster, cleaner once dialed in, and ideal for producing consistent baits in batches.
Aluminum molds are popular because they hold detail well, last a long time, and generally provide a smoother learning curve. When choosing a mold, pay attention to cavity count, bait size, gate design, and whether the mold is known to pour easily. Some shapes are beginner-friendly; some are drama queens with tails that refuse to fill unless everything is perfect.
Step 3: Set Up a Safe, Dedicated Workspace
This is not the moment to improvise on the kitchen counter beside your breakfast cereal. Heated plastisol gets very hot, and the fumes are not something you want drifting through your living room. Work in a well-ventilated area, wear gloves and eye protection, and keep children and pets out of the zone.
Use a dedicated microwave or heat source for bait making only. Do not melt plastisol in the same microwave that reheats pizza rolls. That is not efficient multitasking. That is a future regret.
Step 4: Mix the Plastisol Thoroughly Before Heating
Plastisol separates in storage. The resins and plasticizers need to be fully reincorporated before heating, or your bait may cure poorly and end up gooey, weak, or inconsistent. Shake the bottle or jug thoroughly according to product instructions. Some makers also let larger containers settle on their side briefly before shaking so the separated materials recombine more easily.
If you skip this step, your lure may come out looking like it had an identity crisis halfway through curing.
Step 5: Measure Your Plastisol Into a Heat-Safe Cup
Pour only the amount you need for the batch into a Pyrex-style cup or another heat-safe container recommended for lure making. Beginners should start small. Smaller batches are easier to control, easier to color, and less heartbreaking when the first attempt goes sideways.
Keep your tools ready before heating. Once plastisol reaches working temperature, you want to move with purpose, not wander around looking for glitter while the cup cools and the bait gods laugh quietly.
Step 6: Heat the Plastisol Slowly and in Stages
Heat plastisol in short intervals, stirring between each round. Exact temperatures vary by brand, but many soft bait formulas work in roughly the 320°F to 350°F range, while some manufacturers emphasize reaching about 350°F for full conversion and warning against overheating. The key is to follow your brand’s directions and watch the plastic carefully.
As plastisol heats, it changes from milky to gel-like and then to a clearer, syrupy liquid. If it is still cloudy and clumpy, it is likely underheated. If it scorches, smokes excessively, or darkens unexpectedly, you have gone too far. This is why a thermometer matters. Your eyeballs are helpful, but they are not calibrated laboratory equipment.
Step 7: Add Colorant and Control the Shade
Once the plastic is properly heated, add your colorant a little at a time and stir thoroughly. It is much easier to darken a batch than to rescue one that suddenly looks like a traffic cone. Start light, mix well, and evaluate under good lighting.
Custom color is one of the biggest reasons anglers start making soft plastic lures in the first place. Green pumpkin, watermelon red, black blue, smoke purple, pearl shad, dirty craw, and all those local confidence colors are within reach when you control the recipe.
Step 8: Add Glitter, Scent, and Any Performance Additives
Now comes the fun part. Add heat-resistant glitter, scent, softener, hardener, salt, or buoyancy additives depending on the bait you want. Glitter creates flash. Scent can make the bait more attractive. Softener and hardener let you fine-tune durometer, which affects action and durability.
Use restraint. A little additive can improve a lure; too much can change viscosity, color clarity, sink rate, and final performance. If you want to experiment, do it in small batches and write down the recipe. Future-you will be deeply annoyed if today-you creates the perfect bait and records the formula as “some green, a little gold, looked nice.”
Step 9: Prepare the Mold
Before pouring or injecting, make sure your mold is clean, dry, and ready. Some makers lightly oil the cavity with worm oil to help with release, especially for certain hand pours. If your mold requires clamps, secure it evenly. Misalignment leads to flashing, dents, and words you should not say around children.
For more consistent results, many bait makers also warm the mold slightly. A cold mold can cause thin sections to set too fast and not fill completely. You do not need to roast it like a casserole; you just want it warm enough to avoid shocking the plastic.
Step 10: Pour or Inject the Plastic
For hand-pour molds, pour steadily and deliberately. Many bait makers start with thin appendages or tails first, then fill the body. For two-color hand pours, pour the first layer, let it set slightly, then add the second color before the layers fully blend together.
For injection molds, draw the plastisol into the injector carefully and inject with smooth, controlled pressure. Too little pressure can leave incomplete fills; too much can cause flashing or force colors to bleed together in laminate pours. On dual injectors, it helps to check for even flow before committing to the shot.
Step 11: Top Off and Hold Pressure if Needed
As the plastic cools, it can shrink slightly, especially around thicker bait bodies. Top off the gate or hold steady injection pressure for a moment to reduce dents and voids. This step is simple, but it often separates a decent bait from a clean one.
If your bait repeatedly dents at the head, do not assume the universe hates you personally. It usually means the mold cooled too fast, the plastic was a bit cool, or you did not top it off enough.
Step 12: Let the Lure Cool Before Demolding
Patience matters here. Let the bait cool and set fully before removing it from the mold. Pull it too early and you may stretch appendages, deform the body, or leave fingerprints in your masterpiece. That is art for a museum, not a tackle box.
Cooling time varies by bait size, mold type, and plastisol formula. Thin finesse baits set quickly; thicker swimbaits and heavy-body creatures may need longer.
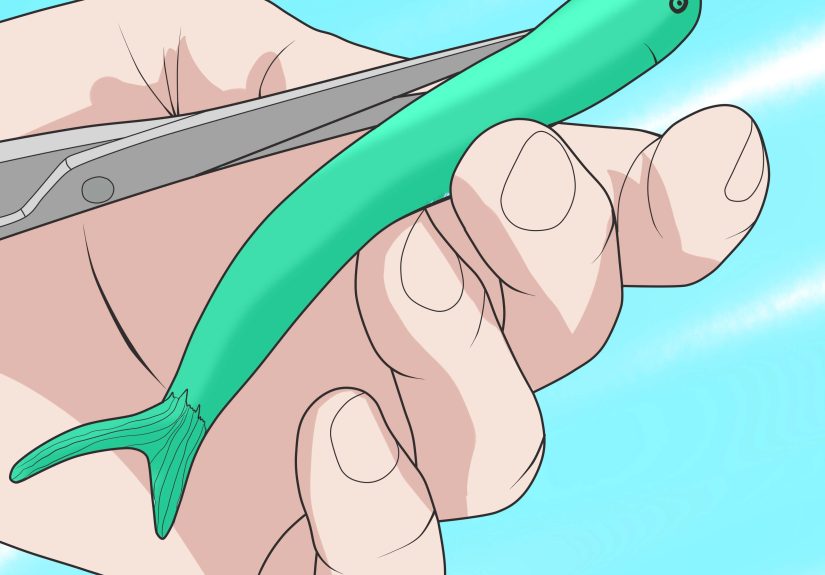
Step 13: Demold, Trim, and Inspect
Remove the finished lure carefully, then trim the sprue, flashing, or any excess plastic with scissors or a sharp blade. Look for incomplete tails, trapped bubbles, dents, or uneven color distribution. Some minor cosmetic issues are fine. Fish are not usually carrying clipboards. But if the bait’s action will be affected, remelt the scrap and try again.
One of the best parts of plastisol lure making is that many mistakes are recyclable. Bad bait today can become tomorrow’s improved version with better color and fewer emotional scars.
Step 14: Cure, Oil, Store, and Test the Bait
After demolding, let your soft plastic lures finish curing and stabilize their shape. Some bait makers let them stand or rest for a day or two before fishing or bagging them. A light coat of worm oil helps reduce sticking, improves appearance, and can carry scent. Store finished baits in appropriate bags and keep different formulas or heavily dyed colors separated if bleeding is a concern.
Then do the most important thing of all: fish them. A lure that looks gorgeous on the bench but swims like a confused carrot is not a success story yet. Test it, tweak it, and improve the next batch.
Common Mistakes Beginners Make
- Not mixing plastisol enough: separated material leads to bad curing.
- Guessing temperature: use a digital thermometer instead of hope.
- Overheating the plastic: scorched plastisol is the smell of disappointment.
- Using poor ventilation: comfort and safety come first.
- Starting with difficult molds: choose beginner-friendly bait profiles first.
- Using too much color or additive: small changes matter more than you think.
- Rushing the cooling phase: let the bait set before demolding.
- Skipping notes: write down recipes, temperatures, and results for repeatability.
Final Thoughts
Learning how to make soft plastic lures is equal parts skill, repetition, and curiosity. Once you understand mold choice, plastisol temperature, additive balance, and cooling behavior, the whole process becomes less intimidating and much more fun. You stop making random bait-shaped objects and start making lures on purpose.
The biggest secret is this: consistency beats complexity. You do not need a ten-color laminate swimbait with cosmic glitter and three scent layers on day one. Start with a clean worm, a reliable craw, or a simple paddle tail. Nail the basics. Then branch out into custom blends, two-tone pours, floating formulas, and weird little creations that make fish wonder what exactly just swam by.
Once you catch a fish on a lure you made yourself, the hobby makes perfect sense. Your tackle box feels more personal, your confidence grows, and store shelves become less of a dependency and more of a backup plan.
Workshop Experience: What Making Soft Plastic Lures Really Feels Like
The first real lesson most people learn when making soft plastic lures is that the process looks easier from across the room. In your mind, it is very smooth: melt plastic, add color, pour mold, catch bass, accept applause. In real life, the first session usually includes at least one surprise. Maybe the plastic is still cloudy when you thought it was ready. Maybe the glitter all sinks to the bottom like it is trying to escape. Maybe your bait comes out looking less like a craw and more like a gummy alien. That is normal.
What gets better fast is your feel for timing. After a few batches, you start noticing how plastisol behaves as it heats. You can tell when it is close, when it needs another quick stir, and when it is finally in that sweet spot where it pours smoothly instead of fighting back. You also learn that molds have personalities. One mold fills beautifully every time and makes you feel like a genius. Another refuses to cooperate until the temperature, angle, and pressure are all exactly right. Suddenly you are not just making lures; you are negotiating with aluminum.
Color mixing becomes its own addictive rabbit hole. At first, you just want a decent green pumpkin. Then you start wondering whether a touch of amber would make it look more natural, or whether black flake would pop better than red in stained water. Before long, you are labeling little test batches like a tackle chemist and defending your formulas with the seriousness of a barbecue pitmaster guarding a family rub recipe.
One of the most satisfying parts of the experience is solving small problems. If a tail does not fill, you adjust heat or mold temperature. If the bait feels too stiff, you change formulas or use a little softener. If colors bleed in a laminate, you work on timing and pressure. Every “bad” batch teaches something useful, and because scrap can often be remelted, the learning curve is more forgiving than it first appears.
There is also a practical joy in making baits that suit your local water instead of relying only on whatever a store happens to stock. If your fish want a subtle smoke minnow with fine silver glitter, you can make it. If they want a ridiculous loud-color creature bait that looks like it was designed during a sugar rush, you can make that too. That kind of control is what keeps many anglers hooked on lure making long after the novelty wears off.
And then there is the best moment of all: the first fish caught on a homemade bait. It does not matter whether it is a giant or a modest little overachiever. The strike feels personal. The fish did not just eat a lure; it ate your lure, with your color choice, your pour, your trimmed sprue, and your slightly obsessive attention to glitter. That moment turns the whole process from hobby to habit. After that, every batch feels less like a craft project and more like part of your fishing system.