Table of Contents >> Show >> Hide
- What Makes a Good Stretcher Bar?
- Tools and Materials
- Step 1: Decide the Size, Profile, and Purpose
- Step 2: Pick Straight, Stable Wood
- Step 3: Create the Bevel and Cut the Four Bars
- Step 4: Dry Fit the Frame and Check for Square
- Step 5: Glue and Fasten the Corners
- Step 6: Add Cross Braces for Larger Frames
- Step 7: Sand, Inspect, and Prep for Canvas
- Common Mistakes to Avoid
- Should You Make or Buy Stretcher Bars?
- Final Thoughts
- Experience and Practical Lessons from Making Your Own Stretcher Bars
- SEO Tags
If you have ever looked at a blank canvas and thought, “Nice, but I would love to spend part of my weekend turning wood into geometry,” congratulations. You are exactly the kind of person who should learn how to make stretcher bars.
Building your own stretcher bars gives you more control over size, depth, strength, and overall quality. It can also save money when you need unusual dimensions or oversized canvases. Best of all, it helps you stop depending on whatever random pre-made frame happens to be left on the art-supply shelf after everyone else has already raided it.
In simple terms, stretcher bars are the wooden framework that supports canvas. Good ones stay square, resist twisting, and keep the canvas from rubbing against harsh edges. Great ones do all that without turning your future painting into a wavy drama production. This guide walks through the process in seven clear steps, from planning your frame to making it ready for canvas.
What Makes a Good Stretcher Bar?
Before you touch a saw, it helps to know what you are trying to build. A solid stretcher bar should be straight, dry, and reasonably lightweight. It should also have an inside edge that is slightly beveled, rounded, or relieved so the face of the canvas does not sit hard against a sharp corner. That little detail matters more than it looks. Ignore it, and your finished painting may eventually show faint pressure lines where the wood sits underneath. That is a rude surprise from a piece of lumber.
A good stretcher frame also stays square. If one diagonal is longer than the other, the frame is out of alignment, and your canvas will fight you every step of the way. On larger builds, added bracing is usually worth the effort because long spans of wood love to remind us that gravity is a very persistent critic.
Tools and Materials
You do not need a heroic workshop, but you do need the basics. Most makers use straight kiln-dried pine or fir, a miter saw or miter box, wood glue, clamps, a square, measuring tape, sandpaper, and either screws, staples, or corner fasteners depending on the method. If you plan to stretch canvas right away, add canvas pliers, a staple gun, and your canvas roll or cut piece.
Step 1: Decide the Size, Profile, and Purpose
Start with the finished canvas size you want, not the wood you happen to have lying around next to a mystery screw and a coffee stain. Are you building a small studio panel replacement, a medium gallery canvas, or something large enough to make your hallway feel emotionally judged?
Choose the depth of the stretcher bar based on how the piece will be displayed. A shallower profile works well for smaller paintings or framed pieces. A deeper profile is better for large work, gallery-wrap presentations, or paintings meant to hang without an external frame. Also think about whether the canvas will wrap around the edges. If it will, neat edges and consistent depth matter even more.
Planning here prevents the classic mistake of cutting four beautiful pieces of wood that form a flawless rectangle for the wrong project.
Step 2: Pick Straight, Stable Wood
This step can make or break the whole build. Select boards that are straight and dry. Sight down the length of each piece with one end near your eye and check for bowing, cupping, or twisting. If a board looks like it has already lived a difficult life, put it back.
For many DIY stretcher bars, 1×2 stock is a practical starting point, especially for small to medium frames. For bigger canvases, you may want a wider or deeper profile for better rigidity. Some artists also use molding with a built-in bevel because it naturally reduces contact between canvas and wood. That said, plain stock can work beautifully if you mill or sand the inner edge properly.
Let the wood acclimate to your shop or studio if possible before cutting. Wood moves with humidity, and while you cannot negotiate with physics, you can stop provoking it.
Step 3: Create the Bevel and Cut the Four Bars
Now it is time to turn lumber into stretcher bars instead of “future firewood.” If your stock does not already have a useful profile, create a slight bevel, relief, or rounded edge on the inside face. You can do this with a router, table saw setup, hand plane, or even careful sanding for a modest build. The goal is simple: the canvas should make the most contact near the outer edge, not sit flat across the face of the wood.
Next, cut each end at a 45-degree angle. Measure carefully and keep your reference edge consistent. When making matching pairs, use the first completed piece as a template for the second. This helps keep opposite sides truly identical, which is a lot easier than trying to “eyeball precision,” a phrase that usually ends in regret.
After cutting, lay out all four pieces on a flat surface. Make sure the miters meet cleanly and the bevel orientation is correct on every side. One flipped piece can turn your elegant frame into modern sculpture.
Step 4: Dry Fit the Frame and Check for Square
Before glue or fasteners come into the picture, assemble the four bars dry. Push the corners together and check every angle. Use a framing square to get close, then measure diagonally from corner to corner in both directions. When both diagonal measurements match, your frame is square.
This is not busywork. This is the difference between a frame that stretches canvas evenly and one that behaves like it was designed by a sleepy raccoon. If the diagonals are off, adjust the corners, inspect your cuts, and trim where needed. Small errors compound quickly once canvas tension is added.
Also check that the frame sits flat on the work surface. A frame can look square and still rock if one or more bars are twisted. Flatness matters because a twisted frame will never feel truly right once stretched.
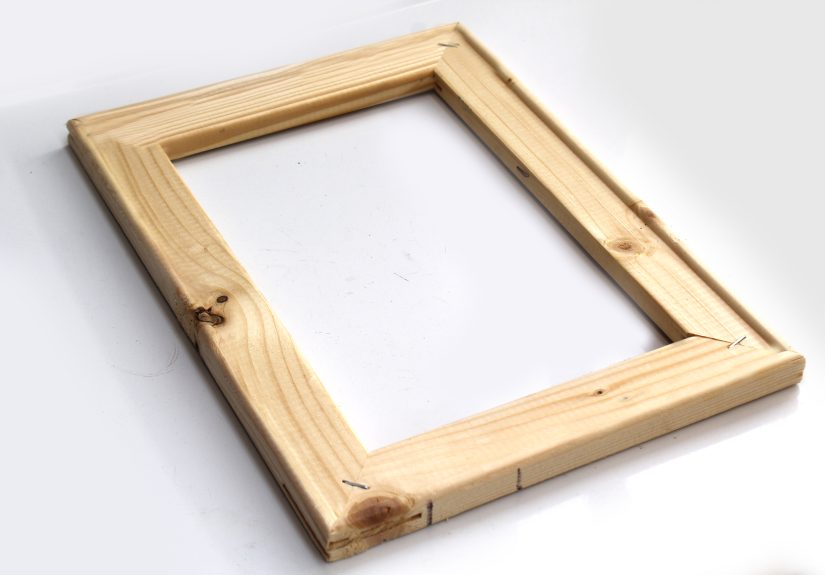
Step 5: Glue and Fasten the Corners
Once the dry fit looks good, apply a small amount of wood glue to each miter joint. Clamp the corners carefully and re-check the diagonals before fastening. If the frame shifts while clamping, pause and correct it. This is one of those moments when impatience produces “character” that nobody asked for.
You have a few fastening options. Some builders use screws driven through one bar into the adjoining bar. Others use staples, V-nails, corner brackets, or specialized stretcher hardware. For a simple shop-made frame, glue plus mechanical reinforcement works well. Just keep the fasteners aligned and avoid overdriving screws hard enough to pull the joint out of square.
Wipe away squeeze-out and let the frame cure on a flat surface. If you rush the drying time, the joint may hold just long enough to betray you during stretching, which is exactly the kind of suspense nobody wants in the studio.
Step 6: Add Cross Braces for Larger Frames
If your canvas is large, do not skip bracing. Long spans can bow, twist, or flex under tension, and that movement eventually shows up where it hurts most: in the finished painting. A single center brace may be enough for a modestly oversized frame. Really large frames may need a cross brace or a more developed internal support layout.
Measure the inside span carefully and cut the brace so it fits snugly without forcing the outer frame out of alignment. That point matters. A brace should support the structure, not act like an overconfident gym coach pushing everything sideways.
Install the brace only after the outer frame is square. Then re-check the whole frame once more. Bracing adds stability, but only if it begins from a straight foundation.
Step 7: Sand, Inspect, and Prep for Canvas
Once the frame is assembled, sand any rough areas, especially around the inner edge and the corners. Remove splinters, sharp edges, and anything that might snag or cut the canvas during stretching. If needed, lightly seal or prime exposed wood, especially if you are thinking long-term about cleanliness and durability.
At this point, your stretcher bars are ready. If you plan to stretch canvas immediately, cut the fabric with enough excess to wrap around the back. Pull from the center of one side, then the opposite side, then the remaining two centers. Continue working outward in an alternating pattern so tension stays even. Fold and secure the corners neatly. A properly stretched surface should feel firm and responsive, not floppy like a half-hearted beach towel.
If your design includes keys or wedges, keep them for later tension adjustments rather than forcing everything too tight from day one. Good stretcher systems are not just about assembly. They are about maintainability.
Common Mistakes to Avoid
Using warped wood
A bowed board will not magically become noble once cut. Start with straight stock.
Skipping the bevel
If the canvas sits hard against a flat edge, you increase the chance of visible stretcher lines later.
Not checking diagonals
A frame that “looks square enough” is often not square enough.
Overbuilding small frames
You do not need bridge engineering for a tiny study. Match the structure to the scale.
Underbuilding large frames
Big canvases need bracing. Otherwise, the frame may move when the canvas tension is added.
Should You Make or Buy Stretcher Bars?
Buying ready-made stretcher bars is faster, more consistent, and often smarter when you need standard sizes. Making your own is ideal when you want custom dimensions, deeper profiles, better control over materials, or the satisfaction of saying, “Yes, I made the support too,” in the calm tone of a person who definitely measured twice.
There is also a practical middle ground. Some artists buy pre-milled bars and assemble them at home, while others build from raw stock only for unusually large or oddly proportioned work. That hybrid approach is not cheating. It is called having a life.
Final Thoughts
Learning how to make stretcher bars is one of those studio skills that seems intimidating right up until the moment it becomes strangely satisfying. The process rewards patience, careful measuring, and a healthy distrust of crooked lumber. Once you understand the logic behind straight stock, beveled edges, square corners, and proper bracing, the build becomes much more predictable.
The real payoff is control. You get the exact size you want, the strength your canvas needs, and the confidence that your surface started on a sound foundation. In painting, plenty of things are gloriously uncertain. Your support structure does not have to be one of them.
Experience and Practical Lessons from Making Your Own Stretcher Bars
One of the most useful things people learn from making their own stretcher bars is that the wood selection stage matters far more than expected. Beginners often get excited about cutting and assembling, but experienced makers know the real battle is won at the lumber rack. A straight board feels almost boring when you pick it up, which is exactly what you want. The dramatic ones, the pieces with twist, bow, or hidden tension, may look harmless at first and then suddenly become the reason your frame rocks on the table like a diner chair with a personality disorder.
Another common lesson is that a flat work surface is not optional. Plenty of first builds happen on a garage floor, a wobbly folding table, or whatever patch of space is currently not covered in clamps. Then the frame goes together, looks fine from one angle, and turns out slightly distorted when checked properly. The makers who improve quickly are the ones who start treating the table like part of the tool list. Once the work surface is reliable, everything else becomes easier to diagnose.
People also tend to underestimate how much tiny measurement differences matter. A sixteenth of an inch can sound harmless in conversation, but in a mitered frame it can turn into a visible gap, a diagonal mismatch, or a corner that needs “a little persuasion,” which is workshop language for “I am about to create a new problem.” After a few builds, most people become less casual with the tape measure and much more loyal to stop blocks, templates, and repeatable cuts.
There is also a funny shift in attitude that happens once someone stretches canvas over a frame they built themselves. The frame stops being invisible. Suddenly, they notice edge quality, stiffness, brace placement, and whether the canvas clears the bar cleanly. They can feel the difference between a frame that is merely assembled and one that is thoughtfully made. That awareness often carries into future painting choices too. Artists become more intentional about scale, wrapping edges, transport, and even storage.
And finally, there is the confidence factor. The first frame usually takes longer than expected. The second one feels better. By the third, many makers realize they are no longer guessing. They have a process. They know how to spot bad stock, how to sneak up on a perfect cut, and how to square a frame without magical thinking. That is the real reward. Not just saving money or making custom sizes, but gaining a dependable studio skill that keeps paying back every time a new project begins.