Table of Contents >> Show >> Hide
- What Is a Milkmaid Braid (and how is it different from a crown braid)?
- Before You Start: Tools and Prep That Make This 10x Easier
- The Classic Milkmaid Braid: 12 Steps
- Step 1: Detangle like you mean it
- Step 2: Choose your part (center is classic, side is modern)
- Step 3: Create two sections
- Step 4: Add texture (especially if your hair is freshly washed)
- Step 5: Decide your braid style: classic, French, or Dutch
- Step 6: Braid the first side
- Step 7: Secure the end with a small elastic
- Step 8: Braid the second side to match
- Step 9: Place the first braid over the top of your head
- Step 10: Pin strategically (less “random stabbing,” more “engineering”)
- Step 11: Wrap the second braid and “weave” the ends together
- Step 12: Finish and set
- Troubleshooting: Fix the Most Common Milkmaid Braid Problems
- Milkmaid Braid Variations (Pick Your Personality)
- Hair-Type Tips That Actually Matter
- How to Make It Last All Day
- Real-World Milkmaid Braid Experiences (500+ Words of “Yep, That Happened”)
- Conclusion
The milkmaid braid is the hairstyle equivalent of showing up to a party looking effortlessly put-together… after putting in a very specific amount of effort.
It’s a braided updo where two braids wrap around your head like a headbandromantic, practical, and weirdly powerful. (You may not be milking cows,
but you will feel capable of carrying three grocery bags per arm.)
Whether you’re going for festival hair, a “cute but I mean business” office updo, or a low-drama style that survives wind, errands, and a surprise selfie,
this guide walks you through a reliable milkmaid braid in twelve clear stepsplus fixes for common mishaps and hair-type tweaks so it doesn’t slide off your
head like a tiny braided hat.
What Is a Milkmaid Braid (and how is it different from a crown braid)?
A milkmaid braid is made by creating two braids (usually one on each side), then wrapping them up and around the head and pinning them in place.
The key detail: the placement sits slightly farther back than a crown braidmore “headband” than “tiara.” If a crown braid is royal vibes at your hairline,
the milkmaid braid is countryside-chic lounging a bit behind it.
Before You Start: Tools and Prep That Make This 10x Easier
Grab these basics
- Brush (or wide-tooth comb for curls)
- Rat-tail comb for a clean part (optional but helpful)
- 2 small elastics (clear or hair-colored)
- Bobby pins (plan on 8–16; yes, really)
- Texturizing product (dry shampoo, texturizing spray, or a touch of styling powder)
- Light hairspray or finishing spray
- Optional: a dab of wax/pomade for flyaways, and a handheld mirror for the back-of-head situation
Prep tips (a.k.a. the secret to not having your braid escape)
- Second-day hair is a cheat code. Slightly “lived-in” hair has more grip than freshly washed, super-silky hair.
- Add grip on purpose. Mist in dry shampoo or texturizing spray, especially at the roots and around the crown where pins need traction.
- If your hair is very fine or slippery: a little backcombing at the crown (gentle!) or a touch of styling powder helps the pins hold.
- If your hair is curly: work with your texture. You can smooth just the part line if you want, but keep the braid slightly looser for a soft, romantic finish.
The Classic Milkmaid Braid: 12 Steps
-
Step 1: Detangle like you mean it
Brush through your hair until it’s smooth and knot-free. Tangles make braiding harder and can create lumpy sections that look less “ethereal milkmaid”
and more “I fought a hedge and the hedge won.” -
Step 2: Choose your part (center is classic, side is modern)
The traditional milkmaid braid uses a center part from forehead to nape. But a side part can look softer, more modern,
and can be easier if your hair naturally falls that way. Either worksjust commit so the final shape looks intentional. -
Step 3: Create two sections
Split your hair into left and right sections. For the most balanced look, make sure the part continues cleanly down the back of your head.
Bring each section forward over your shoulders so you can braid where you can actually see what you’re doing. -
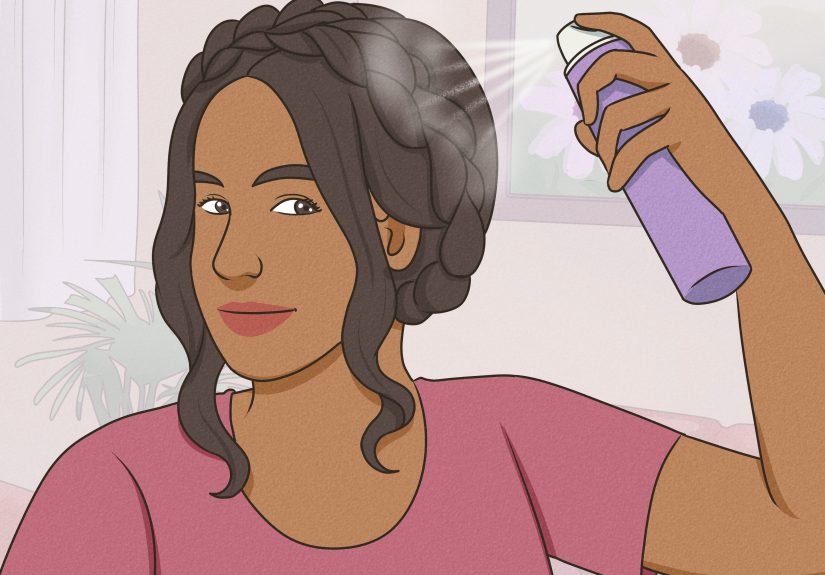
Step 4: Add texture (especially if your hair is freshly washed)
Lightly spray dry shampoo or texturizing spray through the roots and mid-lengths. If you have flyaways, smooth a pea-sized amount of wax/pomade over the surface
(don’t overdo itthis is a braid, not a glass sculpture). -
Step 5: Decide your braid style: classic, French, or Dutch
Classic three-strand braids are easiest and totally acceptable. If you want a more “woven” look that sits flatter and feels extra secure,
do a French braid or Dutch braid (Dutch = inside-out French braid). If you’re newer to braiding, start classicyou can always level up later. -
Step 6: Braid the first side
Start braiding one section down to the ends. Keep tension firm but not headache-tight. If you have layers, leave a couple of soft face-framing pieces near your ears
before you beginthose little wisps are the difference between “storybook” and “strict recital.” -
Step 7: Secure the end with a small elastic
Tie off the braid with a clear or hair-colored elastic. If you want extra fullness, gently tug at the outer edges of the braid (“pancaking”) to widen it.
Do this before pinningonce it’s on your head, you’ll be working blind like you’re defusing a bomb. -
Step 8: Braid the second side to match
Repeat on the other side. Try to keep both braids similar in thickness and tension. Perfection isn’t the goalsymmetry is just helpful so your “headband”
doesn’t look like it’s sliding toward one eyebrow. -
Step 9: Place the first braid over the top of your head
Lift one braid up and lay it across the crown area like a headband, slightly back from the hairline. Aim the tail toward the opposite side.
Tuck the tail end under the braid (or under the other braid later) so the elastic disappears. -
Step 10: Pin strategically (less “random stabbing,” more “engineering”)
Use bobby pins to secure the braid along the pathespecially near the ear, at the crown, and where the tail tucks in.
Slide pins into the center of the braid so they stay hidden. For extra hold, crisscross two pins into an “X” at key anchor points. -
Step 11: Wrap the second braid and “weave” the ends together
Bring the second braid up and around, overlapping it with the first braid. Tuck its tail under the opposite braid so the ends meet cleanly and look continuous.
Keep the overlap tidy: one braid can sit slightly on top of the other, but avoid stacking both ends in one bulky spot unless you enjoy the “mysterious bump”
silhouette. -
Step 12: Finish and set
Check the mirror (and the handheld mirror, if you have one) to make sure the braids feel even and secure. Add pins wherever it feels looseespecially at the back.
Smooth flyaways with a tiny bit of wax or a light mist of hairspray. If you want extra romance, gently loosen a few strands near the temples.
Troubleshooting: Fix the Most Common Milkmaid Braid Problems
“My braids keep slipping off my head.”
- Add grip: dry shampoo or texturizing spray at the roots and where pins go.
- Anchor first: pin above the ear on each side, then pin the crown, then pin the ends.
- Use enough pins: if you used four pins, you basically whispered “please stay” and hoped for the best.
“The ends stick out and look messy (not in the cute way).”
- Tuck the ends under the opposite braid and pin inside the braid, not on top of it.
- Hide elastics by wrapping the tail slightly farther and pinning from underneath.
- Layered hair hack: braid a little tighter and use a tiny touch of wax at the ends before tucking.
“It looks too ‘Heidi’ for me.”
- Loosen it up: pancake the braids and pull a few face-framing pieces free.
- Try a side part for a more modern, asymmetrical vibe.
- Swap braid type: Dutch braids make it more dimensional; a fishtail milkmaid braid reads instantly more “editorial.”
Milkmaid Braid Variations (Pick Your Personality)
1) Dutch Milkmaid Braids (extra dimension)
Do two Dutch braids (inside-out French braids), then wrap and pin as usual. This version looks thicker and often holds better because Dutch braids sit more “raised.”
2) Upside-Down Milkmaid Braid (great for shorter hair)
Start Dutch braiding at the nape and braid upward toward the crown, then finish with a regular braid and elastic. Repeat on the other side.
Wrap both braids over the top and pin. This can help shorter pieces stay incorporated and reduces the “tiny hairs escaping at the bottom” issue.
3) Twisted Milkmaid (when you can braid… sort of)
If braiding isn’t your thing today, create two rope twists instead (two sections twisted and wrapped over each other), secure with elastics, then wrap and pin.
It’s softer, faster, and very forgiving.
4) Accessory upgrade
Slide in a pearl pin, a thin ribbon, or a few small flowers. Keep it simplemilkmaid braids already make a statement, and your head is not a craft store aisle.
Hair-Type Tips That Actually Matter
Fine or slippery hair
- Use dry shampoo/powder at the roots and lightly tease at the crown for grip.
- Try Dutch braids for extra structure.
- Use smaller bobby pins if your hair is very fine; oversized pins can slide.
Thick hair
- Make sure your elastics are strong and don’t snap when you look at them.
- Use longer pins and anchor in sectionsear, crown, backso weight is distributed.
- If the wrap feels bulky, keep the braids snug and tuck tails flat under the opposite braid.
Curly or coily hair
- Work with your texture: slightly looser braids look gorgeous and stay comfortable.
- Smooth only what you want (edges/part line) and let the rest be soft.
- For frizz control, use a light curl cream or a tiny dab of gel at the hairline.
Short hair or lots of layers
- Use the upside-down approach or start braids closer to the ear to catch shorter pieces.
- Expect more pins. This is not the time to be minimalist.
- If you’re just shy of enough length, consider adding a small braid extension or braiding hair for the wrap.
How to Make It Last All Day
- Start with texture (dry shampoo/texturizing spray).
- Pin in layers: anchor points first, then fill in.
- Use an “X” pin at the crown and near each ear for stability.
- Finish with flexible hold hairspray so it stays put without feeling crunchy.
- Pack 2–3 spare pins if you’re going outlike lip balm, but for your hair.
Real-World Milkmaid Braid Experiences (500+ Words of “Yep, That Happened”)
People tend to think the milkmaid braid is only for weddings, festivals, or that one weekend where everyone suddenly dresses like they’re starring in a romantic period drama.
In reality, the most common “milkmaid braid moment” is much less glamorous: you’re running late, your hair is doing the thing where it refuses to be both clean and cooperative,
and you need it out of your face now. That’s where the milkmaid braid shinesbecause it’s basically a functional updo disguised as a style choice.
One typical experience: you try it on freshly washed hair and immediately learn why hairstylists love “dirty hair.” The braids look pretty, surebut the second you lift them up,
they start sliding like a silk scarf on an ice rink. The fix most people discover (after a few dramatic pins falling to the floor) is adding texture on purpose. A quick blast of
dry shampoo or texturizing spray changes everything. Suddenly the pins grip, the braid stays put, and you stop living in fear that your “crown” will migrate south during your commute.
Another very real moment: the first time you pin the braids, you use about four bobby pins and call it a day. Ten minutes later, the whole style loosens, and you’re re-pinning in the
bathroom like you’re patching a leaky boat. With milkmaid braids, more pins isn’t overkillit’s the design. People who end up loving this style usually adopt a simple strategy:
anchor above each ear, anchor at the crown, then pin the ends. Once those foundations are locked, everything else is just “tidying.”
If you have layers, there’s also the “mystery sprout” phaselittle ends poking out at the back or near the ears. A common workaround is to embrace a softer, slightly messier finish
(pull out face-framing pieces on purpose) so it looks romantic rather than accidental. Others learn a more tactical move: tuck the ends deeper under the opposite braid and pin into the
braid’s center so the pins disappear. This is one of those small skill upgrades that makes you feel like you gained +5 adulthood points.
People with thick hair often report the “weight problem”: the braids look incredible, but after a while, everything feels heavyespecially if the wrap sits too high. The fix is placement
and distribution. Position the braid slightly back like a headband, then pin in multiple zones instead of relying on one heroic pin to carry the entire hairstyle like Atlas.
Meanwhile, people with fine hair discover the opposite issue: the braid can look delicate and dreamy, but it needs grip to survive real life. Light teasing at the crown or a dusting of
styling powder is often the difference between “lasted all day” and “lasted until I blinked.”
And then there’s the universal milkmaid braid truth: the first attempt can feel like an octopus wrestling match because your arms get tired and mirrors are unhelpful. But after a few tries,
the motion becomes muscle memorybraid, elastic, wrap, anchor, tuck, pin. Once you get there, it becomes a go-to for days when you want to look polished without heat tools, or when you
want your hair off your neck but still want compliments that start with, “Waithow did you do that?”
Conclusion
A milkmaid braid is one of those rare hairstyles that looks fancy but behaves practicallike a blazer with pockets. Once you learn the wrap-and-pin “engineering,” you can adapt it for
short hair, curly hair, fine hair, thick hair, and even those in-between days when your hair is neither clean nor chaotic, just… emotionally complicated. Start with texture, use enough pins,
tuck the ends like you’re hiding secrets, and you’ll have a braid that stays put through real lifenot just the tutorial fantasy version of it.