Table of Contents >> Show >> Hide
- Before You Hit Print: A 60-Second Checklist
- How to Print a Word Document on Windows (Microsoft 365, Word 2021/2019/2016)
- Step 1: Open the Print Menu
- Step 2: Pick the Right Printer
- Step 3: Choose Copies and Collation
- Step 4: Set Page Range (Print All, Current, Selection, or Custom)
- Step 5: Confirm Orientation, Paper Size, and Margins
- Step 6: Print Double-Sided (Duplex) the Smart Way
- Step 7: Hit Print (But Use Print Preview Like a Seatbelt)
- Optional: Print to PDF Instead of Paper
- How to Print a Word Document on Mac
- Advanced Print Settings That Actually Matter
- Troubleshooting: Fix Common Word Printing Problems
- Problem 1: Printer Says “Offline” or “Not Responding”
- Problem 2: The Print Queue Is Stuck (Nothing Prints, Everything Waits)
- Problem 3: Duplex (Double-Sided) Option Is Missing
- Problem 4: Pages Are Cut Off, Scaled Wrong, or Printing on the Wrong Paper Size
- Problem 5: Word Prints Blank Pages (or Missing Images)
- Problem 6: Print Quality Is Faint, Streaky, or Smudged
- Printing Somewhere Else (Staples, Library, School, Office)
- Print Like a Pro: A Quick Cheat Sheet
- Conclusion
- Bonus: Real-World Printing Experiences ( of “Yep, That Happened”)
Printing a Word document should be the easiest part of your day. Yet somehow, the moment you click Print,
your printer turns into a mysterious creature that only feeds on perfectly good paper and your patience.
Let’s fix that. This step-by-step guide walks you through printing from Microsoft Word on
Windows and Mac, choosing the right settings (without guessing), and troubleshooting
the most common “why is this happening to me?” printing problemsfast.
Before You Hit Print: A 60-Second Checklist
A tiny bit of prep prevents most printing drama. Run through these quick checks before you blame Word, your printer,
or the universe:
- Save your document (Ctrl+S / Cmd+S). Printing the “older version” is a classic plot twist.
- Confirm the printer is on, awake, and has paper loaded correctly (yes, really).
- Check paper size: In the U.S., most home/office printers default to Letter (8.5" x 11").
- Preview first: Print Preview catches cut-off margins, weird page breaks, and surprise blank pages.
- Know your goal: One page? A range? Double-sided? Color? The right settings depend on the job.
How to Print a Word Document on Windows (Microsoft 365, Word 2021/2019/2016)
Step 1: Open the Print Menu
In Word, go to File > Print or press Ctrl+P. This opens the print pane with a preview on the right.
The preview is your “spot the chaos” windowscroll through it if your document is longer than a page.
Step 2: Pick the Right Printer
Under Printer, choose the device you actually want. (If you’ve ever accidentally sent a personal document to the office printer,
you already understand why this matters.)
If you don’t see your printer, don’t panicskip ahead to the troubleshooting section. For now, assume the printer is installed and available.
Step 3: Choose Copies and Collation
- Copies: Set how many you need.
- Collated vs. Uncollated: Collated prints full sets in order (1-2-3, 1-2-3). Uncollated prints all page 1s, then all page 2s, etc.
Example: Printing 3 copies of a 10-page report for a meeting? Choose 3 copies and Collated unless you enjoy sorting paper like a casino dealer.
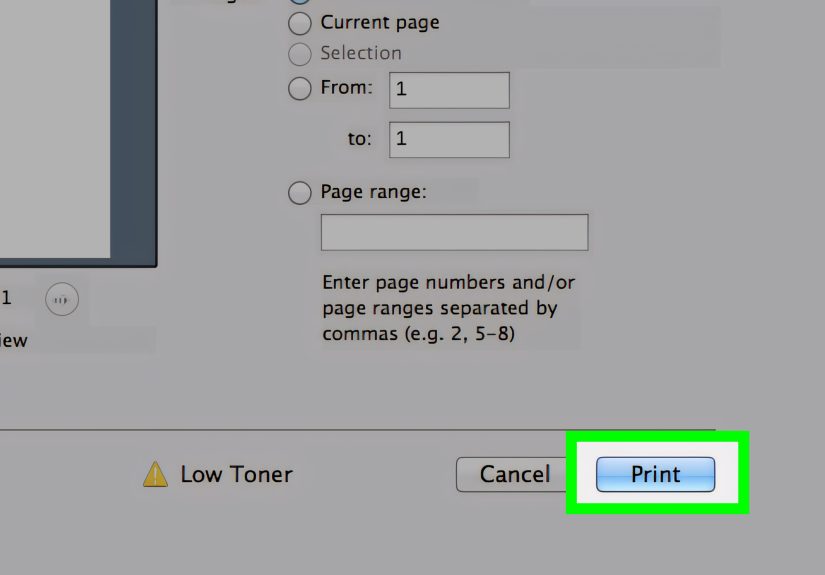
Step 4: Set Page Range (Print All, Current, Selection, or Custom)
In Settings, Word lets you print more precisely than “everything forever”:
- Print All Pages: The default.
- Print Current Page: Great for quick spot-checks.
- Print Selection: Only what you highlighted (handy for a single section).
- Custom Pages: Type specific pages or ranges.
Custom pages example: Type 1-3, 5, 8-10 to print pages 1 through 3, page 5, and pages 8 through 10.
This is a superpower when you only need the signature page and the appendixnot the entire novel.
Step 5: Confirm Orientation, Paper Size, and Margins
Most printing problems come down to mismatch: Word thinks you’re printing one way, the printer thinks you’re printing another way,
and your document gets cropped like a bad haircut.
- Orientation: Portrait vs. Landscape
- Paper Size: Letter vs. Legal vs. A4 (A4 shows up a lot if templates came from outside the U.S.)
- Margins: Too narrow can cause cut-off edges on many printers
If you need a page in landscape, set it in Word first via Layout > Orientation, then double-check the Print pane
still shows the correct orientation.
Step 6: Print Double-Sided (Duplex) the Smart Way
In the Print settings, look for Print One Sided. If your printer supports duplex printing, you may see:
Print on Both Sides (automatic duplex) or Manually Print on Both Sides (you flip and reinsert the stack).
Pro tip: If you choose manual duplex, Word typically prints one side first and then prompts you to flip the pages.
Read the prompt carefullyprinters vary, and the “flip direction” can make your output come out like a book… or like chaos.
Step 7: Hit Print (But Use Print Preview Like a Seatbelt)
If Print Preview looks rightpage breaks, spacing, orientationclick Print. If it looks wrong, fix it now.
Printing “just to see what happens” is how paper jams become lifestyle choices.
Optional: Print to PDF Instead of Paper
Need a clean file to email or upload? In the printer list, choose Microsoft Print to PDF (or a similar PDF printer),
then click Print and save the file. This is also a handy troubleshooting trick:
if it prints to PDF correctly, your Word document is likely fine and the issue is with the printer or driver.
How to Print a Word Document on Mac
Step 1: Open Print
In Word for Mac, go to File > Print or press Cmd+P. You’ll get the macOS print dialog.
Step 2: Choose Printer, Copies, and Pages
Select the printer at the top, choose Copies, then set Pages to print all pages or a range.
Ranges look similar to Windows: for example, 2-4 or 1, 3, 7-9.
Step 3: Set Layout Options (Including Two-Sided)
In the macOS dialog, look for a dropdown that might say Copies & Pages. Choose Layout to find
Two-Sided printing. If available, pick Long-edge binding for normal book-style flipping.
Step 4: Confirm Orientation and Paper Size
If the document needs landscape, set it in Word first via Layout > Orientation, then confirm the print dialog matches.
Also make sure paper size is Letter unless you truly have A4 loaded.
Advanced Print Settings That Actually Matter
Scaling, “Fit to Page,” and Why Your Document Shrunk Like a Sweater in Hot Water
When content is cut off or spills onto an extra page, scaling is usually the culprit. This can happen if:
- Your document is set to A4 but you’re printing on Letter (or vice versa).
- Printer preferences are forcing “fit” or resizing.
- Margins or page size don’t match what your printer can actually print.
Check Word’s Layout settings first (paper size and margins). Then, in the print window, look for printer-specific
options like Scale, Fit to Page, or a percentage size. If you’re printing forms or anything that must be exact,
avoid automatic scaling unless you’re 100% sure it’s correct.
Printing Comments and Track Changes (When You Want the MarkupNot the Secret Draft)
If you use Track Changes, Word can print with or without markup. This is great… except when you accidentally print
your editor’s comments that say “this paragraph is a war crime.”
Before printing, look for settings related to markup, comments, or document showing markup,
and choose what you intend to share.
Envelopes, Labels, and Other Non-Standard Paper
Printing envelopes or labels works best when Word controls the layout. Use Word’s built-in tools (often under
Mailings) so the address block lands in the correct spot. Then match the envelope/label size in both Word and the printer settings.
For labels, always print a test page on plain paper first and hold it behind the label sheet to confirm alignment.
Troubleshooting: Fix Common Word Printing Problems
Problem 1: Printer Says “Offline” or “Not Responding”
Start simple and work upward:
- Power cycle the printer (off, wait 10 seconds, on).
- Confirm the printer is connected (USB seated firmly, or Wi-Fi on the same network).
- On Windows, make sure the correct printer is set as default.
- Run Windows’ built-in printer troubleshooter if available.
If you’re on a home network, a Wi-Fi printer can go “offline” simply because it hopped to a different network band,
lost signal, or got assigned a new IP address. Restarting the router can help if the printer is truly missing.
Problem 2: The Print Queue Is Stuck (Nothing Prints, Everything Waits)
A stuck queue can block new jobs like a bouncer with a grudge. Try this order:
- Cancel all print jobs in your printer queue.
- Restart the printer.
- Restart your computer.
- If it’s still stuck on Windows, restart the Print Spooler service and clear the spool folder (advanced but effective).
If you don’t want to go full tech-mode, clearing jobs and rebooting often solves it. If you do go advanced, be careful
and follow Windows guidance closely.
Problem 3: Duplex (Double-Sided) Option Is Missing
If you know your printer can duplex but Word doesn’t show the option:
- Check printer properties to confirm duplexing is enabled/installed.
- Update or reinstall the printer driver (a driver mismatch can hide features).
- Use Manual duplex as a fallback if automatic duplex isn’t available.
Problem 4: Pages Are Cut Off, Scaled Wrong, or Printing on the Wrong Paper Size
This is usually a mismatch between Word’s page size and the printer’s preferences.
Fix it by aligning all three places that can control paper size:
- Word: Layout > Size (usually Letter in the U.S.)
- Print dialog: Confirm paper size matches
- Printer Preferences: Don’t let the driver override you with a different size
If you’re switching between Letter and A4 documents often, watch for auto-scaling options that “helpfully” resize your layout.
Helpful is great. Surprise resizing is not.
Problem 5: Word Prints Blank Pages (or Missing Images)
Common causes and fixes:
- You printed “Selection” but didn’t select anything meaningfulswitch back to Print All Pages.
- Images are set oddly (floating behind text, or not embedded). Try converting key images to “In Line with Text” for stable printing.
- Corrupt file: Save a copy with a new name, or export to PDF and print the PDF.
Problem 6: Print Quality Is Faint, Streaky, or Smudged
This is often a printer maintenance issue, not a Word issue. Try:
- Select a higher print quality in printer settings if you’re currently on Draft/Economy.
- Run the printer’s maintenance tools (head cleaning/alignment for inkjets).
- Use the right paper type setting (plain vs. photo paper can change ink/toner behavior).
If the printer is printing faint from every app, you’re dealing with ink/toner, clogged nozzles, or hardwarenot Word.
Printing Somewhere Else (Staples, Library, School, Office)
If your home printer is unavailableor you’re in a time crunchprinting at a store or shared printer can be a lifesaver.
The workflow is usually:
- Save your Word document as a PDF (reduces formatting surprises on unfamiliar printers).
- Upload/email the file to the print system (self-serve kiosks often support email or a code-based pickup).
- Select paper size (Letter is typical), color vs. black-and-white, and single vs. double-sided.
Practical tip: If your document uses custom fonts, convert to PDF before you go. Otherwise, the kiosk computer might substitute fonts
and your neatly aligned resume becomes a modern art experiment.
Print Like a Pro: A Quick Cheat Sheet
- Ctrl+P / Cmd+P opens Print fast.
- Always check Print Preview, especially for multi-page documents.
- For partial prints, use Custom Pages (example:
1-2, 5, 7-9). - Need clean sharing? Print to PDF and send the file.
- Cut off text usually means paper size or margins mismatch.
- Nothing prints? Check offline status and print queue first.
Conclusion
Printing a Word document doesn’t have to be a gamble. If you remember just three things, you’ll win most battles:
(1) open Print with Ctrl+P/Cmd+P, (2) verify the right printer and page settings, and (3) use Print Preview before you commit.
When things go sideways, most fixes come down to printer status (offline), the queue (stuck jobs), or mismatched page sizes.
Get those under control and you’ll spend less time troubleshootingand more time enjoying the sweet sound of a printer that actually prints.
Bonus: Real-World Printing Experiences ( of “Yep, That Happened”)
Printing is one of those skills you don’t think you need… until you need it right now. The most common “experience”
people have with Word printing is the last-minute scenario: a resume due in 20 minutes, a permission slip due at 8 a.m.,
a contract that must be signed today, or a boarding pass because your phone decided to cosplay as a brick.
What these moments teach you is simple: the fastest way to print isn’t always the best way to print.
Take the resume example. You open the file, hit Print, and it comes out with the last line cut off. Panic.
In reality, that’s usually a margin or scaling problem. Resumes often use tight formatting, and a printer’s unprintable margins can
clip the bottom. The “experienced” move is to check Print Preview and then slightly increase bottom margin or reduce font size by a tiny step.
The goal isn’t to redesign your resume; it’s to prevent your best bullet point from disappearing like it’s in a magic trick.
Then there’s the school report scenario: you only need pages 2–4, but you print the entire 28-page document anyway because you’re rushing.
The printer spits out page 1, then pauses, then prints page 1 again (because the queue duplicated the job), and suddenly you’re in a paper
snowstorm. This is where experience teaches a boring but powerful habit: print a page range on purpose.
Typing 2-4 is faster than sorting 28 pages and apologizing to a tree.
A classic office moment is the “double-sided disaster.” You choose manual duplex, flip the stack the wrong way, and end up with
upside-down second pages. It feels personal. It’s not personalit’s physics and printer design.
The solution is to do a one-sheet test first. Print two pages with manual duplex, follow Word’s prompt, and see how the printer wants the stack flipped.
Once you learn your printer’s preference, you’ll never have to do the upside-down shuffle again.
Another surprisingly common experience: printing at a shared printer (library, coworking space, store) and discovering your document looks different.
Fonts shift, spacing changes, and what was a clean one-page form becomes a two-page saga. The seasoned move is to export to PDF before leaving home.
PDFs “freeze” your layout so the printer doesn’t improvise. Think of it as telling the printer, “No creative liberties today, thanks.”
Finally, there’s the emotional journey of the print queue. You click Print, nothing happens, so you click Print againthen againthen again.
Suddenly, the printer wakes up and tries to print four copies. Experience teaches restraint: check the queue first.
Cancel extra jobs, restart if needed, and only then reprint. The printer isn’t judging you (probably). It’s just waiting for one clear instruction.
And honestly, don’t we all?