Table of Contents >> Show >> Hide
- Why a Door Makes Such a Good Farmhouse Headboard
- Step 1: Choose the Right Door (Size, Style, and Sanity)
- Step 2: Tools and Materials Checklist
- Step 3: Safety First (Especially with Older Paint)
- Step 4: Measure and Plan Your Cut
- Step 5: Cut the Door Cleanly (Without Splinter Drama)
- Step 6: Patch the Hardware Holes Like a Pro
- Step 7: Sand, Clean, and Prep for Finish
- Step 8: Add Farmhouse Details (Optional, but Highly Satisfying)
- Step 9: Paint or Stain for the Farmhouse Look
- Step 10: Mounting Methods (Pick Your Adventure)
- Step 11: Finishing Touches That Make It Look “Store-Bought”
- Troubleshooting: Common Problems (and Easy Fixes)
- Real-World DIY Experiences: What People Learn the Hard Way (So You Don’t Have To)
- Conclusion: Your Bedroom, But With a Story
If you’ve ever walked past an old door at an architectural salvage yard and thought, “That thing has seen things,” congratulations: you are exactly one impulse purchase away from a charming farmhouse headboard. Turning a reclaimed door into a headboard is one of those DIY projects that looks wildly high-end, costs surprisingly little, and gives your bedroom instant characterlike it just moved in from a cozy country inn and brought pie.
This guide walks you through the whole processmeasuring, cutting, patching, sanding, finishing, and mountingplus real-world tips (including how to avoid the classic “my headboard bonked the wall at 2 a.m.” storyline).
Why a Door Makes Such a Good Farmhouse Headboard
Farmhouse style is all about honest materials, vintage texture, and pieces that look like they had a life before they met your throw pillows. A door checks every box:
- Instant panel detail: Five-panel, three-panel, beadboard, glass panesdoors come with built-in “design.”
- Big visual impact: A door is naturally tall and substantial, which makes the bed feel anchored.
- Budget-friendly: Salvage finds, marketplace deals, or even your own remodel leftovers can become the star.
- Totally customizable: Paint, stain, whitewash, milk paint, chalk paint, wallpaper inserts, shelf ledgesyou’re in charge.
Step 1: Choose the Right Door (Size, Style, and Sanity)
Pick a door style that reads “farmhouse”
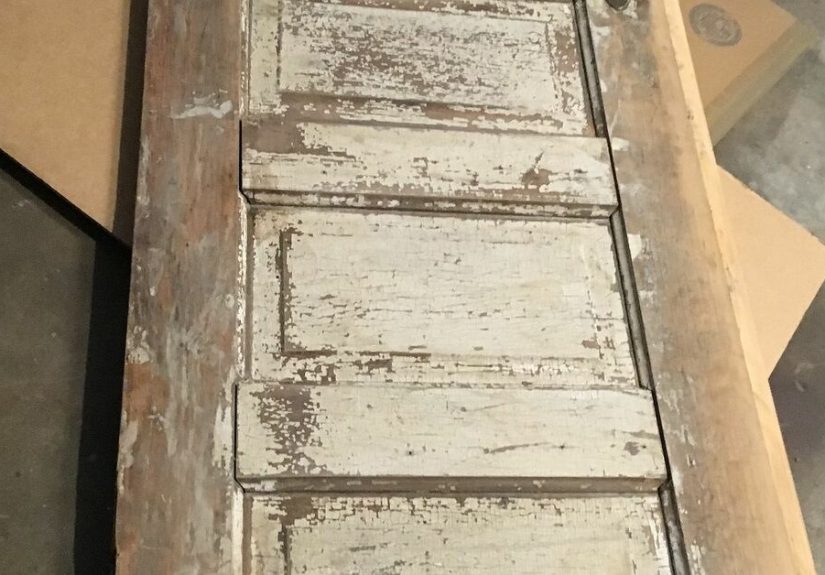
For classic farmhouse vibes, look for a paneled wood interior door (solid wood or solid-core if possible). Five-panel doors are especially popular because the symmetry looks great when rotated horizontally or framed with trim.
Get the sizing right (this part saves your soul)
Most interior doors are about 80 inches tall. That’s amazing news, because when you turn the door sideways, you’re working with a width that can match many beds.
- King bed: 76″ wide a sideways 80″ door often needs little to no trimming.
- Queen bed: 60″ wide you’ll likely trim the door down to fit.
- Cal King: 72″ wide usually a small trim, depending on your door.
- Full: 54″ wide trimming likely.
Pro tip: If you cut the door, try to trim from both ends so the panel layout stays centered and doesn’t look like it’s slowly sliding off to one side.
Check for issues before you buy
- Warping: Sight down the length. A little character is fine; a banana is not.
- Cracks and rot: Minor cracks can be filled. Soft, punky wood is a pass.
- Hardware holes: Doorknob and deadbolt holes are normaljust plan to patch them.
- Weight: Solid doors can be heavy. That’s good for sturdiness, but it affects mounting choices.
Step 2: Tools and Materials Checklist
Tools
- Tape measure, pencil, and straightedge
- Circular saw (or track saw) + clamps for a straight cut
- Orbital sander + sandpaper (80/120/220 grit)
- Drill/driver + bits
- Putty knife
- Stud finder (if wall-mounting)
- Safety gear: eye protection, gloves, and a good mask/respirator
Materials (choose based on your build)
- Old door
- Wood filler (and/or a wood plug for knob holes)
- Primer + paint (or stain + topcoat)
- Optional trim/molding, 1x4s for framing, and caulk
- Mounting method hardware:
- Bed-frame mount: 2×4 legs + bolts/washers or headboard brackets
- Wall mount: French cleat + heavy-duty screws into studs
Step 3: Safety First (Especially with Older Paint)
If your door is old enough to have a backstory, it may also have old paint. Homes built before 1978 may have lead-based paint, and sanding can create hazardous dust. If you’re unsure, treat it like lead might be present:
- Work outside or in a contained area
- Keep kids and pets away from the work zone
- Avoid dry sanding old paint; consider wet sanding or stripping methods designed to reduce dust
- Clean up carefully (think: vacuum with HEPA filtration, wipe surfaces)
Step 4: Measure and Plan Your Cut
Decide whether your door will be:
- Horizontal (most common): door panels run sideways; looks like a wide, architectural headboard.
- Vertical (great for narrow doors): door stands upright; works well for twins or as a dramatic accent with wall-mounting.
- Double-door (big statement): two matching doors side-by-side for a king-size focal point.
Mark the width
Measure your mattress width and decide how much overhang you want. A common goal is 0–2 inches wider than the mattress for a clean look that doesn’t dominate the room. Mark your cut line with a straightedge.
Step 5: Cut the Door Cleanly (Without Splinter Drama)
If trimming is needed:
- Clamp a straightedge as a cutting guide.
- Use painter’s tape over the cut line to reduce splintering.
- Cut slowly with a sharp blade.
- If you cut from both ends, re-check that your panel layout still looks balanced.
Reality check: Hollow-core doors can work, but they’re trickier to patch and mount securely. Solid wood or solid-core doors usually behave better for a headboard build.
Step 6: Patch the Hardware Holes Like a Pro
Option A: Wood plug (sturdy and clean)
Cut a plug from scrap wood using a hole saw that matches the doorknob hole size. Glue it in, let it dry, then skim-coat with wood filler for a seamless finish.
Option B: Filler (quick and effective)
For small dents and screw holes, wood filler is perfect. For larger knob holes, many DIYers use a two-part filler (often called “auto body filler” style) because it hardens fast and sands smooth. Apply in layers, let it cure, then sand flush.
Option C: Make it a feature
If patching feels like homework, turn the knob hole into a design element: a small round plaque, a medallion, a mounted sconce (if you know what you’re doing electrically), or even a centered wood rosette. Farmhouse style loves a good “this was on purpose” moment.
Step 7: Sand, Clean, and Prep for Finish
Good finishing is mostly unglamorous preplike brushing your teeth. You don’t want to do it, but you also don’t want to be the person who didn’t do it.
- Start with 80–120 grit to knock down roughness and old finish edges.
- Move to 220 grit for a smoother painted finish.
- Wipe dust off with a tack cloth or a damp rag.
- Caulk small gaps if you add trim or molding.
Step 8: Add Farmhouse Details (Optional, but Highly Satisfying)
Frame it out with 1x4s
Adding a simple frame around the door can make it look custom-built rather than “I found this near a dumpster (affectionate).” Attach 1×4 boards around the perimeter, fill nail holes, caulk edges, and sand smooth.
Add a top ledge (mantel vibe)
A narrow shelf on top is a farmhouse classic. It’s perfect for leaning art, holding a tiny plant, or staging your current favorite book so it looks like you read more than texts and takeout menus.
Fake “barn door” hardware
Decorative strap hinges or faux rollers can add rustic flairjust keep them low-profile so they don’t catch hair or bedding.
Step 9: Paint or Stain for the Farmhouse Look
Paint options
- Crisp white: Clean, bright, classic farmhouse.
- Warm greige: Softer than white, hides scuffs better.
- Muted greens/blues: Farmhouse with personality.
- Chippy layered look: Paint two colors, then distress edges for a timeworn finish.
Use primer if the wood is raw, stained, glossy, or has knots. Apply 2 coats of paint for even coverage, sanding lightly between coats for a smoother finish.
Stain options
Stain highlights the door’s grain and feels especially rustic. Finish with a protective topcoat (matte or satin tends to look more farmhouse than high-gloss).
Step 10: Mounting Methods (Pick Your Adventure)
Method 1: Attach the door headboard to a bed frame (freestanding style)
This is great if you don’t want to drill into walls. The usual approach is to create “legs” behind the door using 2x4s, then bolt those legs to your bed frame or use headboard brackets.
- Cut two 2×4 legs to extend from the floor up behind the door.
- Secure the door to the legs with screws (pre-drill to avoid splitting).
- Align the headboard with the bed frame’s mounting holes or brackets.
- Use bolts + washers + nuts and tighten evenly so the headboard sits flush and doesn’t wobble.
Tip: If the headboard wobbles, add a horizontal brace between the legs or use felt pads where the headboard meets the wall.
Method 2: Wall-mount with a French cleat (super clean + very sturdy)
A French cleat is basically two matching boards cut at a 45-degree angle. One mounts to the wall (into studs), the other mounts to the back of the headboard. They lock together like a wooden handshake.
- Cut a 1×4 length to match most of your headboard width.
- Rip it lengthwise at a 45-degree angle (or buy a metal cleat system).
- Mount the wall cleat into studs with heavy-duty screws.
- Mount the matching cleat to the headboard.
- Lift and hook the headboard onto the wall cleat.
This method is especially nice for heavy doors, tight bedrooms, or anyone who’s tired of furniture scooting around like it’s auditioning for a dance show.
Step 11: Finishing Touches That Make It Look “Store-Bought”
- Add bumper pads: Felt or rubber pads prevent wall scuffs.
- Seal high-touch finishes: A clear topcoat helps painted surfaces resist scratches.
- Center it visually: Even a small offset looks “off” once the bed is made.
- Style it simply: Farmhouse looks best when it’s cozy, not clutteredthink one statement art piece and a pair of matching lamps.
Troubleshooting: Common Problems (and Easy Fixes)
“My door is too narrow for my bed.”
Options: mount vertically for a twin/full, use two doors side-by-side, or frame the door with wide trim boards to increase visual width.
“The patched knob hole keeps showing through.”
Skim-coat again, sand smoother, and use primer. Dark paints often hide tiny flaws better than bright white.
“It wobbles when I sit up in bed.”
Add bracing, tighten bolts evenly, or switch to a French cleat wall mount for a rock-solid feel.
“The finish looks streaky.”
Use a high-quality brush/roller, don’t overload paint, and sand lightly between coats. Also, paint has feelingslet it dry fully before judging it.
Real-World DIY Experiences: What People Learn the Hard Way (So You Don’t Have To)
Every “old door headboard” tutorial looks calm and tidylike the door politely arrived pre-sanded, offered you a cup of tea, and asked what color it should become. In real life, DIYers tend to run into a few very specific plot twists.
Experience #1: The Salvage Yard Confidence Boost (and the Trunk Tetris)
People often start with a heroic salvage-yard mission: you find the perfect door with dreamy panels and just the right amount of chippy paint. Then you realize it’s roughly the size and weight of a small canoe. The most common lesson here? Bring a tape measure, bring moving blankets, and accept that your car will briefly become a door delivery system with wheels.
Experience #2: Surprise Hardware, Hidden Nails, and the “Why Is This Sparkling?” Moment
Old doors sometimes hide nails, staples, or mysterious metal bits from past lives. DIYers frequently discover this right when the sander hits it and makes a sound that suggests your project is now also a percussion instrument. The workaround is simple: scan for metal, pull what you can, and use the right blade and sanding approach. If the door has decorative metal plates you like, keep themfarmhouse style loves honest history.
Experience #3: The Patch Job That Felt Great… Until the First Coat of Paint
Patching a doorknob hole is emotionally complicated. The filler looks smooth, you feel powerful, and then paint goes on and suddenly the hole’s outline reappears like a ghost who pays rent. The shared wisdom: patch in layers, sand carefully, and don’t skip primer. Also, don’t try to fix everything in one rushed blob of filler. Your future self will thank you, and your headboard won’t look like it’s winking.
Experience #4: The Color Choice Spiral
DIYers often begin with “simple white farmhouse.” Then they see a warm greige. Then they consider a moody blue. Then they start researching “milk paint vs chalk paint” at midnight. The practical takeaway: pick the finish that matches your room’s lighting and your tolerance for scuffs. Bright white is timeless, but it also reveals every bump and brushstroke. A slightly warmer neutral can be more forgiving and still feels farmhouse.
Experience #5: Mounting is Where the Grown-Up Decisions Live
Many people underestimate how much mounting affects daily happiness. If you attach the headboard to the bed frame, everything must be tight and braced so it doesn’t rattle when you sit up. If you wall-mount, you must hit studs and use hardware appropriate for the weight. The “real life” lesson: choose the method that fits your space and the door’s heft. Heavy solid doors often feel best with a French cleat, because it looks clean and stays put.
Experience #6: The Final Reveal Feels Ridiculously Good
Once the bed is made and the headboard is in place, DIYers almost always say the same thing: “Wait… I made this?” A reclaimed door brings instant warmth and architectural detail that’s hard to buy new. It also becomes a conversation pieceespecially when you casually say, “Oh, that? It used to be a door,” like you do this sort of transformation daily.
Conclusion: Your Bedroom, But With a Story
Turning a door into a farmhouse headboard is the perfect blend of thrifty, stylish, and satisfyingly practical. Measure thoughtfully, patch patiently, finish with intention, and mount it safelyand you’ll end up with a headboard that looks custom, feels cozy, and has more personality than most flat-pack furniture combined. Bonus: every time you see it, you’ll get that quiet little DIY pride buzz that pairs beautifully with coffee.