Table of Contents >> Show >> Hide
- Primer vs. Paint: What’s the Real Difference?
- What Does Primer Actually Do?
- Types of Primer (and When to Use Each)
- When Do You Really Need Primer?
- But What About “Paint-and-Primer-in-One”?
- Indoor Air Quality, VOCs, and Safety
- How Pros Choose: A Quick Substrate-to-Primer Map
- Application Tips the Pros Don’t Skip
- Quality Signals and Standards
- Common Myths (Busted)
- Real-World Scenarios (Quick Picks)
- Product-Style Examples (So You Can Decode Labels)
- Step-by-Step: Priming Like a Pro
- Conclusion
- Hands-On Experience: of Hard-Won Primer Wisdom
Short answer: Primer is the under-the-radar MVP that helps paint stick, hide, and last. It solves problems (stains, slick/glossy surfaces, wild color changes), saves topcoat coats, and can even seal funky odors. If paint is the outfit, primer is the good underwearnobody sees it, but wow does it make everything look better.
Primer vs. Paint: What’s the Real Difference?
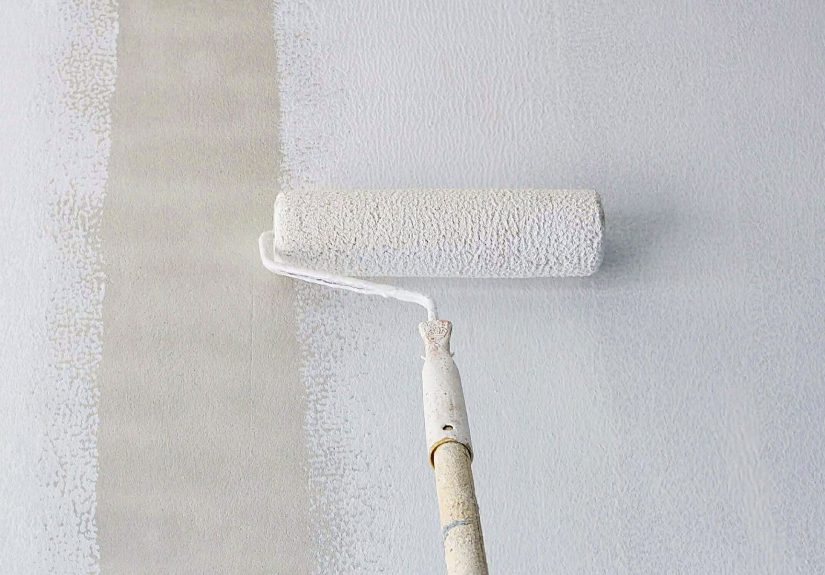
Paint is formulated for color and durability; primer is formulated for adhesion, sealing, and problem-solving. Primers create a uniform, slightly “toothy” substrate so topcoats bond tightly and wear well. Many primers also equalize porosity (think fresh drywall mud next to paper) so your color lays down evenly instead of blotchy.
What Does Primer Actually Do?
1) Improves Adhesion
Primers help new paint grip slick or previously coated surfaces (like old alkyd/oil paint, glossy trim, or laminates). Some brands even recommend a quick test to identify old coatings (e.g., the alcohol rub test) so you can pick the right primer and topcoat system.
2) Blocks Stains and Odors
From water rings and nicotine to crayon art that would make your toddler proud, specialized stain-blocking primers lock contaminants beneath the surface. Heavy-duty oil and shellac formulations are the go-tos for severe stains and for sealing persistent odors (smoke, pets, mustiness).
3) Evens Porosity and Hides Previous Colors
Primers create a uniform base so your final color looks consistent. This is especially important when you’re repainting from dark to light or working over patched areas and fresh joint compound.
Types of Primer (and When to Use Each)
Water-Based (Latex/Acrylic) Primers
Best for: General interior/exterior use, drywall, bare wood in good condition, masonry, previously painted latex surfaces. Water-based primers are easy to use, low odor, and fast-drying. Many modern formulas offer respectable stain resistance and exterior durability (check the label for “multi-surface” or “exterior-rated”).
Oil-Based (Alkyd) Primers
Best for: Tannin-rich woods (cedar, redwood), troublesome stains, and difficult adhesion scenarios. Oil-based primers bond hard and block many stains better than basic latex. They’re a classic choice for trim and doors when you need maximum enamel holdout.
Shellac-Based Primers
Best for: Fire/smoke damage, pet odors, knots and sap bleed, and the “nothing-else-worked” situations. Shellac primers lock down brutal stains fast and sand to a glassy smoothnessbeloved for restoration and spot-priming.
Specialty & Problem-Solver Primers
Manufacturers now offer water-based “restoration” products that mimic many oil/shellac benefits with easier cleanup, plus masonry/alkali-resistant primers, bonding primers for glossy laminates, and rust-inhibitive metal primers. Always match primer to the substrate and the problem you’re solving.
When Do You Really Need Primer?
- New drywall or patched drywall: Use a dedicated drywall or PVA primer to equalize porosity before color coats.
- Big color swings: Going dark-to-light (or vice versa) is smoother, faster, and more even with primer.
- Glossy or previously oil-painted surfaces: Scuff-sand and use a bonding/appropriate primer for reliable adhesion.
- Tannin-bleeding woods and knots: Spot-prime with shellac or tannin-blocking primer to prevent stains from “telegraphing” through.
- Stains/odors/smoke: Use stain- and odor-blocking primers (oil or shellac, or modern water-based restorers).
- Masonry, bare metal, problem substrates: Use substrate-specific primersalkali-resistant for new concrete, rust-inhibitive for metal, bonding for glossy laminates.
But What About “Paint-and-Primer-in-One”?
“Self-priming” paints are essentially higher-solids coatings that build film faster on sound, previously painted surfaces. They save time in mild scenarios but don’t replace true primers for new drywall, glossy/oil surfaces, severe stains, knots, odors, or dramatic color changes. When in doubt, prime.
Indoor Air Quality, VOCs, and Safety
Primers and paints can emit VOCs while drying. Many modern water-based primers are low-VOC, and some brands publish health product declarations or SDS sheets listing contents. There’s no single federal VOC limit for your living room, but minimizing exposure (ventilation, PPE, choosing low-VOC products) is smart.
How Pros Choose: A Quick Substrate-to-Primer Map
- New Drywall: PVA/drywall primer, then quality latex topcoat.
- Previously Painted Latex Walls (dull, clean): High-quality water-based primer or go straight to paint if color change is minor.
- Previously Oil-Painted Trim/Doors: Scuff-sand + bonding primer (oil or specialized acrylic), then enamel. Use the alcohol swab test to identify alkyd vs. acrylic.
- Tannin-Rich Woods / Knots: Shellac or tannin-blocking oil primer.
- Smoke/Pet Odors or Severe Water Stains: Odor/stain-blocking oil or shellac; “restoration” water-based options exist.
- Exterior Bare Wood/Siding: Exterior-rated acrylic or oil primer per manufacturer system; mind temperature application windows.
- Metal (Ferrous): Rust-inhibitive metal primer (brand/system specific).
- Masonry/Concrete/Stucco: Alkali-resistant masonry primer; allow proper cure time.
Application Tips the Pros Don’t Skip
Surface Prep Is 80% of Success
Clean (degrease kitchens), degloss (scuff-sand glossy finishes), patch, and dust off. Tape knots if they’re oozing, and spot-prime repairs before full-priming for the most uniform finish.
Mind the Conditions
Follow label directions for temperature and humidity. “Too cold” or “too humid” can cause poor curing, flashing, or adhesion problems. Many multi-surface primers specify 35–90°F and proper tool selectionworth heeding.
Use the Right Tools
Quality nylon/poly brushes and the correct nap roller cover reduce stipple and ensure even film build. For airless, match the tip size and filter to the product spec; thin only if the label allows.
Respect Dry and Recoat Times
Primers dry quickly, but curing and recoat windows matter for adhesion and stain lock. If you rush, tannins and stains can “ghost” through the first color coat. Check the tech data sheet if you’re in a hurry.
Quality Signals and Standards
While you won’t find a single “primer police,” coatings are engineered around performance standards and lab tests (adhesion, scrub, stain-blocking). Industry bodies like ASTM publish methods used by manufacturers and labs; some primers cite stain-blocking test practices directly.
Common Myths (Busted)
- “White paint is basically primer.” Nopepaint ≠ primer. Use true primer for adhesion, stain-blocking, and porosity control.
- “Self-priming paint always replaces primer.” Works on sound, previously painted wallsnot on stains, odors, new drywall, or glossy/oil surfaces.
- “All low-VOC products are equal.” VOC content varies; always ventilate and review SDS/HPD when sensitive to emissions.
Real-World Scenarios (Quick Picks)
Kitchen grease walls: Clean aggressively, degloss, then bonding or stain-blocking primer to resist telegraphing. Pet odor bedroom: Shellac or dedicated odor-sealing primer. Dark purple to soft white: One solid stain-blocking primer coat saves two or more color coats. New basement drywall: PVA/drywall primer before color so the first coat doesn’t disappear into the paper and mud.
Product-Style Examples (So You Can Decode Labels)
- General-purpose, water-based multi-surface primer: Good first choice for many repaint jobs; often interior/exterior rated.
- Oil-based stain blocker: Classic for water stains, smoke, and tannins on trim/doors.
- Shellac-based sealer: Fast-drying, extreme stain/odor lock; sands to a mirror-smooth base.
- “Restoration” water-based: Newer tech offering heavy stain/odor blocking with water cleanup.
- Exterior-rated acrylic: Designed for weathering and temperature swingsmind the application window.
Step-by-Step: Priming Like a Pro
- Diagnose the surface: What is it (drywall/wood/metal/masonry)? Any stains, odors, or gloss? Do the alcohol swab test if the old coating is unknown.
- Prep thoroughly: Clean, scrape, fill, sand, and dust. Tape off sensitive edges.
- Choose the primer that fits the problem: General-purpose vs. bonding vs. stain/odor vs. specialty.
- Apply at the right thickness: Roll or spray per the label; don’t overwork. Respect temperature/humidity and recoat times.
- Inspect and spot-fix: If any stain ghosts through, spot-prime again before color.
- Finish strong: Caulk after priming (it sticks better), then lay down your topcoats.
Conclusion
Primer is your insurance policy for a paint job that looks better, lasts longer, and resists the “why is this bleeding through?” stress. Pick a primer that matches your surface and problem, follow the label, and you’ll save time and coats in the long run. Your walls (and future you) will thank you.
SEO Finish
sapo: Primer paint is the behind-the-scenes hero that makes color coats stick, hide stains, and last. This guide breaks down what primer is, when you need it (new drywall, stains, glossy trim, big color changes), how to choose between water-based, oil, and shellac options, and the pro steps that deliver a smooth, durable finishwithout extra coats or headaches.
Hands-On Experience: of Hard-Won Primer Wisdom
The “I’ll just skip primer” experiment. I once repainted a rental kitchen where the previous tenant believed bacon grease was a wall finish. I cleaned thoroughlyso I thoughtthen rolled on premium paint labeled “paint & primer.” Looked great wet. Two days later, telegraphed blotches appeared where lingering grease lived. The fix was a scrub-down with a degreaser, a quick scuff, and a dedicated bonding/stain-blocking primer. The repaint covered in one coat and stayed cleanable without shiny “hot spots.” Lesson: self-priming paint is not a magic eraser for contamination.
New drywall humility. On another project, I mixed new drywall with older painted walls in a hallway. Without primer, the first color coat soaked into the mudded seams and screw patches, leaving dull stripes (flashing) you could see from space. A fast PVA/drywall primer unified porosity; the next color coat looked like it came from a magazine. If you see patchwork, think primer first.
Oil or latex underneath? Do the swab. In a 1960s home, the door casings were suspiciously glossy and tough. A quick isopropyl alcohol swab on an inconspicuous spot didn’t soften or remove the finishclassic alkyd/oil. A bonding primer plus scuff-sanding saved me from the heartbreak of peeling latex. The enamel topcoat then cured rock-hard. That 10-second test can save an entire weekend.
Knots and tannins don’t negotiate. Cedar and pine knots will laugh at ordinary latex. I once tried to shortcut a knotty-pine accent wall with a “stain-resistant” latex primer. A week later, amber targets appeared where every knot lived. One coat of shellac-based primer locked it down permanently; the touch-up disappeared after repainting. If you see sapwood, reach for shellac.
Odor control is chemistry, not wishful thinking. Smoke-affected rooms can smell fine mid-paint and then exhale on humid days. A shellac or restoration-grade primer is the closest thing to a reset. I’ve used it in rentals with pet issues and in a condo with a popcorn ceiling that reeked of cigarettes. After sealing and repainting, the spaces smelled neutral even during a week of monsoon humidity.
Exterior timing matters. On exteriors, I’ve had the best results when I follow the label’s temperature window religiously. Priming early morning in cool, damp air led to extended dry times and subtle surfactant leaching (faint streaks). Sticking to the brand’s 35–90°F window and allowing sun and breeze to help yielded tighter films and less flashing. Labels aren’t suggestionsthey’re lifelines.
Final pro move: prime, then caulk. Caulk adheres better to primer than to dusty drywall or chalky old paint. Priming first also highlights gaps you missed, so your caulk lines end up cleaner. It’s a small sequencing tweak that makes trim look carpentry-grade crisp.
Takeaway: Primer is not extra work; it’s a shortcut to fewer topcoats, cleaner edges, and finishes that survive kids, pets, steamy showers, and late-night leftovers. Choose it like a toolby the problem it solvesand your paint jobs will start looking suspiciously professional.