Table of Contents >> Show >> Hide
- What Is a Custom Workshop Squeezebox?
- Why the Squeezebox Idea Still Works
- The Core Parts of a Raspberry Pi Workshop Squeezebox
- Why an Ammo Can Makes a Surprisingly Good Enclosure
- Software Choices: Lyrion, piCorePlayer, and Squeezelite
- Design Tips for a Better Custom Workshop Squeezebox
- How It Compares With Buying a Smart Speaker
- Real-World Uses for a Workshop Squeezebox
- Common Mistakes to Avoid
- Is This Project Beginner-Friendly?
- Experience Notes: Building and Living With a Custom Workshop Squeezebox
- Conclusion
A workshop is rarely a quiet place. There is the polite buzz of a charger, the impolite scream of an angle grinder, the occasional clunk of a dropped wrench, and, if the day is going well, music loud enough to make sanding, soldering, sweeping, or staring at a stubborn bolt feel slightly more heroic. That is where the idea of a custom workshop Squeezebox becomes more than a fun Raspberry Pi project. It becomes a rugged little jukebox with a mission: keep the tunes local, portable, simple, and tough enough to survive a garage.
The original Logitech Squeezebox was a beloved network music player because it did one thing beautifully. It let people stream their own music library over a local network without needing a laptop balanced on a paint can. Years later, the Squeezebox community is still alive through open-source software such as Lyrion Music Server, formerly known as Logitech Media Server, and player software like Squeezelite and piCorePlayer. In other words, the hardware may have aged, but the concept still has more lives than a shop cat.
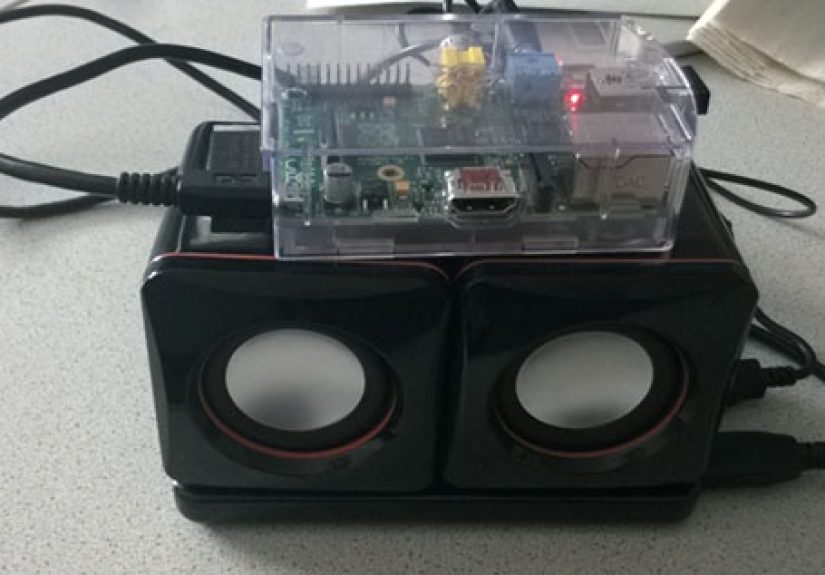
The project behind “A Custom, Workshop Squeezebox” takes that spirit and gives it steel boots. Instead of buying a delicate speaker for a dusty workbench, a maker built a garage-ready music streamer using a Raspberry Pi, a small touchscreen, USB-powered speakers, a Wi-Fi adapter, a USB hub, and a power bank, then mounted the whole setup inside a repurposed ammo can. It is part music player, part toolbox, part “please do not knock this off the bench again.”
What Is a Custom Workshop Squeezebox?
A custom workshop Squeezebox is a DIY network audio player designed for tough spaces such as garages, sheds, maker labs, woodshops, repair benches, and hobby rooms. It borrows the core idea of the classic Squeezebox: store or manage music on a server, connect a player over the local network, and control playback without depending entirely on cloud services.
In practical terms, the build is a compact Raspberry Pi music streamer. The Raspberry Pi runs player software, connects to the local network by Wi-Fi or Ethernet, sends audio to speakers or a DAC, and can be controlled from a touchscreen, phone, tablet, or browser. The “workshop” part matters because the enclosure, power system, and controls are chosen for real-world messiness. Dust happens. Gloves happen. Coffee happens. Gravity, that old villain, happens constantly.
The best version of this project is not necessarily the prettiest. It is the one that works every time you walk into the garage, flip a switch, and need background music before your motivation wanders off to check email.
Why the Squeezebox Idea Still Works
The appeal of the Squeezebox has always been control. Many modern smart speakers are convenient, but they often assume your music lives in a subscription service, your account is always logged in, and your internet connection is behaving like a responsible adult. A local Squeezebox-style setup flips the priorities. Your music library can stay on your home network. Your playlists can be yours. Your workshop radio does not need to become a tiny billboard with a speaker attached.
Lyrion Music Server keeps the old Squeezebox ecosystem useful by serving local music collections, internet radio, and supported streaming services to compatible players. It can run on many platforms, including Linux, Windows, macOS, NAS devices, and Raspberry Pi systems. For a maker, that flexibility is gold. You can run the server on a dedicated Pi, an existing home server, or a computer already storing your music. Then the workshop unit acts as the player.
This separation between server and player is one of the smartest parts of the system. If the workshop box gets dusty, dented, or upgraded, the music library does not have to move. The Squeezebox is just the friendly front end: a rugged messenger carrying playlists from the server to the speakers.
The Core Parts of a Raspberry Pi Workshop Squeezebox
A project like this can be built in many ways, but the classic approach uses a handful of parts that are easy to understand and widely available.
1. Raspberry Pi as the Brain
The Raspberry Pi is the small computer at the center of the build. Older projects used boards such as the Raspberry Pi Model B, while a modern builder might choose a Raspberry Pi 3, 4, or 5 depending on availability, power needs, and software preference. The Pi handles networking, audio playback, display output, and communication with the music server.
For workshop audio, the newest and fastest board is not always required. Music streaming is lightweight compared with video editing or gaming. A stable power supply, reliable storage card, and clean software setup matter more than bragging rights. Nobody has ever impressed a drill press by saying, “This streamer has eight gigabytes of RAM.”
2. Audio Output and Speakers
The original custom workshop build used USB-powered speakers inside the enclosure. That choice makes sense for portability because the speakers and Pi can share a compact power arrangement. For better audio quality, modern builders may use a USB DAC, a Raspberry Pi DAC HAT, powered bookshelf speakers, or a small amplifier module connected to passive speakers.
The right choice depends on the workshop. A woodworking shop with saws and dust collection needs volume and durability more than delicate hi-fi detail. A clean electronics bench may benefit from a DAC and compact near-field speakers. A garage gym may need enough punch to compete with a fan, a treadmill, and your questionable decision to do burpees.
3. Touchscreen or Headless Control
A small touchscreen, such as a 320 x 240 PiTFT-style display, gives the unit a self-contained feel. You can see what is playing, tap controls, and avoid reaching for your phone with hands covered in glue or grease. The tradeoff is that a screen adds complexity, power draw, and another hole to cut in the enclosure.
A headless setup is simpler. The player runs without a built-in display and is controlled from a phone, tablet, web interface, or app. For many workshops, headless control is perfectly fine. Still, a front-panel display gives the build personality. It turns a box of electronics into a proper gadget, and gadgets are more fun when they blink politely.
4. Wi-Fi, Ethernet, and Local Networking
A Squeezebox-style player needs a network connection. Wi-Fi is convenient for a portable unit, especially if the box moves between the garage, patio, basement, and driveway. Ethernet is more reliable if the player lives in one location and network cabling is available.
For a workshop, reliability should win whenever possible. Thick walls, metal shelving, power tools, and distance from the router can weaken Wi-Fi. If your player stutters whenever someone closes the garage door, the music is not haunted; the network is probably struggling. A better access point, Ethernet bridge, or wired connection can turn a frustrating build into a dependable one.
5. Power Supply and Battery Options
The original workshop Squeezebox concept included a power bank for portability and an external USB power option. This is a clever combination. Battery power lets the unit work away from outlets, while external power keeps it running during long sessions.
Power planning is not glamorous, but it is essential. A Raspberry Pi, touchscreen, USB hub, Wi-Fi adapter, and speakers can draw more current than a weak charger can provide. Underpowered Pi systems may reboot, glitch, lose Wi-Fi, or behave like they have had too much coffee. A proper 5.1V Raspberry Pi power supply or a high-quality battery bank with enough output is one of the easiest ways to prevent mysterious problems.
Why an Ammo Can Makes a Surprisingly Good Enclosure
A metal ammo can is not the only possible case, but it has personality. It is tough, portable, usually has a handle, and looks right at home in a workshop. A plastic project box may be easier to cut, but an ammo can says, “This playlist has survived things.”
However, using a metal enclosure brings design challenges. Metal blocks Wi-Fi signals, so antenna placement matters. A USB Wi-Fi dongle may need to sit outside the case or connect through a short extension. Sharp cut edges must be filed smooth. Electronics need insulation from the conductive case. Speakers need proper mounting. Ventilation must be considered if the unit runs warm. And if the can once held anything dirty, oily, or questionable, it should be cleaned thoroughly before electronics go anywhere near it.
The charm of the original project came from its practical roughness. Holes were cut for speakers, a touchscreen, and power access. Mounting screws were adapted. Hot glue helped secure components. The result was not a sterile retail product. It looked like something built by a person who needed music in the garage and had tools nearby. That is the heart of DIY.
Software Choices: Lyrion, piCorePlayer, and Squeezelite
The software side of a custom Squeezebox can be surprisingly approachable. Many builders choose piCorePlayer, a lightweight Raspberry Pi distribution designed for Squeezelite playback and, if desired, running Lyrion Music Server. It can turn a Pi into a Squeezebox-compatible player with relatively little overhead.
Another common approach is to run Lyrion Music Server on a separate machine and install Squeezelite on the Raspberry Pi player. This keeps the workshop device lean and lets a more permanent server manage the music library. For users who already have a NAS or home server, this is often the cleanest setup.
The basic workflow is simple in concept:
- Install the chosen player software on a microSD card.
- Boot the Raspberry Pi and connect it to the network.
- Configure audio output, Wi-Fi, and the player name.
- Connect the player to Lyrion Music Server.
- Test playback before sealing everything inside the case.
That last step deserves applause. Test before final assembly. Test the speakers. Test the power bank. Test Wi-Fi. Test the display. Test whether the USB hub behaves. Test whether your enclosure layout allows cables to bend naturally. Future you will be grateful, and future you already has enough problems.
Design Tips for a Better Custom Workshop Squeezebox
Plan the Layout Before Cutting
Before attacking the enclosure with a drill, grinder, rotary tool, or heroic confidence, arrange every component on the bench. Check cable lengths, port access, heat clearance, speaker depth, and whether the lid can close without crushing anything. Cardboard templates help. Painter’s tape helps. Measuring twice helps. Measuring once and muttering “close enough” helps less.
Protect the Electronics
Workshops create dust, vibration, and accidental impacts. Use standoffs for the Raspberry Pi, strain relief for cables, and insulation between circuit boards and metal surfaces. If the enclosure is conductive, do not let exposed solder joints or USB boards rest directly against it. A small short circuit can turn a music player into a silent modern sculpture.
Make the Controls Glove-Friendly
Tiny buttons are annoying in a workshop. Large physical controls for volume, power, or play/pause can be more useful than a touchscreen alone. Some builders add a rotary encoder for volume or a front-panel power switch. Even if playback is usually controlled from a phone, physical controls make the device feel finished.
Think About Heat and Ventilation
A sealed metal case can trap heat. Raspberry Pi boards are efficient, but displays, amplifiers, and charging circuits can warm up. If the unit will run for hours, add ventilation holes, use heatsinks where appropriate, and avoid placing the Pi directly above heat-producing components. A workshop player should be rugged, not roasted.
Keep Maintenance Easy
The best DIY projects are serviceable. Use removable panels, accessible screws, labeled cables, and enough slack to open the case without tearing wires out. Future upgrades may include a better DAC, larger speakers, a different battery, or a new Raspberry Pi. Build as if you will open the box again, because you probably will.
How It Compares With Buying a Smart Speaker
A smart speaker is easier. Buy it, plug it in, sign in, and start streaming. A custom workshop Squeezebox asks more from you. You must choose parts, install software, solve power issues, cut an enclosure, and occasionally wonder why Linux has chosen this moment to develop an attitude.
But the reward is ownership. A smart speaker is a product. A custom Squeezebox is a tool you understand. You can repair it, modify it, run local files, change the interface, improve the speakers, and keep it working long after a manufacturer has moved on to the next shiny cloud-connected cylinder. For a workshop, that matters. Makers like things they can fix.
There is also something satisfying about building a music player that looks like it belongs next to clamps and socket sets. It does not need to pretend to be minimalist home decor. It can be industrial, chunky, scratched, and proud.
Real-World Uses for a Workshop Squeezebox
A custom workshop Squeezebox is useful anywhere music needs to be local, reliable, and a little louder than polite conversation. In a garage, it can stream playlists while you repair a bicycle or detail a car. In a woodshop, it can play internet radio or local albums without putting a laptop near sawdust. In a craft room, it can provide podcasts, jazz, folk, or whatever keeps the glue gun moving. In a maker space, it can serve as a shared audio station that members control from the network.
It can also become part of a whole-house audio setup. Lyrion Music Server supports multiple players, so the workshop unit can sync with other rooms. Start music in the kitchen, continue it in the garage, and finish the playlist outside while pretending yard work is a lifestyle choice.
Common Mistakes to Avoid
The first mistake is choosing an enclosure before understanding the component layout. A case that looks cool may be awkward once speakers, cables, boards, and batteries enter the scene. The second mistake is ignoring power requirements. Many Raspberry Pi audio problems are secretly power problems wearing a fake mustache.
The third mistake is sealing the unit too tightly. Dust protection is good, but electronics still need airflow and access. The fourth mistake is relying on weak Wi-Fi inside a metal case. The fifth mistake is skipping software backups. Once the system works perfectly, clone the microSD card or save your configuration. Nothing builds character like rebuilding a music player from scratch, but character is overrated on a Saturday.
Is This Project Beginner-Friendly?
Yes, with patience. A basic headless Raspberry Pi Squeezebox player is beginner-friendly if you are comfortable flashing an SD card, using a web interface, and following setup instructions. The enclosure work raises the difficulty. Cutting metal, mounting speakers, wiring power, and safely organizing components require care.
Beginners should start with the electronics on the bench before building the final case. Get the Pi booting. Get music playing. Confirm the server sees the player. Then add the touchscreen or DAC. Only after the system works should you move into drilling and mounting. This staged approach turns one big scary project into several small manageable victories.
Experience Notes: Building and Living With a Custom Workshop Squeezebox
The real joy of a project like this is not just the finished box. It is the strange little journey from “I should build a workshop music player” to “why is there hot glue on my elbow?” A custom workshop Squeezebox teaches several lessons that apply to almost every DIY electronics project.
First, the enclosure will fight back. On paper, everything fits. In real life, cables have thickness, USB plugs stick out farther than expected, speaker magnets occupy space like tiny landlords, and the lid closes only when you tilt the power bank at exactly the right angle. The best experience comes from mocking up the build before committing. Use cardboard, foam board, or even paper cutouts. Place the Raspberry Pi, speakers, screen, hub, and battery exactly where they will go. Open and close the lid. Pretend you are changing the SD card. Pretend a cable has failed. If maintenance looks annoying now, it will be worse later.
Second, sound in a workshop is different from sound in a living room. In a quiet room, you may care about imaging, detail, and whether the cymbals sparkle like artisanal rain. In a garage, you care whether you can hear the chorus over a shop vac. Small speakers mounted in a metal box can sound boxy, so placement matters. A little internal damping can reduce rattles. Rubber washers can help isolate vibration. If the case buzzes at certain frequencies, do not panic. Every workshop has at least one mysterious buzz; this one just happens to be yours.
Third, a visible interface changes how people use the device. A headless player is clean and simple, but a small display gives the box a face. It invites interaction. It also makes troubleshooting easier because you can see whether the Pi is alive, the player is running, or the network has vanished into the digital bushes. If the display is too small for comfortable touch control, it can still show track information while primary control happens from a phone.
Fourth, portability is addictive. Once the unit has a handle and battery power, it stops being just a workshop radio. It becomes the patio radio, the driveway radio, the “we are painting the spare room and need morale” radio. That means ruggedness matters. Use cable ties, proper mounts, covered connectors, and a charging port that does not require opening the whole case. The fewer delicate rituals required to use it, the more often it will actually be used.
Fifth, local music feels different. Streaming services are convenient, but a local library has personality. Old ripped CDs, live recordings, carefully named folders, strange compilation albums, and songs you forgot you owned all reappear. A Squeezebox-style setup makes that library useful again. In a workshop, that can be oddly motivating. The right album can turn a messy bench cleanup into a small event. The wrong album can still be skipped, which is why remote control exists.
Finally, the best experience is the moment the build becomes invisible. At first, you notice every part: the Pi, the screen, the power bank, the speaker holes, the software settings. After a while, you just walk in, start the music, and work. That is when the project succeeds. A custom workshop Squeezebox is not only a clever Raspberry Pi build. It is a small piece of infrastructure for creativity, repair, and weekend ambition. It keeps the soundtrack running while your hands are busy making something else.
Conclusion
A custom workshop Squeezebox is the kind of DIY project that makes perfect sense once you understand the problem. Workshops need music, but they also need equipment that can survive dust, bumps, imperfect Wi-Fi, and the occasional “oops.” By combining a Raspberry Pi, Squeezebox-compatible software, practical speakers, smart power planning, and a rugged enclosure, you can build a portable network audio player that feels personal, useful, and wonderfully overbuilt.
It is not the easiest way to play music in a garage. It is the most maker-friendly way. You get local control, upgradeable parts, open-source software, and a device that looks like it belongs beside real tools. That is the beauty of the project: it turns an old streaming idea into a modern workshop companion. And unlike a fragile smart speaker, it will not look offended when sawdust lands on it.
Note: This article is written for web publication in original American English and is based on real DIY audio, Raspberry Pi, Squeezebox, Lyrion Music Server, and workshop electronics practices without adding source-link elements inside the article body.