Table of Contents >> Show >> Hide
- What Is a DIY Lego Head Organizer?
- Why Make One Instead of Buying One?
- Best Uses for a DIY Lego Head Organizer
- Materials You Will Need
- Step-by-Step: How to Make a DIY Lego Head Organizer
- Smart Sorting Ideas for LEGO Pieces
- Design Ideas for Different Rooms
- Safety Tips Before You Start
- Cleaning and Maintenance
- Common Mistakes to Avoid
- DIY Lego Head Organizer Experience: What Actually Works in Real Life
- Conclusion
A DIY Lego Head Organizer is one of those projects that looks playful, solves a real storage problem, and makes you wonder why the tiny plastic bricks have been allowed to roam free like caffeinated ants for so long. If your home has LEGO pieces under the sofa, inside the sock drawer, and somehow in the dog’s bed, this organizer can bring order back to the kingdom.
The idea is simple: create a LEGO minifigure-head-inspired storage container that can hold bricks, minifigures, instruction booklets, craft supplies, desk items, or small toys. You can make it from a round plastic container, a large jar, a bucket, a repurposed storage bin, or an existing LEGO-style storage head that you customize with labels, compartments, and sorting systems. The result is part toy storage, part room decor, and part “please stop stepping on bricks at midnight” survival tool.
This guide walks you through materials, design choices, sorting methods, safety notes, decorating ideas, and real-life experience tips for making a DIY Lego Head Organizer that is useful, cute, and durable enough for everyday playroom chaos.
What Is a DIY Lego Head Organizer?
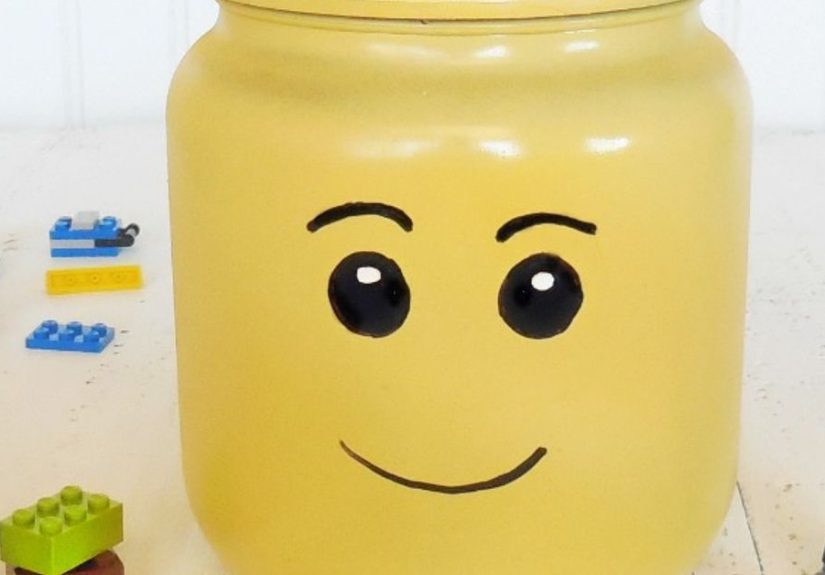
A DIY Lego Head Organizer is a storage container designed to look like a classic yellow LEGO-style minifigure head. It usually has a rounded shape, a removable lid, and a simple face drawn, painted, or applied with vinyl decals. Inside, it can be left open for quick cleanup or divided into sections for better sorting.
Official LEGO Storage Heads are stackable, rounded containers inspired by minifigure heads and are commonly used for storing bricks and accessories. A DIY version borrows that cheerful look but gives you more freedom. You can choose the size, expression, color, compartments, labels, and purpose. Want a happy face for regular bricks, a wink for minifigures, and a dramatic “panic face” for mystery pieces nobody can identify? That is the spirit.
Why Make One Instead of Buying One?
Buying a ready-made LEGO storage head is easy, and it can be a great option. But building your own organizer gives you three big advantages: customization, budget control, and better fit for your home.
Customization
Every LEGO collection is different. Some kids build mostly vehicles. Some collect minifigures. Some adults keep specialized pieces sorted like a tiny engineering warehouse. A DIY organizer lets you create compartments for the way your family actually plays.
Budget Control
You can make a simple version using a clean plastic container, yellow spray paint suitable for plastic, black adhesive vinyl, and a few small bins. Many materials may already be sitting in your house waiting for their comeback tour.
Better Use of Space
A DIY Lego Head Organizer can sit on a shelf, desk, play table, cube unit, or closet system. You can make a mini version for a desk or a large version for a playroom. The project scales nicely, which is good news if your LEGO pile has started developing its own weather system.
Best Uses for a DIY Lego Head Organizer
This organizer can do more than hold random bricks. With the right setup, it becomes a practical sorting station.
- Loose LEGO bricks: Great for quick cleanup after building sessions.
- Minifigures: Keep characters, hair pieces, hats, and accessories together.
- Specialty pieces: Store wheels, windows, doors, plants, tiles, and Technic pins.
- Instruction manuals: Use a separate folder or inner sleeve so booklets do not get crushed.
- Desk supplies: Pencils, erasers, clips, and sticky notes fit well in a small version.
- Party storage: Use it for LEGO-themed birthday favors or activity pieces.
Materials You Will Need
You do not need a professional workshop. A clean table, basic supplies, and a little patience will do most of the heavy lifting.
Basic Materials
- One round plastic container, bucket, jar, or lidded storage bin
- Yellow paint made for plastic, or yellow adhesive vinyl
- Black vinyl, paint pen, or permanent marker for the face
- Clear sealant suitable for the paint you use
- Small removable bins, cups, or drawer dividers
- Printable labels or label maker tape
- Soft cloth and mild soap for cleaning the container
- Painter’s tape, scissors, craft knife, and ruler
Optional Upgrades
- Lazy Susan turntable for rotating access
- Small handle on the lid
- Foam pads on the bottom to protect shelves
- Magnetic label plates
- Stackable inner containers
- Baseplate attached to the lid for mini builds
Step-by-Step: How to Make a DIY Lego Head Organizer
Step 1: Choose the Right Container
Look for a container with a smooth rounded body and a removable lid. A large plastic snack tub, craft bucket, food-safe storage container, or small wastebasket with a lid can work. The shape matters more than perfection. Once it is yellow and smiling, most people will understand the idea immediately.
For small collections, choose a container around 6 to 8 inches tall. For bigger collections, look for something closer to 10 to 12 inches tall. If the organizer is for children, make sure it is lightweight enough for them to lift safely when full.
Step 2: Clean and Prep the Surface
Wash the container with mild soap and warm water, then dry it completely. Paint and vinyl stick better to a clean surface. Avoid very hot water when cleaning LEGO pieces or plastic accessories, because high heat can affect plastic quality. A soft cloth or sponge is usually enough.
Step 3: Paint or Wrap It Yellow
If your container is already yellow, congratulationsyou have skipped the messiest step and deserve a snack. If not, use paint designed for plastic. Apply thin coats instead of one heavy coat. Heavy paint can drip, peel, or create a finish that looks like melted cheese, which is not the goal.
Adhesive vinyl is another option. It creates a smooth finish and avoids paint fumes, but it can be trickier on curved surfaces. Work slowly, smooth bubbles as you go, and trim carefully around the lid.
Step 4: Add the Face
The face is where the organizer gets personality. A classic smile is timeless. A wink is fun. A sleepy face works well for bedtime cleanup. A shocked face is perfect for the bin labeled “Pieces Found in Weird Places.”
Use black adhesive vinyl for the cleanest result. Draw the eyes and mouth on paper first, then cut them out as templates. If you prefer painting, use a black paint pen and seal the design after it dries.
Step 5: Create Interior Compartments
You can leave the inside open, but compartments make the organizer more useful. Add small cups or removable bins for categories such as minifigure parts, wheels, flat plates, tiny pieces, and “unknown but important-looking parts.”
For younger builders, keep categories simple. Too many sections can turn cleanup into homework, and nobody wants a storage system that requires a meeting. Try broad categories first: bricks, people, wheels, special pieces, and instructions.
Step 6: Add Labels
Labels are the secret sauce of toy organization. Use words for older kids and picture labels for younger children. Color-coded labels can help quick sorting, but organizing only by color may become frustrating for larger collections because finding a specific shape in a sea of red bricks can feel like archaeology.
A practical compromise is sorting by piece type first, then color for the most-used categories. For example, keep all wheels together, all minifigure parts together, and all flat plates together. This helps builders find functional pieces faster.
Step 7: Add a Play Feature
To make the organizer even more useful, attach a small LEGO-compatible baseplate to the lid. This gives kids a mini building surface and makes the organizer feel like part of the play experience, not just the cleanup police.
Use removable adhesive strips if you want the lid to stay washable. Avoid permanent glue if the container may need deep cleaning later.
Smart Sorting Ideas for LEGO Pieces
The best LEGO storage system is not the fanciest one. It is the one people will actually use after building. A perfect 42-category system is useless if every cleanup ends with everything dumped into one drawer while someone yells, “Close enough!”
Sort by Type
This is the most useful method for serious building. Categories can include bricks, plates, slopes, tiles, wheels, windows, doors, hinges, plants, animals, and minifigure accessories. Sorting by type helps builders find the shape they need quickly.
Sort by Color
Color sorting looks beautiful and works well for small collections. It is also easy for kids to understand. However, as collections grow, color sorting can make it harder to find specific parts.
Sort by Set
If your child loves rebuilding official sets, keep pieces and instructions together in labeled bags or boxes. The Lego Head Organizer can hold “currently rebuilding” pieces while long-term sets stay in separate containers.
Use a “To Sort” Section
This is a sanity-saving feature. Add one small compartment labeled “To Sort” for stray pieces. Instead of stopping everything to classify one tiny gray connector, drop it there and sort later. Future you will appreciate this kindness.
Design Ideas for Different Rooms
Playroom Version
Use a large container with big labels and durable inner bins. Keep it low on a shelf so children can reach it. Add a funny face to make cleanup feel less like a chore.
Bedroom Version
Choose a medium container that fits on a cube shelf or bedside table. Store favorite minifigures, small builds, and nightstand clutter. It becomes both decor and storage.
Desk Version
Make a mini Lego Head Organizer for pencils, erasers, USB drives, clips, and fidget pieces. This is a great idea for students, home offices, and adult LEGO fans who want their desk to say “organized” but also “I still know how to have fun.”
Birthday Party Version
Create several mini organizers as party centerpieces. Fill them with building challenges, crayons, or favor bags. A simple smiling face works well for a LEGO-themed party table.
Safety Tips Before You Start
LEGO bricks and many small toy parts can be choking hazards for children under 3. Keep small pieces away from babies and toddlers, and always follow age guidance on toys and storage accessories. If the organizer will be used in a shared playroom, place small parts out of reach of younger siblings.
Use non-toxic materials when possible, especially if children will handle the organizer often. Let paint and sealant cure fully before use. If you add handles, hinges, or decorations, make sure they are firmly attached and do not create sharp edges or pinch points.
Cleaning and Maintenance
A Lego Head Organizer will eventually collect dust, fingerprints, snack crumbs, and possibly one raisin that has been legally classified as ancient. Clean the outside with a soft cloth and mild soap. Avoid abrasive scrubbers that can scratch the finish.
For the LEGO pieces inside, hand cleaning with mild detergent and warmnot hotwater is usually safest. Rinse well and let pieces dry completely before returning them to the organizer. Moisture trapped in a closed container can lead to musty smells, and nobody wants mystery swamp bricks.
Common Mistakes to Avoid
Making the System Too Complicated
If kids need a chart, a password, and three deep breaths to clean up, the system is too complicated. Start simple and add categories only when needed.
Using Weak Paint
Not all paint sticks to plastic. Choose paint made for plastic surfaces and allow proper drying time. A rushed paint job may peel quickly.
Forgetting About Weight
LEGO bricks become surprisingly heavy in bulk. A large container filled to the top may be hard for a child to carry. Use smaller removable bins inside if needed.
Skipping Labels
Labels make the difference between “organized” and “decorative bucket of chaos.” Even simple labels help everyone return pieces to the right place.
DIY Lego Head Organizer Experience: What Actually Works in Real Life
After making and using a DIY Lego Head Organizer, the biggest lesson is that the organizer should support the builder’s habits, not fight them. Some kids love sorting. Others believe all bricks belong in one glorious plastic soup. Adults may dream of perfectly labeled drawers, but the best system is the one that survives Tuesday afternoon.
A large open-head organizer works wonderfully for fast cleanup. When playtime ends, kids can scoop loose bricks into the container in under a minute. This is especially helpful in living rooms, where LEGO pieces tend to spread across the floor like they are claiming territory. The cheerful head shape also makes cleanup feel more playful. Instead of saying, “Put away the LEGO,” you can say, “Feed the head.” Is it silly? Yes. Does it work? Surprisingly often.
For serious building, compartments matter. The most useful setup is not ultra-detailed sorting, but medium-level sorting. One section for minifigures, one for wheels, one for flat plates, one for tiny specialty pieces, and one for basic bricks gives enough structure without turning cleanup into a tax form. The “To Sort” compartment is essential. It gives everyone permission to be imperfect, which is exactly what a family storage system needs.
Another experience-based tip: keep instructions separate. If instruction booklets go into the same container as loose bricks, they quickly become bent, torn, or buried. A slim folder, magazine file, or zip pouch next to the organizer works better. Label it clearly so rebuilding favorite sets does not begin with a dramatic search party.
The lid can become the most fun part of the project. Adding a small baseplate to the top creates a display spot for a mini build or favorite character. In practice, kids often use it as a “parking zone” for builds they do not want taken apart yet. This helps reduce arguments about whether a half-built spaceship is treasure or clutter. For adult LEGO fans, the lid display can hold a rotating minifigure scene or a tiny seasonal build.
Durability depends heavily on prep work. Containers that are washed, dried, lightly sanded if needed, and painted with plastic-friendly paint hold up much better. Vinyl faces are easier to replace than painted faces, especially if the organizer gets heavy use. A removable vinyl smile can be swapped for a Halloween face, holiday face, sleepy face, or “I stepped on a brick” face.
Placement also matters. The organizer should live where the building happens. If kids play on the floor, keep it low. If they build at a table, keep it beside the table. If it lives across the room in a closet, the LEGO pieces will not magically walk back into it, although they will continue magically appearing under your feet.
The best surprise is how decorative the organizer can be. A bright yellow LEGO-style head adds humor and color to a shelf, but it still looks intentional. It is more charming than a random plastic tub and less visually noisy than several mismatched bins. For shared spaces, one large head for quick cleanup paired with smaller hidden bins for sorted pieces is a strong combination.
In the end, a DIY Lego Head Organizer is not just a craft project. It is a small household peace treaty. It gives builders easy access, gives parents a cleanup plan, and gives loose bricks a place to live that is not the bottom of someone’s foot. That is a win worth smiling about.
Conclusion
A DIY Lego Head Organizer is a fun, practical, and customizable way to manage LEGO clutter while adding personality to a playroom, bedroom, desk, or party setup. By choosing the right container, adding a classic minifigure-style face, creating simple compartments, and using clear labels, you can build an organizer that looks great and actually gets used.
The most successful version is easy to reach, easy to clean, and simple enough for everyday cleanup. Whether you use it for bricks, minifigures, wheels, instructions, or desk supplies, this cheerful organizer turns scattered pieces into a system. And if it saves even one barefoot midnight LEGO injury, it has earned its place in the home.