Table of Contents >> Show >> Hide
- What It Is (And What Makes It Different)
- Why People Love Them
- The Trade-Offs (Because Every Cool Thing Has a Catch)
- How to Choose the Right One
- What’s Behind the Wall: The Rough-In Valve, Depth, and the Mighty Plaster Guard
- Installation Overview: New Build vs. Retrofit
- Water Efficiency: Flow Rates, WaterSense, and “Why Does This Feel Weak?”
- Finishes, Style, and Long-Term Sanity
- Maintenance and Troubleshooting
- Common Mistakes to Avoid
- FAQ
- Bottom Line
- Real-World Experiences and Lessons (The 500-Word Reality Check)
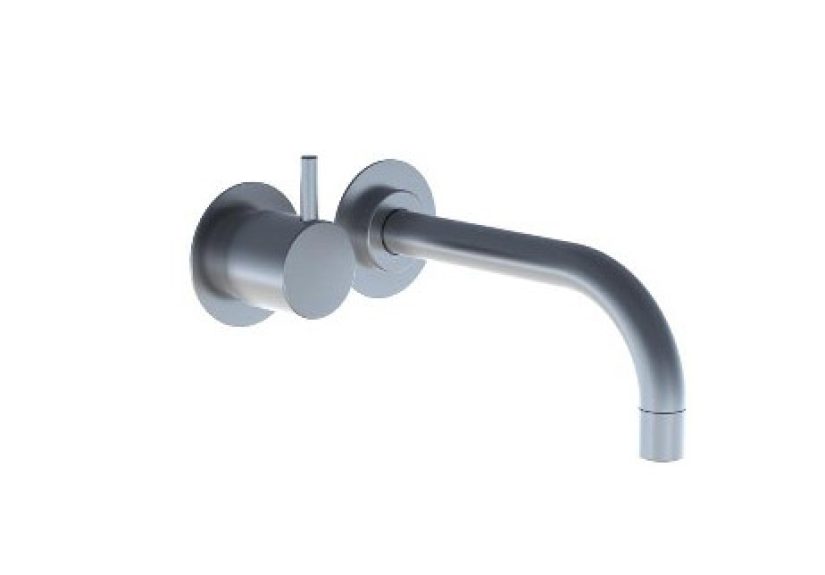
A wall-mounted one-handle faucet is the bathroom equivalent of moving your Wi-Fi router off the floor: suddenly everything feels cleaner, smarter, and a little more “I definitely have my life together.”
Instead of sitting on the sink deck (or countertop), the faucet mounts on the wall, and a single lever controls both temperature and flow. The look is sleek. The countertop is easier to wipe down.
And yesyour guests will notice. (They’ll also pretend they’ve always known faucets can do that.)
But wall-mount faucets are not just “a normal faucet, but higher.” They change how you plan your sink, your plumbing, your tile depth, and your future ability to fix things without opening a wall.
This guide breaks down what to buy, where to place it, what’s hiding behind the drywall, and how to avoid the most common “why is the water hitting the back rim?” moments.
What It Is (And What Makes It Different)
With a wall-mounted one-handle faucet, the visible “trim” (spout + handle) mounts through the finished wall. Behind that wall is a rough-in valve (the mechanical heart of the faucet) connected to your hot and cold supply lines.
The handle mixes hot and cold inside that valve, then sends water out through the spout into the sink.
In plain English: deck-mounted faucets are relatively forgiving because the plumbing connections live in the cabinet. Wall-mounted faucets ask you to commit earlybecause once the wall is finished, changing placement is… not fun.
(Technically possible. Emotionally expensive.)
Why People Love Them
1) Countertops stay cleaner
No faucet base on the countertop means fewer places for water spots and toothpaste foam to set up a permanent residence. You can wipe behind the sink like a normal human, instead of performing
a weird sponge ballet around faucet hardware.
2) More flexibility with sink styles
Wall-mount faucets pair beautifully with vessel sinks, trough sinks, and minimalist basinsespecially when you want the sink to be the star and the counter to stay visually “quiet.”
You can also place the spout at a height that feels right for your specific sink, rather than being limited by faucet bodies designed to sit on a deck.
3) A modern, tailored look
Wall-mounted hardware can make even a basic vanity look custom. It’s one of those upgrades that reads “designer bathroom” without requiring a chandelier made of artisanal driftwood.
The Trade-Offs (Because Every Cool Thing Has a Catch)
Installation is more complex (and usually more expensive)
Wall-mounted faucets typically require a dedicated wall-mounted valve and careful rough-in planning. That can mean opening the wall, adding blocking/bracing, and routing supply lines to the correct height.
In new construction, it’s manageable. In a retrofit, it’s a project.
Service access matters more than you think
If something leaks behind the wall, you want a plan. Some installations rely on access from the sink cabinet area; others benefit from an access panel (especially on the opposite side of the wall).
The goal is simple: your future self should not need a drywall saw as a first diagnostic tool.
Placement mistakes are painfully obvious
If a deck-mounted faucet is a little off, you might shrug and keep brushing your teeth. If a wall-mounted faucet is off, the water stream will loudly announce it by splashing the countertop,
hitting the rim, or missing the drain like it’s auditioning for a water park.
How to Choose the Right One
Step 1: Start with the sink (yes, really)
Your sink dictates everything: basin depth, rim height, drain location, and how much “landing zone” you have before water ricochets onto the counter.
If you’re using a vessel sink, be extra pickybecause a shallow vessel with a high wall spout can turn handwashing into a splash sport.
Step 2: Nail the spout reach (where the water lands)
“Spout reach” is the horizontal distance from the wall (or mounting point) to where the water exits the spout.
A practical way to plan is to aim the water stream so it falls close to the drainideally not at the front edge and not smashing the back wall of the basin.
- Quick measurement trick: measure from the wall to the center of the drain, then compare to the faucet’s stated spout reach.
- Common range: many bathroom sinks work well with a reach in the neighborhood of 4 to 8 inches, but your sink shape is the boss.
- Goal: water should land roughly in the “working zone” of the basin, not on the slope near the rim.
Step 3: Choose a sane spout height (to control splash)
Height is a balance: too low and you’ll feel like you’re washing your hands under a shelf. Too high and water gains confidenceand then it gains momentum.
A deeper sink gives you more forgiveness. A shallow basin demands a more careful height and reach combo.
Practical guideline: aim for comfortable hand clearance while keeping the stream low enough that it doesn’t splash out when it hits the basin. If your household includes kids (or enthusiastic handwashers),
prioritize splash control over “spa vibes.”
Step 4: Handle placement and ergonomics
One-handle designs are popular because they’re easy to use and intuitive: one lever, one brain cell, done.
Consider which side you want the handle on, how far it will stick out, and whether it’s comfortable for all users (including anyone with limited grip strength).
What’s Behind the Wall: The Rough-In Valve, Depth, and the Mighty Plaster Guard
The rough-in valve is the hidden assembly that gets mounted between studs. It sets the faucet’s depth, supports the trim, and houses the cartridge that controls mixing and flow.
Many wall-mounted systems have manufacturer-specific valves, so you typically choose your “ecosystem” first: rough-in valve now, trim later.
Depth matters (tile + drywall + thinset are not imaginary)
Rough-in valves are designed with a minimum/maximum depth range. That range is there because the wall finish thickness varies.
If the valve sits too deep, the trim may not seal correctly or the handle may not operate properly. Too shallow, and the trim can look wrongor not fit at all.
This is where the plaster guard earns its paycheck. The plaster guard (often a plastic sleeve or dome) helps protect the valve during construction and provides a reference for finished wall depth and cutouts.
Follow the valve’s depth markings like your bathroom’s happiness depends on it. (It kind of does.)
Testing before the wall closes
Many rough-in valves can be pressure tested with air or water before you install the finished wall. This is the “sleep better at night” step.
If your installer suggests skipping it, politely insistbecause once the tile is up, surprises get pricey.
Installation Overview: New Build vs. Retrofit
New construction (easier planning, cleaner walls)
In a new build or full gut renovation, the studs are exposed, supply lines are accessible, and you can place blocking exactly where it’s needed.
This is the ideal scenario for wall-mounted faucets because you can coordinate the sink height, the spout position, and the valve depth before any surfaces are finished.
Retrofit (doable, but budget for wall work)
If you’re replacing a deck-mounted faucet with a wall-mounted one, you’ll usually need to open the wall to install the rough-in valve and route supply lines to the new location.
You may also need patching, waterproofing considerations (especially around tile), and potentially an access strategy for future servicing.
Blocking and stability are non-negotiable
The valve must be securely mountedtypically with bracing between studsso the handle and spout feel solid when used.
Wiggly wall faucets are a fast track to regret (and sometimes leaks).
Water Efficiency: Flow Rates, WaterSense, and “Why Does This Feel Weak?”
Modern bathroom faucets are often designed for water efficiency. If you’re shopping in the U.S., you’ll see WaterSense labeling on many models.
WaterSense-labeled bathroom sink faucets are designed to reduce water use while maintaining performance.
If you’re worried about pressure, remember: “flow rate” (gallons per minute) isn’t the same as “pressure.”
Many well-designed faucets use aerators and flow shaping to feel strong even at lower flow rates.
But if your home has low water pressure to begin with, choose a faucet known for good spray pattern and consider checking your supply valves and aerator maintenance.
Finishes, Style, and Long-Term Sanity
Finish is not just aestheticsit’s maintenance. Polished chrome is classic and forgiving. Matte black is dramatic and modern, but it can show mineral deposits depending on your water.
Brushed and “spot-resistant” finishes help hide fingerprints and water spots, making daily life easier.
Whatever finish you choose, use gentle cleaners unless the manufacturer explicitly says otherwise. Harsh abrasives can dull coatings, and some specialty finishes prefer mild soap and water over “industrial strength sparkle paste.”
Maintenance and Troubleshooting
Easy wins
- Clean the aerator: mineral buildup can distort the stream and increase splashing.
- Check handle movement: stiffness can signal cartridge wear or debris.
- Watch for slow drips: a small drip can be a cartridge or seal issuebetter handled early than ignored for months.
Plan for service access
Even high-quality valves and cartridges eventually need attention. Ask (before installation) how the cartridge is serviced and whether it can be accessed from the front through the trim.
If your setup makes service complicated, consider an access panel on the opposite side of the wallespecially in a high-value tile installation.
Common Mistakes to Avoid
- Buying the faucet before choosing the sink: the reach/height combo may be wrong.
- Ignoring finished wall thickness: tile depth can push you outside the valve’s allowable range.
- Placing the spout too short or too long: water lands in the wrong spot and splashes.
- Skipping pressure testing before closing the wall: hidden leaks are the worst leaks.
- No plan for future service: “We’ll deal with it later” becomes “Why is there a hole in my wall?”
FAQ
Will a wall-mounted faucet work with a sink that has faucet holes?
Usually, wall-mounted faucets are chosen for sinks without deck holes (or when the deck holes are not being used).
If your sink has pre-drilled holes, you may need a different sink, a deck plate solution (not typical for wall-mount), or decorative hole coversdepending on the sink and overall design.
Do wall-mounted faucets splash more?
They can if the spout is too high, the reach is off, or the sink is shallow. When matched correctly to a sufficiently deep basin, they can be just as tidy as deck-mounted faucetssometimes tidier,
because the water stream can be aimed more precisely.
Is one-handle better than two-handle?
One-handle is typically easier and faster for daily use, and it’s often more comfortable for users who prefer a simple lever motion.
Two-handle can offer more precise temperature tuning, but many people find the single-handle experience more convenientespecially in a busy household.
Bottom Line
A wall-mounted one-handle faucet is a “measure twice, tile once” kind of upgrade. When planned well, it looks custom, cleans easily, and pairs beautifully with modern sink styles.
When planned poorly, it becomes a very stylish way to spray water onto your countertop.
Start with the sink. Match reach and height. Respect valve depth. Pressure test before you close the wall.
Do that, and you’ll end up with a faucet that feels as good as it lookswithout turning your bathroom into an accidental splash zone.
Real-World Experiences and Lessons (The 500-Word Reality Check)
If you skim homeowner reviews and contractor “please learn from this” stories, a few patterns show up again and again with wall-mounted one-handle faucets.
First: people absolutely love the look. The faucet feels like it belongs in a boutique hotel, and the countertop stays calmer and easier to wipe down.
The happiest folks tend to be the ones who planned the faucet after selecting the sink and vanity heightbecause the water stream lands where it should, and handwashing doesn’t require gymnastics.
The most common “oops” story is spout reach. Someone falls in love with a minimalist spout, installs it, and then realizes the stream lands closer to the back wall of the basin than the drain.
The result is splash, noise, and an ongoing debate about whether the faucet is “fine” or “a menace.” (It’s usually a menace.)
In contrast, when the reach is matched to the drain location, the faucet feels almost magically tidywater goes where it’s supposed to, and the basin stays usable.
Another real-world lesson: wall thickness is not a theoretical concept. Tile, thinset, backer board, and drywall add up.
Installers who follow the rough-in depth marks and keep the plaster guard in place until the right moment tend to deliver clean trim fit and smooth handle action.
Installers who eyeball it sometimes end up fighting the trim kit later, which can lead to weird gaps or hardware that doesn’t sit flush.
Homeowners rarely forget the phrase “we have to open the wall again,” because it is never said in a joyful tone.
Families with kids often report a specific learning curve: a tall spout over a shallow basin is basically a splash fountain.
If you’re outfitting a powder room that guests use carefully, you can lean into style.
If it’s a primary bath where someone will wash muddy hands, rinse a toothbrush, and occasionally attempt to bathe a small toy dinosaur, choose a deeper sink and a moderate spout height.
The design can still be beautifuljust less aquatic.
Finally, the “future service” stories: people who planned access (or at least confirmed that the cartridge can be serviced from the front) sleep better.
People who didn’t plan access tend to discover how creative plumbers can be with language when they see a fully tiled wall and no route to the valve.
The best experience is the one nobody talks about later: the faucet works, the handle stays smooth, the wall stays dry, and the only drama in the bathroom is whether the hand towels are “decorative” or “allowed to be used.”