Table of Contents >> Show >> Hide
- Why a DIY Bathroom Makeover Is Worth It
- Start With a Plan Before You Start Shopping
- The Best DIY Bathroom Makeover Ideas for Maximum Impact
- A Simple Weekend DIY Bathroom Makeover Plan
- DIY Bathroom Makeover Ideas for Small Spaces
- Common DIY Bathroom Makeover Mistakes to Avoid
- When to DIY and When to Call a Professional
- Final Thoughts on Planning a DIY Bathroom Makeover
- Experience: What a DIY Bathroom Makeover Really Feels Like
- SEO Tags
Your bathroom does not need a celebrity contractor, a six-figure budget, or a demolition crew marching in like they are filming a home makeover show. In many cases, a smart DIY bathroom makeover is less about ripping everything out and more about making strategic changes that improve style, storage, comfort, and function. Translation: you can create a bathroom that feels fresh and polished without turning your house into a dust storm.
The secret is knowing what to update, what to leave alone, and what should absolutely not be “winged” with a YouTube tutorial and blind optimism. A successful bathroom refresh starts with a plan, sticks to a realistic budget, and focuses on the upgrades that deliver the most visual impact. Think paint, lighting, hardware, mirror swaps, vanity updates, fresh caulk, better storage, and moisture-smart materials.
In this guide, we will walk through practical, budget-friendly ways to transform your space, avoid common mistakes, and make your bathroom look more expensive than it really was. Your wallet can exhale now.
Why a DIY Bathroom Makeover Is Worth It
A bathroom is one of the hardest-working rooms in any home. It deals with humidity, soap residue, water splashes, hair products, and the occasional mystery stain nobody wants to claim. Because it gets so much daily use, even small changes can make a huge difference in how the room feels.
A thoughtful bathroom makeover can:
- Make a dated room feel modern and clean
- Improve storage in small or awkward spaces
- Boost comfort and functionality
- Create a more relaxing, spa-like atmosphere
- Help prevent moisture-related problems by improving ventilation and finishes
And no, you do not need to move plumbing lines or knock down walls to make it happen. In fact, one of the smartest ways to keep a budget bathroom makeover affordable is to keep the existing layout. Moving a sink, toilet, or shower usually sends costs soaring faster than you can say, “Why is this estimate double?”
Start With a Plan Before You Start Shopping
The fastest way to waste money is to buy first and think later. Before you order a single faucet or paint sample, step back and evaluate the room like a designer with a coffee in one hand and a measuring tape in the other.
1. Decide What Really Needs to Change
Make two lists: what is ugly and what is actually not working. Ugly might be a builder-grade mirror, brass hardware from another era, or walls painted the color of sad oatmeal. Not working might be poor lighting, zero storage, peeling caulk, or a vanity that has seen things.
Focus first on function. If your bathroom has poor ventilation, lingering moisture, or mildew-prone corners, solve that before you buy a cute soap dispenser and call it progress.
2. Set a Realistic Budget
A DIY bathroom makeover can be done at many price points. Some refreshes cost a few hundred dollars. Others creep into the low thousands if you replace a vanity, flooring, or major fixtures. The trick is to assign your money to the upgrades with the biggest payoff.
A sample budget might look like this:
- Paint and supplies
- Mirror
- Lighting
- Cabinet hardware and faucet
- Storage pieces or shelving
- Caulk, grout refresh, and trim materials
- Decor and textiles
3. Measure Everything
And then measure it again, because “I think it will fit” has launched many regrettable returns. Measure the vanity width, mirror space, wall height, floor area, and clearance around doors and drawers. This matters even more in a small bathroom makeover, where every inch has a job.
The Best DIY Bathroom Makeover Ideas for Maximum Impact
Paint: The MVP of Affordable Makeovers
If there were a hall of fame for inexpensive home upgrades, paint would have its own wing. A fresh coat on the walls can instantly brighten the room, while painting the vanity can completely change the style. Navy, deep green, charcoal, soft gray, warm white, and muted taupe all work beautifully depending on the mood you want.
For a clean and timeless look, pair light walls with a darker vanity. For a cozy mood, try a richer wall color with warm metallic accents. Just make sure you use paint suited for humid spaces. Bathrooms are not the place for wishful thinking or bargain-bin shortcuts.
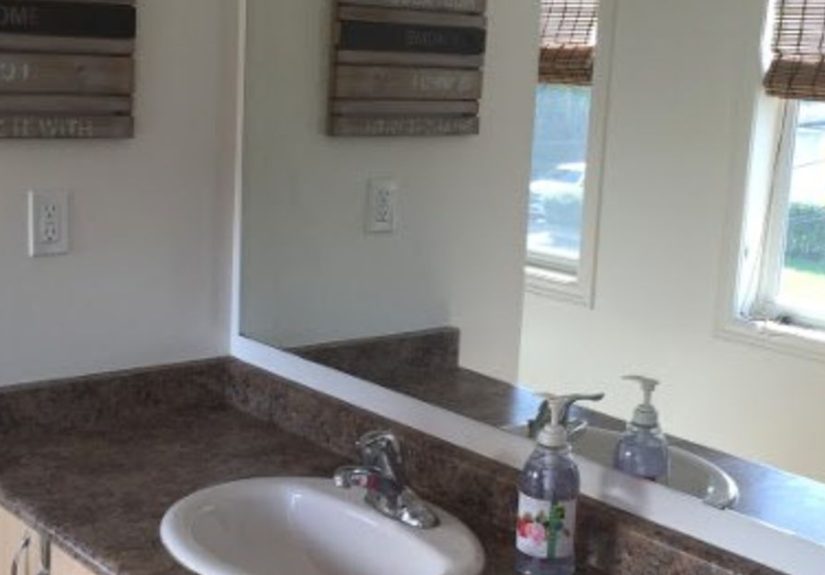
Swap the Mirror
One of the easiest ways to take a bathroom from builder-basic to intentional is to replace the mirror. A plain sheet mirror often makes a room feel unfinished. Add a framed mirror, a rounded mirror for softness, or a medicine cabinet with style and storage. Suddenly the room has a focal point instead of just a reflective rectangle doing the bare minimum.
Upgrade the Lighting
Bad bathroom lighting is incredibly rude. It makes a room feel smaller, duller, and less inviting. Replacing an outdated vanity light with something cleaner and brighter can change the entire mood. Layered lighting works best: overhead light for general use, vanity lighting for daily grooming, and maybe a dimmer if you want the room to whisper “spa” instead of “office break room.”
Change Hardware and Fixtures
New drawer pulls, knobs, towel hooks, toilet paper holders, and a faucet can do a lot of heavy lifting in a DIY bathroom renovation. Choose one finish and keep it consistent. Matte black, polished nickel, brushed brass, and chrome are all popular options. Consistency makes the room feel designed, even if you upgraded it one online cart at a time.
Refresh Caulk and Grout
This is not the glamorous part of the makeover, but it may be the most satisfying. Fresh caulk around the tub, shower, and sink makes the room look cleaner almost immediately. Regrouting or using a grout refresh product can revive tired tile and make old surfaces look new again. It is the home improvement equivalent of getting a haircut and suddenly looking far more organized than you actually are.
Add Smart Storage
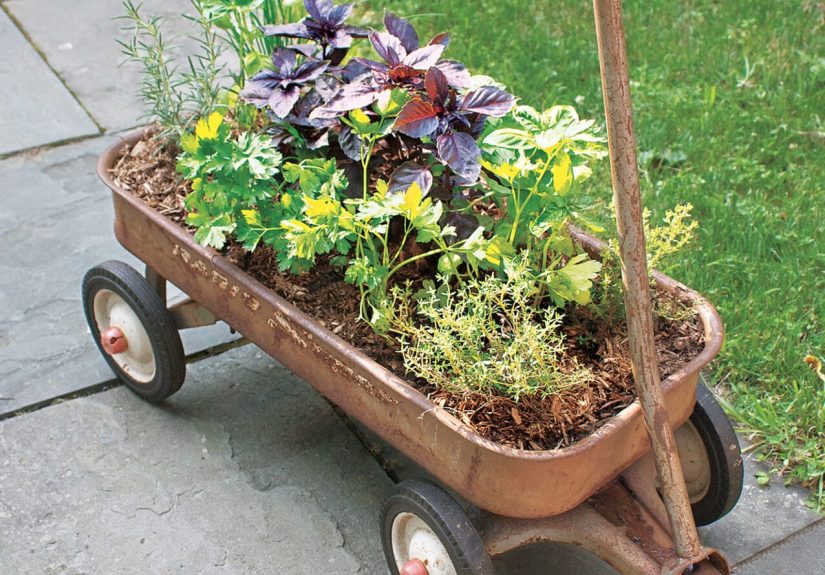
Bathrooms are notorious for offering approximately three square inches of usable storage and expecting you to make it work. Add open shelves, a slim cabinet, over-the-toilet storage, drawer organizers, baskets, or a wall-mounted medicine cabinet. In a smaller bathroom, vertical storage is your friend. Floor space is precious, and clutter is the fastest way to make the room feel cramped.
Replace Textiles and Accessories
Do not underestimate the power of new towels, a washable bath rug, a fresh shower curtain, and matching dispensers or trays. These finishing details bring the whole room together. If your budget is limited, spend wisely on the permanent elements first, then use accessories to layer in color and personality.
A Simple Weekend DIY Bathroom Makeover Plan
Day 1: Prep and Demo Lite
Clear everything out. Remove the mirror if you are replacing it. Take down old hardware, switch plates, curtains, and art. Clean every surface thoroughly, patch holes, sand where needed, and tape off edges. If you are painting the vanity, remove the doors and label the hardware so reassembly does not turn into a puzzle designed by chaos.
Day 2: Paint and Surface Updates
Paint the walls first, then the vanity or trim. Let everything dry fully. If you are applying peel-and-stick wallpaper or flooring, work slowly and keep the surface clean and dry. This is not a race. Bubbles, crooked seams, and rushed corners have a way of announcing themselves forever.
Day 3: Install and Style
Hang the mirror, install the light fixture, switch out the faucet if you are comfortable doing so, add hardware, recaulk where needed, and bring in storage pieces. Finish with towels, art, greenery, and practical accessories. Stand back and admire your excellent life choices.
DIY Bathroom Makeover Ideas for Small Spaces
If you are working with a tiny bathroom, do not fight the space. Help it feel bigger.
- Use lighter wall colors to reflect more light
- Choose a larger mirror to visually expand the room
- Install shelves above the toilet or door
- Use clear glass or visually lighter shower curtains when possible
- Keep the color palette simple and cohesive
- Pick storage that lifts clutter off the countertop
Another clever move is to continue the same color or material across multiple surfaces. Repetition makes a small room feel calmer and more cohesive, which often reads as larger.
Common DIY Bathroom Makeover Mistakes to Avoid
Ignoring Moisture and Ventilation
A beautiful bathroom will not stay beautiful for long if moisture is trapped inside. If your fan is weak, noisy, or nonexistent, deal with that early. Good airflow helps protect paint, trim, caulk, and walls. It also makes the room more comfortable and easier to maintain.
Choosing Looks Over Durability
Bathrooms need materials that can handle humidity, cleaning, and regular use. Pretty but impractical finishes may not age well. Choose surfaces and products that are suitable for wet or humid areas, especially around tubs, showers, and sinks.
Doing Plumbing or Electrical Work Beyond Your Skill Level
Confidence is great. Water leaking inside a wall is not. Cosmetic upgrades are excellent DIY territory. Major electrical changes, complicated plumbing work, or structural changes are not ideal places to test your adventurous side. Know when to call a pro.
Forgetting the Visual Balance
If every single element is trendy, the room can start to feel chaotic. Mix practical classics with one or two personality-packed moments. Maybe that is a dramatic mirror, patterned wallpaper, or a bold vanity color. Let one feature shine instead of making the room compete with itself.
When to DIY and When to Call a Professional
You can usually handle painting, hardware replacement, decor updates, shelving, mirror installation, recaulking, basic faucet swaps, and many storage improvements on your own. Those are excellent bathroom remodel ideas on a budget.
Bring in a professional for:
- Major plumbing changes
- Electrical rewiring
- Vent fan installation if new ducting is required
- Tile shower waterproofing
- Structural repairs
- Persistent leaks, mold, or water damage
That is not “giving up.” That is being smart enough to avoid turning a makeover into an apology tour.
Final Thoughts on Planning a DIY Bathroom Makeover
A successful DIY bathroom makeover is not about spending more. It is about choosing better. Better lighting. Better storage. Better finishes. Better planning. When you focus on updates that improve both style and function, even a modest budget can go surprisingly far.
Start with a clear vision, keep the layout if you can, address moisture issues early, and use paint, fixtures, and finishing details to transform the room. The result is a bathroom that feels cleaner, brighter, and more personal without demanding a full-scale renovation.
In other words, you do not need a luxury budget to create a bathroom you actually enjoy walking into every morning. You just need a solid plan, a weekend or two, and enough determination to scrape off old caulk without losing your sense of humor.
Experience: What a DIY Bathroom Makeover Really Feels Like
The first thing most people discover during a DIY bathroom makeover is that the room somehow looks worse before it looks better. You remove the towels, the mirror, the hardware, and the old shower curtain, and suddenly your bathroom feels like a tiny abandoned movie set. It is deeply humbling. But it is also the point where you begin to see the room honestly. You notice what is dated, what is damaged, and what has simply been hiding in plain sight for years.
One of the most memorable parts of the process is how quickly small changes start to build momentum. The minute the old yellowed caulk is gone, the vanity is painted, and the new mirror goes up, the room begins to feel different. Not “sort of better.” Different. Cleaner. Fresher. Like the bathroom finally woke up and decided to participate in the rest of the house.
There is also a surprisingly emotional side to the makeover. Bathrooms are private spaces. They are where mornings begin and long days end. Updating one can change your routine in a subtle but meaningful way. Better lighting makes getting ready less annoying. Better storage makes the counter feel calm instead of chaotic. A new paint color can make the whole room feel warmer, brighter, or more peaceful. Suddenly, the everyday experience improves, not just the appearance.
Of course, no DIY story is complete without one or two mildly chaotic moments. Maybe the old towel bar leaves behind mystery holes in the drywall. Maybe the faucet installation takes twice as long as expected. Maybe you discover that the previous owner believed caulk should be applied with the enthusiasm of a frosting bag. These moments are annoying, yes, but they are also part of the charm. A DIY bathroom makeover teaches patience, problem-solving, and the valuable life lesson that hardware screws are experts at vanishing exactly when needed.
The best part is the ending. Not the dramatic television-reveal version, but the real one. The room is done. The floor is clean. The paint has dried. The towels are folded. You turn on the light, and for the first time in a long time, the bathroom feels intentional. It reflects your taste, your effort, and your decision to improve the space instead of waiting for the perfect time or perfect budget.
That is what makes a DIY bathroom makeover so rewarding. It is practical, creative, and personal all at once. You are not just replacing a mirror or painting a vanity. You are changing the feel of a room you use every single day. And every time you walk in and think, “Wow, this actually looks good,” you get the quiet satisfaction of knowing you made it happen yourself.