Table of Contents >> Show >> Hide
- The Core Idea: Build an “Upcycled Welcome Station” (One Focal Spot = Instant Upgrade)
- Why Upcycling Works So Well in Front Yards
- Quick Planning: 10 Minutes That Save You 10 Headaches
- Materials: What to Look for (and What to Avoid)
- DIY Step-by-Step: The Upcycled Welcome Station
- Plant Pairings That Make Upcycled Containers Look High-End
- Weatherproofing: Make It Last Beyond One Cute Weekend
- Real-World Examples You Can Copy
- Common Mistakes (So Your Yard Doesn’t Accidentally Become a Thrift Store Exhibit)
- Maintenance That Takes 5 Minutes (and Keeps It Looking 5-Star)
- DIYer Field Notes: Experiences You’ll Recognize
Curb appeal is basically your house’s handshake. It’s the first impression, the “nice to meet you,” the subtle flex that says, “Yes, I do have my life together… at least in the front yard.” The good news? You don’t need a landscape architect, a truckload of fancy stone, or a budget that requires a small loan and a heartfelt apology.
This guide walks you through an easy upcycled front yard decorating idea DIY that looks intentional (not “I dragged random stuff outside and hoped for the best”). You’ll build a charming Upcycled Welcome Stationa styled, weather-friendly vignette near your front walk or porch using thrifted, salvaged, and “why do I still own this?” items you already have.
The Core Idea: Build an “Upcycled Welcome Station” (One Focal Spot = Instant Upgrade)
Instead of trying to makeover the entire front yard at once (hello, burnout), you’ll focus on one highly visible zone:
- The corner by the front steps
- One side of the front walkway
- The area near your mailbox
- A blank patch by the porch railing
This works because the human brain loves a focal point. Give people one spot to admire and they’ll assume the rest of the yard is equally fabulous. (You and I can keep the truth between us and the azaleas.)
Why Upcycling Works So Well in Front Yards
Upcycling isn’t just a budget hackit’s a style move. Front yards look best with layers, height, and personality. Repurposed items naturally bring all three:
- Texture: galvanized metal, aged wood, woven baskets, painted ceramics
- Story: a colander planter or old window frame reads as “charming,” not “new from aisle 12”
- Flexibility: swap seasonal plants without rebuilding anything
And if you’re eco-minded, keeping items in use is a practical way to reduce waste while upgrading your home’s exterior.
Quick Planning: 10 Minutes That Save You 10 Headaches
1) Choose a “vibe” in one sentence
Pick a simple direction so your upcycled pieces look curated:
- “Rustic farmhouse with clean lines”
- “Colorful cottage garden”
- “Modern minimal with a pop of whimsy”
- “Desert drought-tolerant + reclaimed wood”
2) Pick a tight color palette
A palette makes thrifted items look like a collection instead of a yard sale. Aim for:
- One neutral (black, white, charcoal, natural wood)
- One main accent (navy, sage, terracotta, sunny yellow)
- Optional: one small “spark” color (copper, teal, coral)
3) Decide your “hero” piece
Your hero item is the big attention-grabber: a thrifted ladder, a salvaged bench, a chunky vintage container, or an oversized planter. Everything else supports it.
Materials: What to Look for (and What to Avoid)
Great upcycle finds for outdoors
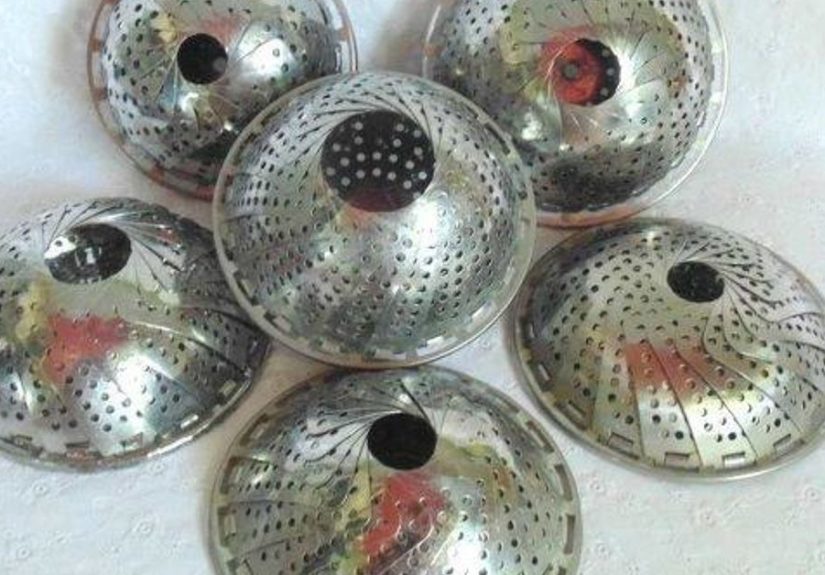
- Old colanders, buckets, watering cans (easy planters)
- Wooden ladders, crates, shelving (vertical height)
- Galvanized tubs, wheelbarrows, toolboxes (statement planters)
- Picture frames or old window frames (backdrop/garden “art wall”)
- Leftover bricks, pavers, or composite boards (path edging or stepping accents)
- Sturdy baskets (use as a cachepot with a liner)
Avoid (or use carefully)
- Anything with peeling old paint if you suspect leadseal it properly or skip it.
- Items that trap water with no drainage (unless you use a pot inside).
- Lightweight items in windy areas (they’ll redecorate the neighborhood at 2 a.m.).
DIY Step-by-Step: The Upcycled Welcome Station
Time: 1–2 hours (plus paint drying if you paint)
Skill level: Beginner-friendly
Cost: Often under $50 if you thrift smart (and/or own a mysterious garage pile)
Step 1: Place your “hero” structure for height
Choose one of these as your main vertical element:
- Old ladder: lean it against a wall/fence/porch column and secure it
- Crate stack: two or three crates stacked and screwed together
- Small bench or chair: becomes a plant stand instantly
- Reclaimed shelf: mount to a sturdy surface for a “plant gallery” look
Design tip: height makes small spaces look intentional. One tall element + a few medium + a few low pieces creates a balanced “triangle” that’s pleasing to the eye.
Step 2: Add 3–5 repurposed planters (mix sizes, repeat one element)
This is where the magic happens. Use a mix like:
- One big statement container (galvanized tub, wheelbarrow, oversized basket)
- Two medium planters (buckets, stockpots, ceramic bowls)
- One or two quirky small planters (colander, teacup grouping, old boots)
Make it functional (not swampy):
- Drill drainage holes in metal/plastic items when possible.
- If drilling is a no-go, place a nursery pot inside and remove it for watering.
- Use coco liners or landscape fabric inside wire baskets.
Step 3: Create a backdrop with an upcycled “frame moment”
Backdrops make your vignette feel finished. Try:
- Hang a few thrifted frames on a fence like outdoor wall art.
- Use a salvaged window frame as a “garden gallery” behind your planters.
- Frame a climbing plant: place a trellis or wire grid behind the station for greenery that grows into the design.
Bonus: A backdrop also hides utility boxes, blank siding, or that one patch of fence that’s… spiritually tired.
Step 4: Add one “welcome detail” that feels like a wink
One playful touch keeps upcycled decor from looking too serious. Pick just one:
- A simple wreath (even a seasonal one) on a gate or porch wall
- A small sign (keep it classyone word is usually enough)
- A birdbath, tiny stool, or lantern cluster
- A watering can filled with cut flowers as a temporary accent
Rule: If everything is quirky, nothing is quirky. One wink is charming; five winks is a yard circus.
Step 5: Anchor it with a mini “edge” or path accent
To make the station look like it belongs there, give it a boundary:
- Line the front with a few leftover bricks or pavers.
- Create two or three “stepping accents” leading toward it.
- Add mulch or small gravel under the station to unify the materials.
This is the secret sauce for curb appeal: a defined edge makes the whole thing look designed.
Plant Pairings That Make Upcycled Containers Look High-End
Plants are the styling tool that ties everything together. Use a simple formula:
- Thriller: something tall (ornamental grass, spike, small shrub, upright rosemary)
- Filler: something full (petunias, geraniums, coleus, lantana)
- Spiller: something trailing (sweet potato vine, creeping jenny, ivy, bacopa)
Easy front yard picks by sunlight:
- Full sun: lantana, salvia, petunias, succulents (in well-draining soil)
- Part shade: coleus, begonias, ferns in protected pots
- Low-maintenance evergreen look: dwarf boxwood + seasonal color in smaller pots
Weatherproofing: Make It Last Beyond One Cute Weekend
Seal and protect
- Metal: rust-resistant spray paint or a clear exterior sealant
- Wood: exterior paint, stain, or outdoor-rated sealer
- Baskets: use liners and keep them slightly elevated so water doesn’t sit underneath
Stability matters
- Secure ladders or tall pieces with brackets or discreet screws.
- Use heavier containers at the bottom of a display.
- In windy areas, tuck planters close to walls or use hidden weights.
Real-World Examples You Can Copy
Example A: Cottage-Colander Color Pop
- Hero: thrifted wooden ladder (painted white)
- Planters: two hanging colanders + one galvanized tub at the base
- Plants: bright annuals (filler) + trailing vine (spiller)
- Finish: small brick edge + one simple wreath
Example B: Modern Minimal Salvage
- Hero: black-painted crate stack
- Planters: matching neutral buckets + one oversized woven basket
- Plants: upright grasses + white blooms + green spillers
- Finish: gravel base + one framed “window” on the fence as backdrop
Example C: Farmhouse “Junk Garden” Done Neat
- Hero: vintage bench
- Planters: watering can, old toolbox, and a large tub
- Plants: herbs + daisies + trailing ivy
- Finish: a small lantern cluster and a defined mulch bed
Common Mistakes (So Your Yard Doesn’t Accidentally Become a Thrift Store Exhibit)
- Too many tiny items: they read as clutter from the street. Go bigger or group small items tightly.
- No color plan: random colors make “upcycled” look “unplanned.”
- No drainage: plants rot and mosquitoes throw a party.
- Blocking the walkway: keep paths clearcurb appeal shouldn’t require an obstacle course.
- Forgetting maintenance: front yard decor needs to look good from the street, not just on reveal day.
Maintenance That Takes 5 Minutes (and Keeps It Looking 5-Star)
- Once a week: deadhead blooms, trim spillers, rotate pots for even growth.
- After storms: check stability and dump extra water from cachepots.
- Monthly: wipe down hero items, touch up paint if needed.
- Seasonally: swap plants and change one small accent (wreath, sign, lantern).
DIYer Field Notes: Experiences You’ll Recognize
The first “experience” most people have with an upcycled front yard project is a sudden realization that their garage contains an entire museum of almost-useful objects. You’ll start with confidence“I’m just going to use what I already have”and then you’ll find three mismatched buckets, one lonely basket, and a chair that looks like it survived a pirate fight. That’s normal. The trick is to pick your hero piece early so the rest of the decisions get easier. Once you commit to “ladder display” or “bench vignette,” your brain stops trying to make a random toaster into garden art. (Please do not make a toaster into garden art.)
Next comes the thrift-store phase, which is basically treasure hunting with fluorescent lighting. You’ll spot something oddlike a colanderand suddenly it’s not a kitchen tool, it’s a hanging planter with “whimsy.” This is where people learn the most important upcycling lesson: items look cuter outdoors when they’re repeated or coordinated. One colander is quirky. Two colanders look intentional. Three colanders might look like a pasta-themed yard, so pace yourself.
Then you’ll hit the “drainage reality check.” Many upcycled containers are not thrilled about holding soil and water like a normal pot. People often try to skip drilling holes because drilling feels like a big commitment. A simple workaround is the “pot-in-a-pot” method: keep plants in nursery pots, hide them inside your upcycled container, and pull them out to water. That one move prevents root rot, mosquito puddles, and the slow heartbreak of watching your petunias dissolve into sadness.
Weather is the next teacher. A display that looks adorable at 3 p.m. can look like a yard tornado reenactment after a windy night. The experience many DIYers share is learning that the bottom of your arrangement should be heavy and the top should be light. Put your biggest container down low, tuck lighter pieces closer to a wall, and secure tall items like ladders so they don’t become surprise neighborhood décor. If your area gets intense sun, you’ll also discover that some paints fade faster than you’d expectso outdoor-rated sealers are worth the extra step.
Finally, there’s the best part: the “neighbor reaction.” Not always dramaticoften it’s just a small compliment or someone slowing down as they walk bybut it’s satisfying because you created curb appeal without buying a matching set of anything. And that’s the secret joy of upcycled front yard decorating: your space looks like you. It’s creative, a little clever, and it quietly says, “I can make something beautiful out of what I already have.” Which is basically a superpowerjust with more dirt under your fingernails.


