Table of Contents >> Show >> Hide
- What Is Reflexology, Exactly?
- Before You Start: A Quick Safety Check
- How to Do Reflexology: 13 Steps
- Step 1: Set Up a Comfortable Space
- Step 2: Wash and Inspect Your Feet
- Step 3: Get Into Position
- Step 4: Start With Slow Breathing
- Step 5: Warm Up the Foot With Broad Strokes
- Step 6: Loosen the Ankle and Toes
- Step 7: Work Each Toe One by One
- Step 8: Press Across the Ball of the Foot
- Step 9: Thumb-Walk Through the Arch
- Step 10: Give the Heel Some Attention
- Step 11: Trace the Inner and Outer Edges of the Foot
- Step 12: Work the Top of the Foot and Between the Bones
- Step 13: Finish Slowly and Repeat on the Other Foot
- Helpful Pressure Tips for Beginners
- Common Reflexology Mistakes to Avoid
- What Reflexology May Help With
- Experiences With Reflexology: What People Often Notice
- Conclusion
- SEO Tags
Reflexology has one of the best PR teams in wellness. It sounds ancient, mysterious, and just specific enough to make your feet feel important. And honestly, your feet are important. They carry you through grocery runs, long workdays, bad decisions in uncomfortable shoes, and that “quick walk” that somehow turned into 9,000 steps.
If you want to learn how to do reflexology at home, the good news is that you do not need a spa robe, whale music, or the hands of a wizard. You just need a comfortable place to sit, a little patience, and a gentle touch. The key is to treat reflexology as a relaxing, focused foot-pressure routine that may help you unwind, not as a replacement for medical care. Done the right way, it can feel soothing, grounding, and surprisingly effective at helping you slow down.
This guide walks you through how to do reflexology in 13 steps, plus safety tips, beginner mistakes to avoid, and real-world experiences people often have when they start practicing it.
What Is Reflexology, Exactly?
Reflexology is a complementary practice that involves applying pressure to specific points on the feet or hands. Traditional reflexology maps suggest that different zones of the foot correspond to different areas of the body. That idea is part of reflexology’s history and appeal, though modern research has not proven the body-map theory in a clear, one-to-one way.
What is easier to understand is the relaxation effect. Focused foot pressure can feel calming, help release tension, and encourage you to pause for a few minutes instead of living like an email inbox with legs. For many people, that alone makes reflexology worth learning.
Before You Start: A Quick Safety Check
At-home reflexology should feel gentle to moderately firm, never sharp or punishing. This is not a “no pain, no gain” situation. Your foot is not in boot camp.
Skip reflexology and talk to a healthcare professional first if you have:
- Open sores, blisters, rashes, cuts, or foot infections
- Diabetes with numbness, neuropathy, or foot ulcers
- Severe swelling, unexplained foot pain, or a recent foot injury
- Suspected blood clots or deep vein thrombosis
- Pregnancy complications or a high-risk pregnancy
If you are unsure whether your feet are “massage-safe,” it is smarter to ask first than to guess with your thumbs later.
How to Do Reflexology: 13 Steps
Step 1: Set Up a Comfortable Space
Start in a chair, on a couch, or on the bed with your back supported. You want to be relaxed enough to focus, but not so relaxed that you slide sideways and end up doing accidental floor yoga.
Keep a towel nearby, plus optional lotion or oil. A tiny amount is enough. If your hands slide around like they are on an ice rink, you used too much.
Step 2: Wash and Inspect Your Feet
Clean feet are more pleasant to work on, and a quick check helps you notice any cuts, tenderness, swelling, bruising, or irritated skin. If something looks off, stop there. Reflexology works best on healthy, intact skin.
Step 3: Get Into Position
Rest one foot across the opposite knee or place it on a pillow in front of you. Support the heel with one hand while the other hand does the work. This helps you stay relaxed and keeps you from gripping the foot like it owes you money.
Step 4: Start With Slow Breathing
Before touching the foot, take three slow breaths. Inhale through your nose, exhale longer than you inhale, and let your shoulders drop. This sounds simple because it is simple, and it matters because tension in your upper body often shows up as tension in your hands.
Reflexology tends to feel better when your pressure is steady and calm instead of rushed and pokey.
Step 5: Warm Up the Foot With Broad Strokes
Use both hands to make long, gentle strokes from the heel toward the toes and back again. Repeat this for 30 to 60 seconds. You are not “doing the points” yet. You are waking up the tissue, increasing comfort, and helping the foot feel less guarded.
This is also the moment to test pressure. Aim for a 4 to 6 out of 10: firm enough to feel focused, light enough that the person receiving it can still breathe normally and stay relaxed.
Step 6: Loosen the Ankle and Toes
Gently rotate the ankle a few times in each direction. Then wiggle, pull, and lightly stretch each toe. Keep it easy and controlled. This mini warm-up often makes the rest of the session smoother because the foot is less stiff and more responsive.
Example: If the foot feels tight after a day of standing or walking, spend a little extra time here before moving on.
Step 7: Work Each Toe One by One
Using your thumb and index finger, gently squeeze, roll, and pull each toe from base to tip. Spend about 10 to 15 seconds on each toe. Traditional reflexology maps often associate the toes with the head and neck area, but whether you follow the map or not, this part usually feels relaxing.
If one toe feels unusually tender, reduce the pressure instead of digging deeper. Tender does not automatically mean “productive.” Sometimes it just means “please calm down.”
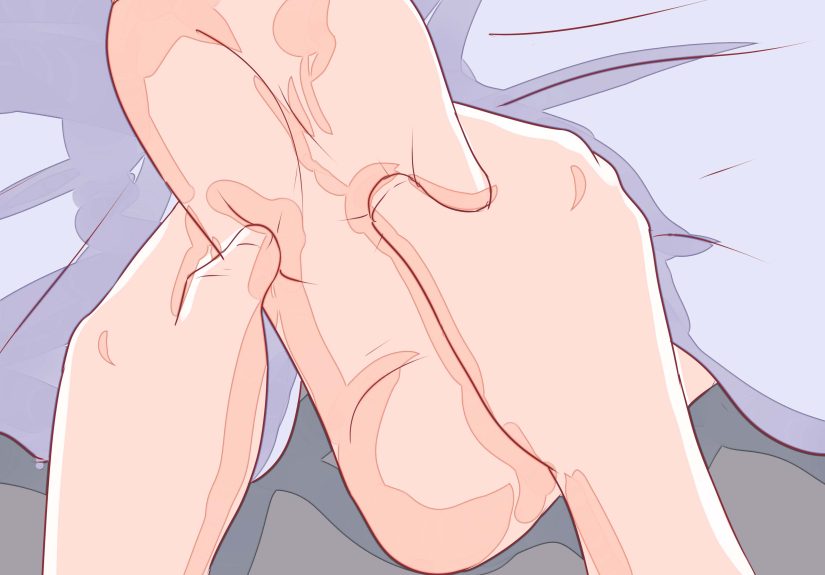
Step 8: Press Across the Ball of the Foot
The ball of the foot is the padded area just below the toes. Use both thumbs to press and release across this area from the inner side to the outer side. Move slowly in small increments.
You can also use a “thumb-walk” technique here: bend your thumb slightly, press, move a little, press again, and continue in a tiny stepping motion. Think inchworm, not jackhammer.
Step 9: Thumb-Walk Through the Arch
The arch is one of the most satisfying areas to work. Support the top of the foot with your fingers while your thumb moves slowly along the sole from the ball of the foot toward the heel. Then repeat in parallel lines until you have covered most of the arch.
This area is often where people store a surprising amount of tension, especially if they spend a lot of time standing, wearing unsupportive shoes, or pretending their sneakers are still “fine” three years after retirement age.
Step 10: Give the Heel Some Attention
The heel can handle slightly firmer pressure than the toes or arch, but it still should not hurt. Use your thumbs to make small circles around the heel pad and the edges of the heel. Then press and release slowly.
If you have plantar fasciitis symptoms or heel soreness, keep pressure moderate and brief. This should feel comforting, not aggravating.
Step 11: Trace the Inner and Outer Edges of the Foot
Run your thumb slowly along the inner edge of the foot from heel to big toe, then along the outer edge from heel to little toe. Traditional reflexology maps often treat these edges as important pathways, but even without using a chart, this sweep helps you cover the areas that broad strokes can miss.
Move slowly enough that you can notice where the foot feels tight, sensitive, or especially pleasant to work on.
Step 12: Work the Top of the Foot and Between the Bones
Reflexology is often focused on the sole, but the top of the foot deserves some love too. Use your thumbs to make light strokes from the toes toward the ankle. Then gently massage between the long bones of the foot using soft, narrow lines.
This step can feel surprisingly relieving for people whose feet feel compressed from tight shoes. Keep pressure lighter here because the top of the foot is usually more sensitive than the bottom.
Step 13: Finish Slowly and Repeat on the Other Foot
End with long soothing strokes from heel to toes, a few gentle ankle circles, and a soft hold around the foot for several seconds. Then switch sides and repeat the full sequence on the other foot.
A full beginner session usually lasts 10 to 20 minutes per foot. Drink some water afterward, stand up slowly, and notice how you feel. Many people report feeling lighter, calmer, sleepier, or generally more human.
Helpful Pressure Tips for Beginners
- Use your thumb pad, not your thumbnail. Your foot did nothing to deserve that.
- Go slower than you think. Slow pressure often feels better than strong pressure.
- Avoid pain. Mild sensitivity is okay. Sharp, electric, or lingering pain is not.
- Keep your hands relaxed. If your own fingers cramp up, you are working too hard.
- Start short. Ten minutes per foot is plenty for your first few sessions.
Common Reflexology Mistakes to Avoid
Using too much pressure
The fastest way to turn reflexology into “please stop touching me” is to press too hard. Gentle to moderately firm pressure is enough for home practice.
Rushing through the routine
Reflexology is not a speed event. If you rush, your pressure gets sloppy and the relaxing effect drops off fast.
Ignoring obvious foot problems
Blisters, infections, unexplained swelling, and numbness are not minor details. They are giant blinking caution signs.
Treating reflexology like a cure-all
Reflexology may help you relax and feel better in the short term, but it should not replace medical care for pain, infections, circulation issues, diabetes complications, or any ongoing health problem.
What Reflexology May Help With
At-home reflexology is best thought of as a relaxation and self-care practice. People often use it to unwind before bed, decompress after work, or give tired feet a little mercy after a long day. Some also find that it helps them feel more aware of tension patterns in their body, especially when paired with slow breathing.
That said, keep expectations realistic. Reflexology is not magic, and your foot is not a remote control for every organ in your body. The biggest benefit for many beginners is simple: focused touch, slower breathing, and a short window of calm in a loud day.
Experiences With Reflexology: What People Often Notice
One reason reflexology sticks around is that the experience can be memorable even when the explanation is less dramatic than the hype. Beginners often expect fireworks and instead notice something quieter: their jaw unclenches, their breathing slows down, and they stop mentally composing tomorrow’s to-do list for a few minutes. That may not sound flashy, but in real life it is a pretty solid win.
A common first experience is surprise at how sensitive the feet are. Someone may think, “It’s just a foot massage,” then discover that the arch feels oddly tender, the heel feels dense and tight, and the toes seem to have their own tiny personalities. The big toe may feel easy to work, while the little toe acts like it was personally offended by the entire idea. This is normal. Feet do a lot of work, and they remember it.
Another common experience is a feeling of deep calm after just one session. Some people feel sleepy. Others feel mentally clearer, like they finally closed twenty browser tabs in their brain. A desk worker who sits all day may notice that reflexology makes the feet feel warmer and less stiff. A retail worker or server may feel that the session takes the edge off heavy, achy feet. A runner might find the arch work especially satisfying after long mileage, while someone who wears dress shoes all week may love the toe stretches most.
People also notice that reflexology can reveal habits. Maybe one foot is much more tender than the other. Maybe the outer edge of the foot feels tight because of posture or old shoe choices. Maybe the top of the foot is sore because the laces are always tied too tightly. These observations are useful because reflexology is not just about pressure points; it is also a chance to pay attention.
There can be a learning curve, too. The first few sessions may feel awkward. Your hands get tired. You forget the order. You wonder whether “thumb-walking” is a legitimate technique or the name of a tiny hiking club. Then, after a few tries, your rhythm improves. You learn how much pressure feels good, where to slow down, and when to stop. That confidence is part of the experience.
Perhaps the most underrated part of reflexology is consistency. A single session can feel nice, but a short routine done regularly often feels more useful than one epic, once-a-month foot marathon. Ten or fifteen quiet minutes a few evenings per week can become a ritual: towel down, breathe, warm the feet, work the arches, finish, sleep better. Nothing dramatic. Just practical, repeatable relief.
In the end, the experience of reflexology is often less about chasing a miracle and more about creating a moment of deliberate care. Your feet get attention, your nervous system gets a break, and you get a reminder that sometimes the most effective wellness habit is not complicated at all. It is just you, a chair, two thumbs, and the rare decision to slow down on purpose.
Conclusion
If you want to learn how to do reflexology, start simple. Use gentle pressure, move slowly, and focus on relaxation rather than perfection. The best at-home reflexology routine is the one you can do comfortably, consistently, and safely.
Think of reflexology as a smart self-care habit for tired feet and busy brains. It may not solve every problem in life, but it can absolutely make the next twenty minutes better. And honestly, that is more than most apps can promise.


