Table of Contents >> Show >> Hide
- Why Olive Oil Works for Shaving (and When It Doesn’t)
- What You’ll Need
- How to Shave With Olive Oil: 8 Steps
- Step 1: Choose the right olive oil (and use less than you think)
- Step 2: Patch test if you’ve never put olive oil on your skin
- Step 3: Prep the skin with warm water and a gentle cleanse
- Step 4: Apply olive oil on damp skin
- Step 5: Shave with the grain using light pressure
- Step 6: Reapply oil only where needed
- Step 7: Rinse thoroughly and cool down the skin
- Step 8: Aftercare + razor care (the part people skip, then regret)
- Pro Tips for a Better Olive Oil Shave
- Troubleshooting: Common Problems (and Fixes)
- Safety Notes: When to Skip Olive Oil Shaving
- Real-Life Experiences: What It’s Actually Like to Shave With Olive Oil (About )
- Conclusion
If your shaving routine currently involves a can of foam that smells like “Arctic Thunder” (whatever that is), shaving with olive oil might sound like a kitchen accident waiting to happen. But olive oil can work as a shaving oila slick, skin-softening layer that helps your razor glide instead of drag. The result can be a smoother shave with less tugging, especially if your skin gets cranky with traditional creams.
That said: olive oil isn’t magic, and it isn’t for everyone. It can feel heavy, it can clog pores for some people, and research suggests it may irritate or weaken the skin barrier in certain skin types (especially eczema-prone skin). The goal is to use it strategically: small amount, good prep, clean razor, gentle technique, and smart aftercare.
Why Olive Oil Works for Shaving (and When It Doesn’t)
The good stuff
- Slip: Oil creates a lubricating layer so the blade glides more easily.
- Visibility: Unlike thick foam, oil is mostly clearhelpful for shaping edges and avoiding missed spots.
- Comfort for dry skin: Many people find oils feel less drying than soap-based lathers.
The not-so-good stuff
- Breakouts: Olive oil can be mildly pore-clogging for some skin types, especially on the face.
- Barrier irritation: If you’re eczema-prone or very sensitive, olive oil may not be a friendly choice.
- Mess factor: Your razor, sink, and towel may all feel like they joined an oil spill reenactment.
Bottom line: shaving with olive oil is most likely to be a win on body areas like legs or arms, and less predictable on acne-prone facial skin. If you’re prone to razor bumps, technique matters more than the productso we’ll focus on both.
What You’ll Need
- Olive oil: Extra-virgin is fine; pick one that’s plain (no added fragrance or essential oils).
- A clean, sharp razor: Dull blades are basically tiny rakes.
- Warm water (shower or washcloth)
- Gentle cleanser (fragrance-free if you’re sensitive)
- Soft towel
- Optional: A gentle exfoliant (washcloth or mild scrub) and a fragrance-free moisturizer or aloe gel
How to Shave With Olive Oil: 8 Steps
Step 1: Choose the right olive oil (and use less than you think)
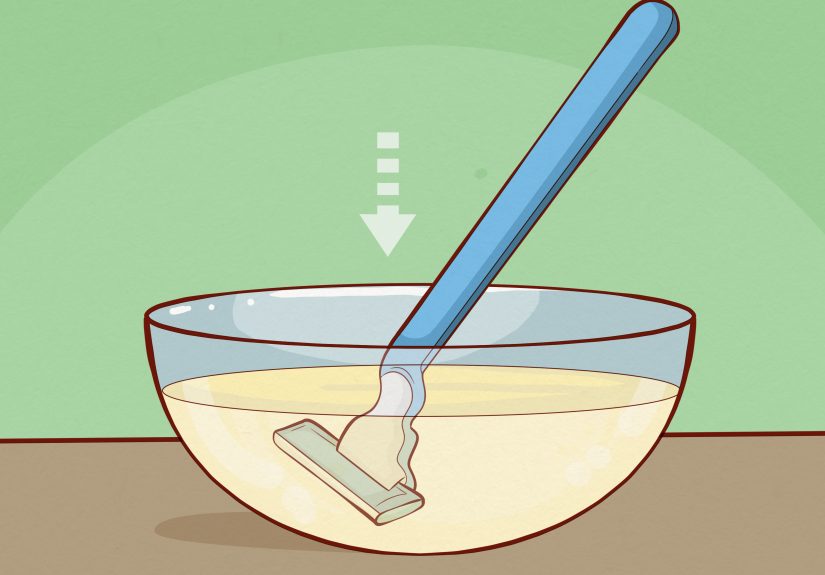
You don’t need a salad’s worth of oil. Start with a few drops to 1 teaspoon depending on the area. If you pour it like you’re marinating chicken, your razor will clog and your bathroom will turn into a slip hazard. Keep it simple: plain olive oil, no fragrance, no “spa blend,” no mystery additives.
Step 2: Patch test if you’ve never put olive oil on your skin
If your skin is sensitive, acne-prone, or you’ve had reactions to skincare products before, do a quick patch test: apply a small amount to an area like the inner forearm and watch it over the next day or two. If you get itching, burning, a rash, or clusters of bumps, olive oil probably isn’t your shaving soulmate.
Step 3: Prep the skin with warm water and a gentle cleanse
Warm water softens hair and helps reduce tugging. Shave at the end of a shower or hold a warm, damp washcloth on the area for a minute or two. Then cleanse the skin to remove sweat, deodorant, sunscreen, and anything else that can mix with oil and gunk up your blade.
Optional exfoliation: If you’re prone to razor bumps or “strawberry skin,” gently exfoliate beforehand with a washcloth or mild scrub. Keep it gentleaggressive scrubbing before shaving is like picking a fight and then being surprised you lost.
Step 4: Apply olive oil on damp skin
Turn off the water, but don’t fully dry the area. Apply olive oil to damp skin and spread it into a thin, even layer. Damp skin helps the oil spread more easily, so you use less and get more glide.
Give it 30–60 seconds to soften hair and coat the skin. This is a great time to do something productive, like remembering where you left your phone, or wondering why socks disappear in the laundry.
Step 5: Shave with the grain using light pressure
Use short strokes and shave in the direction your hair grows (with the grain). This helps reduce razor burn and ingrown hairs. Let the blade do the workpressing harder doesn’t make it “more effective,” it just makes it more likely you’ll donate layers of skin you wanted to keep.
- Rinse the blade after every 1–2 strokes to prevent oil + hair buildup.
- Keep your angle steady and avoid repeatedly shaving the same spot.
- If you need closer: Reapply a tiny bit of oil and do a second pass gently (still avoiding heavy pressure).
Step 6: Reapply oil only where needed
If the glide starts to fade or your razor begins to drag, add a drop or two of oil to that specific area. Resist the urge to keep layering oil everywhere. More isn’t betterit’s just… more.
Step 7: Rinse thoroughly and cool down the skin
Once you’re done, rinse with warm water to remove most residue, then finish with cool water to calm the skin. Pat dry (don’t rub like you’re trying to erase your existence).
If you feel extra oily, you can do a quick second rinse with a small amount of gentle cleanserespecially on the face or areas prone to clogged pores.
Step 8: Aftercare + razor care (the part people skip, then regret)
Apply a fragrance-free moisturizer or soothing gel (like aloe) to help reduce irritation. Avoid strongly scented products right after shavingfreshly shaved skin is more reactive and easier to irritate.
Then clean your razor: rinse well, shake off water, and store it in a dry place. Replace disposable blades regularly, because dull blades increase irritation and razor bumps.
Pro Tips for a Better Olive Oil Shave
1) Use a sharper blade than you think you need
Olive oil can be slick, but it doesn’t “lift” hair the way some shaving creams do. A sharp blade helps you get a clean cut without repeated passes. If you’re getting tugging, it’s usually a sign to change the blade.
2) Don’t share razorsever
Even tiny nicks can involve blood, and shared razors can spread infections. Keep razors personal, like toothbrushes. (Yes, that means your sibling/roommate/parent does not get “just one quick borrow.”)
3) If you’re acne-prone, be cautious on the face
Olive oil may clog pores for some people. If you notice breakouts after trying it, switch to a lighter shaving oil option or go back to a non-comedogenic shave gel. Also consider doing a gentle cleanse after shaving to remove residue.
4) If you’re eczema-prone or very sensitive, consider alternatives
Some skin types don’t love olive oil, especially if the skin barrier is already compromised. If olive oil makes your skin sting, itch, or look red and irritated, stop using it. A fragrance-free shaving cream for sensitive skin may be a safer bet.
Troubleshooting: Common Problems (and Fixes)
“My razor keeps clogging.”
- Use less oil (seriouslystart with a few drops).
- Rinse the blade more often.
- Consider shaving under running water, or swish the razor in a cup of warm water between strokes.
“I’m getting razor bumps/ingrowns.”
- Shave with the grain and use light pressure.
- Don’t stretch or pull skin tight while shaving.
- Exfoliate gently before shaving (or between shaves) to keep dead skin from trapping hairs.
- If bumps are severe, take a break from shaving until skin calms down.
“My skin feels irritated afterward.”
- Rinse with cool water, pat dry, and apply a fragrance-free moisturizer.
- Avoid hot showers right after shaving if you’re already irritated.
- Make sure your blade is clean and sharp.
“I broke out after shaving with olive oil.”
- Stop using olive oil and switch to a non-comedogenic shave product.
- Cleanse after shaving to remove residue (especially on the face).
- Patch test any new oil before using it widely.
Safety Notes: When to Skip Olive Oil Shaving
- Active rash, infection, or open cuts: Let skin heal first.
- Known olive allergy (rare, but possible): Avoid.
- Eczema flare-ups or very sensitive skin: Olive oil can irritate some skin barriers.
- Frequent facial breakouts: Olive oil may worsen congestion for some people.
Real-Life Experiences: What It’s Actually Like to Shave With Olive Oil (About )
The first time most people try shaving with olive oil, the biggest surprise is how different it feels compared to foam. There’s no fluffy cushion, no big cloud of latherjust a thin, slippery layer that makes the razor glide. If you’re used to shaving cream giving you a “buffer,” the oil approach can feel a little exposed at first. That’s why prep matters so much: warm water, softened hair, and a sharp blade.
A common “week one” experience is overusing oil. It’s easy to think, “This is working… so more must be better.” Then the razor clogs, the sink gets greasy, and you’re suddenly doing bathroom cleanup like it’s your new hobby. People who end up liking olive oil shaving usually learn quickly that the sweet spot is tiny amounts: a few drops spread thin on damp skin. When you nail the amount, the razor stays cleaner, and the shave feels smooth instead of slippery-chaotic.
Another real-world detail: olive oil shaving can be great for visibility. On legs, underarms, or arms, it’s easier to see what you’ve shaved and what you missed. That can reduce the “repeat pass” habit that causes irritation. For anyone shaping edgeslike cleaning up around sideburns or a necklineclear oil can make the process feel more precise than opaque lather. The flip side is that some people miss the comfort of cream, especially with coarse hair, and end up combining methods: a thin layer of oil underneath, plus a small amount of sensitive-skin shaving gel on top.
People also report that after-shave feel can be softerespecially on dry skinbecause oil leaves a protective film. That’s a win for legs in winter or for skin that feels tight after regular soap-based shaving. But on oily or acne-prone areas, the same film can feel heavy. In those cases, the best “experience hack” is a gentle cleanse after shaving to remove extra residue, followed by a light, fragrance-free moisturizer. It sounds like extra work, but it often prevents that next-day “why do I suddenly have bumps?” surprise.
Finally, there’s the learning curve of pressure. Oil makes it easy to glide, which can trick people into pressing harder for a closer shave. The folks who get the best results usually do the opposite: they keep pressure feather-light, take short strokes, rinse the blade often, and accept that one careful pass is better than three aggressive ones. When olive oil shaving works, it tends to feel calmerless scraping, fewer angry red patches, and a shave that looks smooth without feeling like your skin just survived a tiny sandpaper event.
Conclusion
Shaving with olive oil can be a simple, effective alternative if you want more glide, less dryness, and better visibility especially on body areas. The key is doing it the smart way: warm-water prep, a thin layer of oil on damp skin, shaving with the grain using light pressure, and finishing with soothing aftercare. If your skin is acne-prone or eczema-prone, take it slow, patch test first, and don’t be afraid to switch methods if your skin votes “no.”