Table of Contents >> Show >> Hide
- Why a Watermelon Wreath Works So Well
- What You Need for a Watermelon Wreath Using Tin Can Lids
- How to Make a Watermelon Wreath Using Tin Can Lids
- Best Design Ideas for a Watermelon Tin Lid Wreath
- Common Mistakes to Avoid
- Where to Display It
- Hands-On Experiences and Lessons From Making This Craft
- Conclusion
Some craft projects whisper summer. This one practically cannonballs into the pool wearing sunglasses. A watermelon wreath using tin can lids is cheerful, budget-friendly, and wonderfully a little bit clever. It turns ordinary metal lids into a front-door decoration that looks custom, colorful, and surprisingly polished. Best of all, it gives leftover craft supplies and humble kitchen castoffs a second act instead of a one-way trip to the junk drawer.
If you love DIY decor that feels playful without looking messy, this project hits the sweet spot. The design is simple: red or pink “fruit,” a green rind, black “seeds,” and a round wreath arrangement that reads instantly as watermelon. The trick is in the finish. When the paint is smooth, the layout is balanced, and the lids are attached securely, the result looks intentional rather than improvised. In other words, less “I found this in a garage box” and more “I absolutely meant to make summer look this cute.”
This guide walks through how to make a watermelon wreath using tin can lids, what supplies work best, how to paint and assemble the pieces, and how to avoid the little mistakes that can turn a charming afternoon craft into a hot-glue melodrama. You will also find styling ideas, display tips, and a longer section at the end about real-life crafting experiences related to this project so the article feels practical, not theoretical.
Why a Watermelon Wreath Works So Well
Watermelon is one of those motifs that refuses to be unfashionable. It is nostalgic, instantly recognizable, and tied to warm-weather gatherings, porches, picnics, and easy summer decorating. Unlike fussy seasonal themes that demand expensive supplies, a watermelon color palette is forgiving. Red, pink, dark green, light green, black, and white do most of the work for you. Even if you are not a professional crafter, people will still look at the finished wreath and say, “Oh, that’s adorable.” That is the dream.
Using tin can lids also adds texture and dimension. Flat paper circles can make a cute kids’ craft, but metal lids have a little structure and shine. They catch the light, create depth, and make the wreath feel sturdier. If you use canning lids or clean metal jar lids, the rounded shape already resembles little watermelon slices. Arrange several of them around a wreath base and the project almost designs itself.
There is another bonus here: this is a great upcycled decor idea. People love crafts that feel resourceful, especially for summer decorating when the goal is lighthearted style without a heavy budget. Repurposing tin can lids, canning lids, or unused jar tops gives the project personality. It feels handmade in the best way.
What You Need for a Watermelon Wreath Using Tin Can Lids
Core Supplies
For the basic version of this DIY watermelon wreath, gather a wreath base, clean tin can lids or canning lids, acrylic or spray paint, brushes, hot glue, and optional florist wire. A grapevine wreath form gives a rustic look, while a flat wire wreath form creates a cleaner layout. Foam forms also work if you want full coverage and easier lid placement.
You will also want:
- Red or watermelon-pink paint
- Dark green and light green paint
- Black paint pen or small brush for seeds
- White paint for highlights, optional
- Primer if your lids are slick or glossy
- Clear sealer for outdoor use
- Ribbon for hanging or a bow
- Sandpaper or a sanding sponge
- Paper towels and rubbing alcohol or soap and water for cleaning
Choosing the Right Lids
The neatest version of this craft usually comes from canning jar lids, Mason jar lids, or other metal lids with smooth rolled edges. They are easier to paint and safer to handle. If you want to use actual food-can lids, inspect them carefully. Any sharp burrs, jagged cuts, or bent edges should be smoothed down or skipped entirely. A cute wreath is great. A tetanus plot twist is not.
Try to collect lids in similar sizes for a more uniform design. Mixing sizes can work, but it needs to look intentional. One larger center focal piece with smaller surrounding “slices” can be charming. A random collection that looks like the recycling bin exploded is less charming.
How to Make a Watermelon Wreath Using Tin Can Lids
1. Clean and Prep the Lids
Start by washing every lid thoroughly. Remove dust, grease, labels, and sticky residue. If the surface is shiny, lightly scuff it with fine-grit sandpaper. This helps paint grip the metal better. Wipe everything dry before painting. Skipping prep is one of the fastest ways to end up with chipped paint and disappointment.
2. Prime if Needed
If your lids are very slick, metallic, or previously coated, use a primer designed for metal surfaces. A light, even coat is enough. Let it dry fully according to the product directions. Primer is not glamorous, but neither is watching your beautiful watermelon rind peel off like a bad sunburn.
3. Paint the Watermelon Colors
Paint the center of each lid red or deep watermelon pink. Then add a light green band near the outer edge, followed by a darker green ring for the rind. Some crafters prefer to paint the entire lid red first and add the greens later. Others tape sections for cleaner lines. Both approaches work. The important part is using thin coats and allowing each layer to dry before adding the next.
If you want a more whimsical look, lean into bright pink. If you want a more realistic farmhouse-style finish, use a deeper red with slightly muted greens. Either way, several light coats look better than one thick coat. Thick paint has a way of announcing itself from across the porch.
4. Add the Seeds
Once the paint is fully dry, add black watermelon seeds with a paint pen, permanent marker, stencil, or tiny brush. Keep them slightly oval or teardrop-shaped. Do not overdo it. A few well-placed seeds look cute and crisp. Too many seeds and your wreath starts looking like it has strong opinions about modern art.
You can also add tiny white highlights to give the seeds a little dimension, though this is optional. If your style leans more playful than realistic, leave them flat and graphic.
5. Plan the Layout Before Gluing
Before reaching for the glue gun, arrange the lids on your wreath base. Test a full circle, a half-moon design, or a clustered swag-style composition. Step back and look at it from a distance. The goal is visual balance, not mathematical perfection. You want it to feel full without becoming crowded.
A full round arrangement is classic and works beautifully on doors. A lower-half crescent leaves room at the top for a bow. A diagonal cluster can feel more modern. There is no single correct layout, but there is always one arrangement that makes the whole project suddenly click. Find that one before you commit.
6. Attach the Lids Securely
Hot glue is usually enough for indoor display or covered porch use. For extra stability, especially on grapevine or wire forms, pair hot glue with florist wire. Tuck the wire around the wreath frame and between lid gaps so it stays hidden. This is especially helpful if you are layering lids slightly or adding embellishments.
Work in sections rather than gluing everything at once. Start with the largest or most visible pieces, then fill in around them. Hold each lid in place for a few seconds so it bonds properly.
7. Add Finishing Touches
At this stage, decide whether you want the wreath to stay simple or become delightfully extra. A striped bow in green gingham, black-and-white polka dots, or red ribbon can finish the piece beautifully. Faux leaves, ladybugs, mini signs, or a “Hello Summer” tag can also work, but restraint matters. The lids should remain the stars. Do not let a bow the size of a beach umbrella hijack the whole fruit.
8. Seal for Outdoor Display
If the wreath will hang outdoors, finish it with a clear protective sealer suitable for crafts. Let the piece cure fully before hanging. Covered porches are ideal. Direct sun and heavy rain can shorten the life of any painted wreath, so think of sealing as helpful insurance rather than magic armor.
Best Design Ideas for a Watermelon Tin Lid Wreath
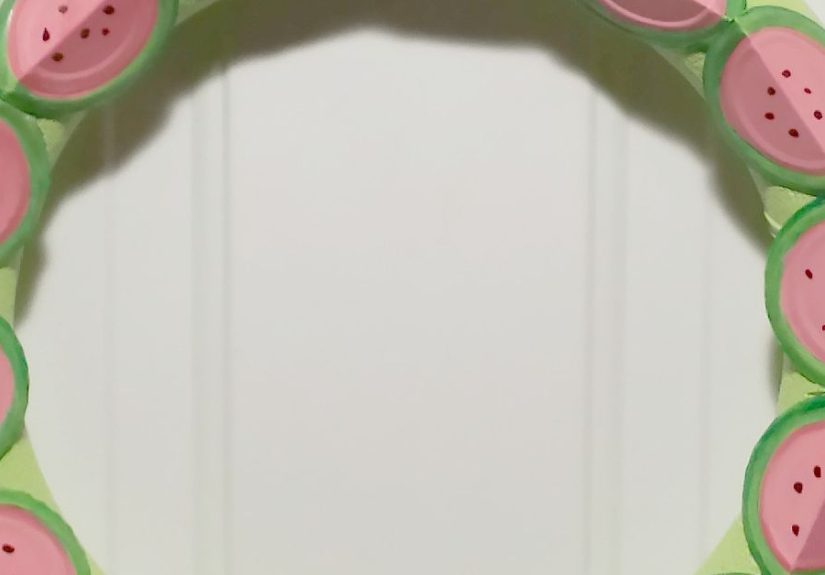
Classic Full-Circle Watermelon Wreath
This is the easiest and most recognizable version. Arrange painted lids all the way around a round form, keeping the rind edges facing outward. Add a small bow at the top or bottom and call it a day. It is friendly, bright, and perfect for front-door summer decor.
Watermelon Slice Wreath
Instead of a full circle, create a half-round or wedge design that looks like one giant watermelon slice. This works especially well on a flat base. Paint a bold red center, add layered greens at the rim, and place black seeds across the face. You can use lids around the edges or as dimensional accents over a painted base.
Farmhouse Watermelon Wreath
Use slightly distressed paint, muted greens, and a burlap or ticking-stripe bow. This version feels less cartoonish and more cottage-inspired. It works well with white doors, wood siding, and neutral porch decor.
Playful Picnic Wreath
Add ribbon that suggests picnic blankets, mini faux florals, or a small welcome sign. This version is festive and cheerful, ideal for summer parties, cookouts, or seasonal porch styling. It is the crafting equivalent of bringing a fruit salad that actually gets eaten.
Common Mistakes to Avoid
The biggest mistake is rushing the drying time. Paint that feels dry on the surface may still be soft underneath. If you stack, glue, or seal too soon, you can smudge the finish or trap tackiness into the project.
Another common issue is skipping the test layout. When crafters glue first and design later, the wreath can end up lopsided or too sparse. Always lay everything out before attaching.
People also tend to use too many embellishments. The watermelon theme is already bold. Let the color do the work. One nice bow beats seven random accessories every time.
Finally, do not ignore surface prep. Clean lids, light sanding, and primer when needed can make the difference between a wreath that lasts the season and one that starts shedding paint by the second weekend of June.
Where to Display It
A watermelon wreath using tin can lids looks great on a front door, porch wall, mudroom hook, kitchen pantry door, or even above a summer beverage station. It also works as party decor for backyard birthdays, Fourth of July gatherings, pool parties, or casual brunches.
If you are styling a porch, repeat the colors in subtle ways. A green doormat, red geraniums, or black-and-white pillows can make the wreath feel part of a bigger design story. Suddenly your front entry says, “Yes, I do have my life together,” even if there is a delivery box hidden behind the planter.
Hands-On Experiences and Lessons From Making This Craft
One of the most interesting things about making a watermelon wreath using tin can lids is how quickly a simple idea starts teaching you bigger crafting lessons. On paper, the project seems almost too easy. Paint a few lids, glue them to a wreath form, add seeds, done. In real life, it becomes a small master class in patience, layout, color balance, and the art of knowing when to stop adding things.
The first experience many people have with this project is surprise. The lids do not look like much when they are spread out on a table. They are just little circles of metal. But once the first coat of red or pink goes on and the green rind starts forming around the edges, the watermelon theme becomes obvious right away. That early transformation is satisfying. It gives the craft momentum. It also makes even beginners feel more confident because the design is so forgiving.
Another common experience is learning that prep matters more than expected. A lid that is not fully cleaned or lightly scuffed can reject paint in annoying little patches. That moment is usually followed by the universal crafter sentence: “Well, I guess I should have done that first.” The good news is that once the surface is prepped properly, the painting part becomes fun. Thin coats, a steady hand, and a little drying time go a long way.
People also notice how important arrangement is. A wreath can look awkward when every lid is technically pretty but placed without rhythm. Move two pieces, overlap one slightly, shift a bow off-center, and suddenly the whole thing looks styled. That is one of the best parts of the project. It teaches your eye how to edit. You begin to understand that crafting is not only about making individual pieces but also about composing them together.
There is also a strong emotional side to this kind of summer craft. Watermelon decor tends to remind people of family cookouts, front porches, school breaks, county fairs, or hot afternoons with cold drinks. Because of that, the finished wreath often feels more personal than expected. It is not just seasonal decor. It is cheerful memory decor. That sounds dramatic for painted metal lids, but honestly, summer crafts have range.
Many crafters say this project becomes easier the second time. The first wreath teaches the process. The second lets you play. Maybe you try brighter colors, a different base, a larger bow, or a simpler modern look. Maybe you make a matching centerpiece or mini version for a kitchen hook. Once you realize how versatile the watermelon motif is, the project starts expanding in your head in the most dangerous way possible: the fun way.
In the end, the best experience tied to this craft is that it feels joyful without demanding perfection. If a seed is slightly crooked, no one cares. If one lid overlaps another more than planned, it still looks charming. A watermelon wreath made from tin can lids succeeds because it is clever, colorful, and handmade enough to have personality. It welcomes people before they even knock, and that is exactly what a good wreath should do.
Conclusion
A watermelon wreath using tin can lids is one of those rare DIY projects that manages to be inexpensive, practical, adorable, and genuinely fun to make. It turns humble materials into something bright enough for summer decor yet simple enough for beginner crafters. With the right paint prep, a balanced layout, and a few polished finishing touches, you can create a wreath that looks custom-made for your home.
Whether you hang it on a front door, display it in a kitchen, or use it as part of a summer party setup, this project brings instant personality. It is colorful without being chaotic, playful without looking childish, and creative without requiring a craft room that resembles a television set. That is a pretty sweet deal for a handful of metal lids and a glue gun.


